3D Print Delamination: Why Layers Split and How to Fix It
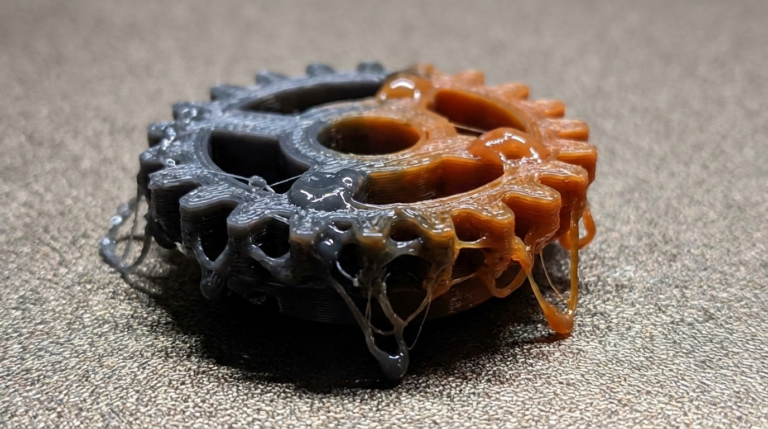
You just pulled a print off the bed and it cracked right along a layer line. Maybe it happened mid-print, or maybe the part looked fine until you applied a tiny bit of force. Either way, you’re dealing with delamination — one of the most frustrating problems in FDM 3D printing.
Layer delamination means your printed layers aren’t bonding properly to each other. Instead of forming a solid object, you end up with something that splits apart like a cheap wafer cookie. The good news? This problem is almost always fixable once you understand what causes it.
What Exactly Is 3D Print Delamination?
Delamination occurs when adjacent layers in an FDM print fail to fuse together with sufficient strength. In a well-printed part, each new layer of molten plastic bonds to the layer beneath it through a combination of heat and pressure. When that bond fails — partially or completely — you get delamination.
The signs are usually obvious: visible gaps between layers, cracks that follow layer lines, parts that break apart with minimal force, or prints that literally fall apart on the build plate mid-print. Sometimes delamination is subtle — the part looks fine but has significantly reduced mechanical strength.
The Root Causes of Layer Splitting

1. Print Temperature Too Low
This is the number one cause of delamination, full stop. When your nozzle temperature is too low, the extruded plastic doesn’t stay hot enough to properly melt into the layer below it. You’re essentially stacking semi-solid plastic on top of slightly-too-cool plastic, and the molecular bond between layers suffers dramatically.
Each filament type has an optimal temperature range, and printing at the lower end of that range (or below it) significantly increases your risk of delamination. PLA is relatively forgiving, but materials like PETG, ABS, and especially nylon are highly sensitive to temperature.
The fix: Increase your nozzle temperature by 5-10°C increments. Print a temperature tower to find the sweet spot where layer adhesion is strong without introducing other problems like stringing or oozing. For PLA, try 210-215°C. For PETG, aim for 235-245°C. For ABS, 240-260°C typically works well.
2. Cooling Fan Too Aggressive
Part cooling fans are essential for good overhangs and bridging, but too much cooling works against layer adhesion. When the fan blows cold air directly onto freshly deposited filament, it cools the plastic before it has time to bond with the layer below.
This is especially problematic with materials that already have poor inter-layer adhesion characteristics, like ABS and ASA. But even PLA can delaminate if the cooling is excessive — particularly on small parts where each layer gets hit with cold air before the previous one has fully bonded.
The fix: Reduce your fan speed. For PLA, try 50-70% instead of 100%. For PETG, keep it at 30-50%. For ABS and ASA, turn the fan off completely (or use 0-20% maximum). Many slicers let you set different fan speeds for the first few layers versus the rest of the print — use this feature.
3. Drafts and Temperature Fluctuations
An open window, an air conditioning vent, or even walking past your printer repeatedly can create enough airflow to cause delamination. The ambient temperature around your printer matters more than most people realize.
ABS is notorious for this — it’s essentially impossible to print large ABS parts reliably without an enclosure. But PETG and even PLA can be affected by significant drafts, especially on tall prints where the upper layers are far from the heated bed’s warmth.
The fix: Move your printer away from windows, doors, and AC vents. For ABS and ASA, an enclosure is practically mandatory. Even a simple cardboard box or IKEA LACK table enclosure can make a dramatic difference. For other materials, just eliminating direct drafts is usually sufficient.
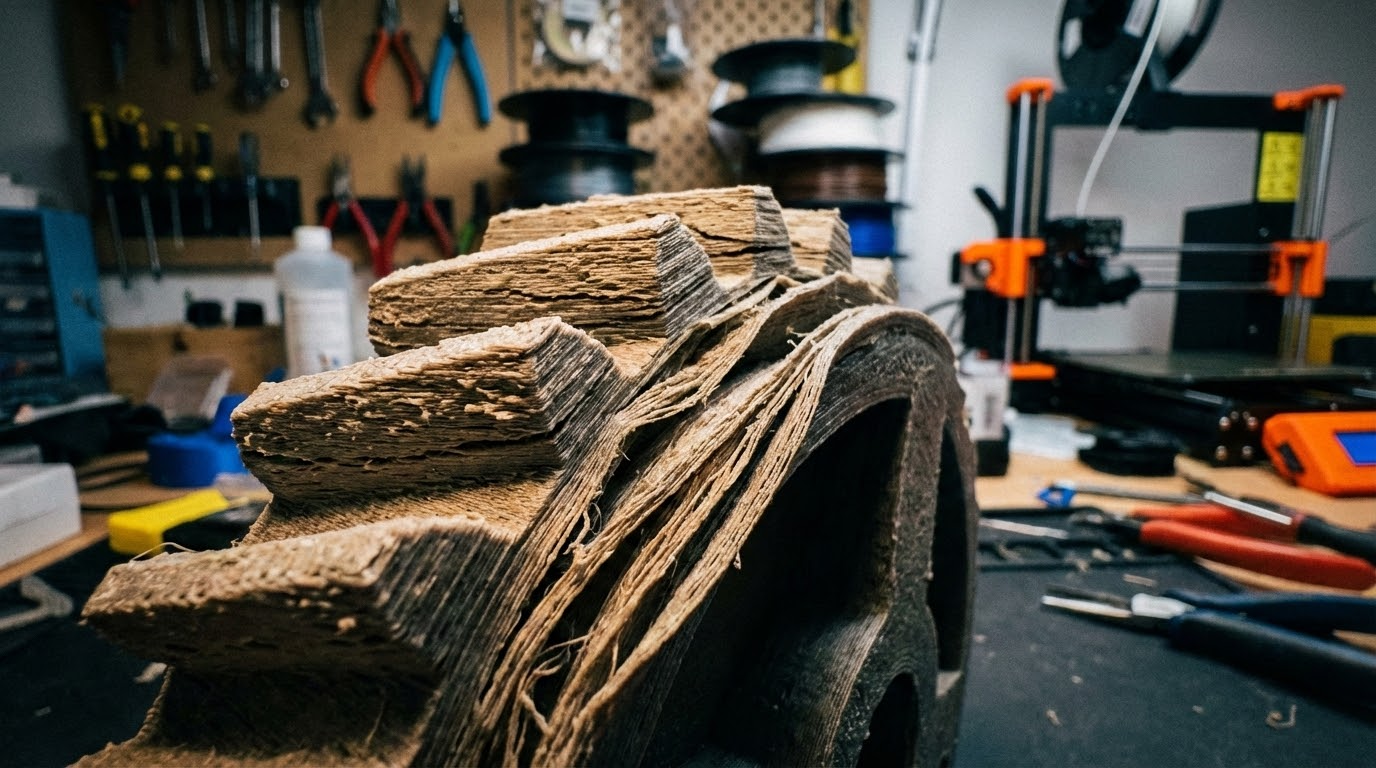
4. Layer Height Too Tall
When your layer height exceeds about 75-80% of your nozzle diameter, you’re pushing the limits of how well layers can bond together. The nozzle can’t squish the new filament into the previous layer effectively, resulting in weaker inter-layer bonds.
With a standard 0.4mm nozzle, a layer height of 0.32mm is about the maximum for reliable adhesion. Going to 0.36mm or higher significantly increases delamination risk, especially with less forgiving materials.
The fix: Keep your layer height at or below 75% of your nozzle diameter. For a 0.4mm nozzle, 0.2-0.28mm is the safe range. If you need thicker layers for speed, consider upgrading to a larger nozzle (0.6mm or 0.8mm) instead of pushing your 0.4mm nozzle beyond its limits.
5. Print Speed Too Fast
High print speeds mean each layer has less time to bond with the one below it. The nozzle moves on before the deposited filament has fully melted into the previous layer. This is compounded by the fact that faster speeds often require lower temperatures to avoid other issues, creating a double whammy for layer adhesion.
The fix: Slow down. Try reducing your print speed by 20-30% and see if delamination improves. Pay special attention to perimeter speeds — outer walls printed too fast are often the first place delamination shows up. Most slicers allow separate speed settings for perimeters versus infill.
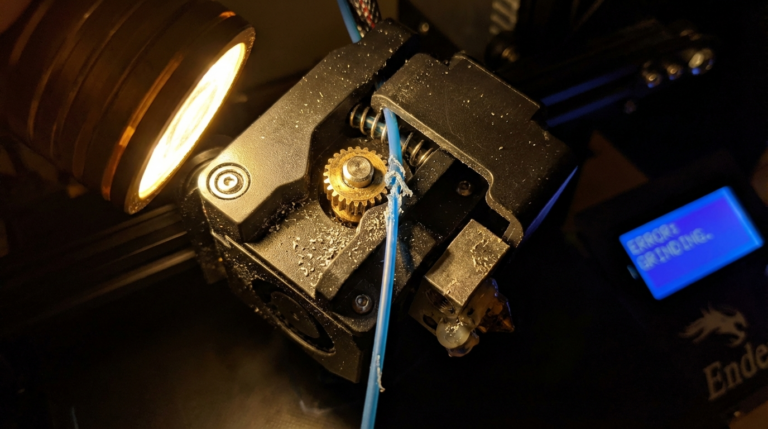
6. Wet or Degraded Filament
Moisture-absorbed filament is a silent killer of layer adhesion. When wet filament passes through the hot nozzle, the moisture turns to steam, creating micro-bubbles in the extruded plastic. These bubbles weaken the layer bond and can cause visible gaps between layers.
Nylon is extremely hygroscopic and can absorb enough moisture in just a few hours of exposure to cause serious delamination. PETG and PVA are also highly susceptible. Even PLA, while less hygroscopic, can be affected if stored improperly for extended periods.
The fix: Dry your filament before printing. A dedicated filament dryer is the best solution (4-6 hours at the appropriate temperature for your material). In a pinch, a food dehydrator or oven set to a low temperature works too. Store filament in sealed bags with desiccant packets when not in use.
Advanced Fixes for Persistent Delamination
Increase Extrusion Width
Wider extrusion lines mean more surface area contact between layers, which improves bonding. Try increasing your extrusion width to 120% of your nozzle diameter. With a 0.4mm nozzle, set your extrusion width to 0.48mm. This forces the nozzle to squish filament more aggressively into the layer below, creating stronger bonds.
Reduce Infill Speed
Infill lines are often printed at the highest speeds, and if they don’t bond well to the layers above and below, the entire internal structure of your part is compromised. Reducing infill speed to match your perimeter speed can improve overall part strength significantly.
Use Concentric or Gyroid Infill
Some infill patterns create more layer-to-layer contact than others. Grid and line patterns can leave large unsupported spans that are prone to delamination. Gyroid infill, with its smooth curves, tends to produce better inter-layer bonding. Concentric infill is also good for parts that need to resist splitting forces.
Calibrate Your Extruder
Under-extrusion is a sneaky cause of delamination. If your extruder isn’t pushing enough filament, each layer is thinner than it should be, which means less material to bond with the next layer. Calibrate your e-steps and check for partial clogs or worn extruder gears that might be reducing flow.
Material-Specific Tips
PLA
PLA is the easiest to get good layer adhesion with. If you’re getting delamination with PLA, check your temperature first (try 210-215°C), then reduce cooling. PLA delamination almost always comes down to temperature being too low or cooling being too aggressive.
PETG
PETG needs higher temperatures (235-245°C) and lower fan speeds (30-50%). It’s also more sensitive to moisture than PLA, so drying your filament is important. PETG tends to string more at higher temperatures, but it’s better to deal with some stringing than have delaminated parts.
ABS/ASA
These materials essentially require an enclosure for reliable printing. The chamber temperature should stay above 40°C if possible. Print with no cooling fan, or 10-15% maximum. ABS at 245-260°C with no fan in an enclosure will give you excellent layer adhesion.
Nylon
Nylon is the most challenging material for layer adhesion. It must be dried thoroughly before printing (80°C for 6-8 hours). Print in an enclosure at 250-270°C with no cooling fan. Even with perfect settings, nylon parts may have lower inter-layer strength than other materials — this is somewhat inherent to the material.
Testing Your Layer Adhesion
Don’t just eyeball it — test your layer adhesion properly. Print a simple rectangular bar (about 10mm x 10mm x 50mm) and try to snap it along the layer lines. A well-bonded print should be difficult to break this way. If it snaps cleanly along a layer line with minimal force, your adhesion needs work.
For a more scientific approach, print layer adhesion test models available on Thingiverse and Printables. These are specifically designed to be pulled apart along layer lines, and some even include measurement scales so you can quantify your layer bond strength.
When Delamination Isn’t Really Delamination
Sometimes what looks like delamination is actually a different problem. A partial clog that intermittently reduces flow can create weak spots that look like delamination but are actually under-extrusion. A loose Z-axis lead screw can cause layer registration issues that mimic delamination. And a worn PTFE tube in a Bowden setup can cause inconsistent extrusion that creates periodic weak layers.
If you’ve tried all the temperature and cooling fixes without improvement, look at your hardware. Check your PTFE tube for damage, ensure your lead screw is tight and lubricated, and verify that your extruder is gripping the filament properly.
Wrapping Up
Delamination is one of those problems that has a seemingly endless list of potential causes, but in practice, 90% of cases come down to three things: temperature too low, cooling too high, or wet filament. Start with those three fixes, and you’ll solve most delamination issues without breaking a sweat.
For the remaining stubborn cases, work through the environmental factors (drafts, enclosure), then check your hardware (extruder calibration, PTFE tube condition). With a systematic approach, you can achieve excellent layer adhesion with virtually any FDM filament on the market.