3D Print Not Sticking to Supports? Here Is How to Fix It
Why Do 3D Prints Fail to Stick to Supports?
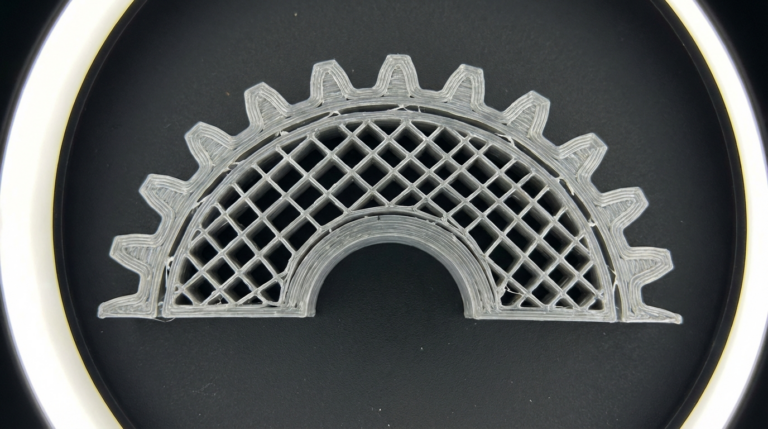
Supports are supposed to hold up your overhangs and bridges while printing. But when your print doesn’t stick to the supports — or the supports don’t stick to the build plate — you end up with spaghetti, collapsed overhangs, or parts that look like they melted halfway through. It’s one of the most frustrating troubleshooting scenarios because there are multiple possible causes, and the fix depends on which one is actually at play.
Let me walk you through the most common reasons 3D prints fail to adhere to their supports, and the specific settings to adjust for each situation.
Understanding Support Interface Layers
Before diving into fixes, let’s clarify what happens at the boundary between your print and its supports. Most slicers create a special zone called the “support interface” — a dense layer of material between the loose support structure and the bottom of your print. This interface layer is critical because it’s what your print actually rests on.
If your slicer doesn’t generate interface layers (or you’ve disabled them), the print sits directly on the sparse, lattice-like support structure. The contact area is tiny, adhesion is poor, and your overhangs suffer. Step one: make sure support interface layers are enabled. In Cura, this is “Enable Support Interface.” In OrcaSlicer and PrusaSlicer, look for “Support interface layers” — set it to 2-3 layers.
Interface layer density matters too. Set it to 80-100%. This creates a nearly solid platform for your print to rest on, which dramatically improves adhesion and overhang quality. Yes, the supports will be harder to remove — but that’s preferable to supports that don’t actually support anything.
The Z-Distance Problem
The most common cause of prints not sticking to supports is incorrect Z-distance (also called “support gap” or “support Z offset”). This is the vertical gap between the top of the support interface and the bottom of your print.
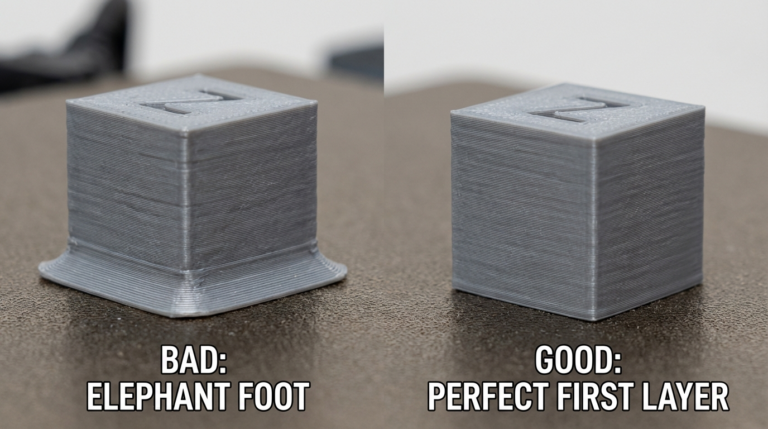
Too much gap: the first layer of your print bridges across the gap and doesn’t bond to the support. You get droopy, rough bottom surfaces and sometimes the print lifts off the support entirely.
Too little gap: the support fuses to the print and becomes impossible to remove. You’ll damage the surface trying to pry it off.
The sweet spot for most materials:
- PLA: 0.15-0.2mm (one layer height at 0.2mm)
- PETG: 0.2-0.25mm (PETG bonds to supports aggressively, so increase the gap)
- ABS: 0.15-0.2mm
- TPU: 0.2-0.3mm (flexible materials need more gap to prevent permanent bonding)
If your print isn’t sticking to supports at all, try reducing the Z-distance by 0.05mm. This brings the first printed layer closer to the support surface, improving adhesion. Make small adjustments — 0.05mm at a time — because the window between “doesn’t stick” and “fused together” can be surprisingly narrow.
Support Pattern and Density
Your support pattern affects how much surface area contacts the bottom of your print. Common patterns and their adhesion characteristics:
Lines/zigzag: Good adhesion, easy removal. The default for most slicers and the best general-purpose option.
Grid: Strong adhesion, harder to remove. Use when supports need to hold up heavy overhangs or tall structures.
Lightning: Minimal adhesion. Lightning supports are designed to use minimal material and touch the print as little as possible. Great for saving filament but terrible if your problem is already insufficient support adhesion.
Tree supports: Variable adhesion depending on branch tips. Tree supports are excellent for complex geometries but can have weak contact points where thin branches meet the print. If using tree supports and experiencing adhesion issues, increase the “tip diameter” or “contact area” setting.
For adhesion problems, switch to lines pattern at 25-30% density. Higher density means more contact area, which means better adhesion. Once the adhesion problem is solved, you can reduce density to minimize material usage.
Temperature and Cooling Effects
Supports are typically printed at the same temperature as the rest of your model, but cooling settings can sabotage support adhesion in subtle ways.
When the fan blows at full speed on thin support columns, they cool rapidly and contract. By the time your print’s bottom layer reaches the support interface, the interface may have contracted enough to create a slight gap — beyond the Z-distance you configured. This is especially common with tall, thin supports in PLA with aggressive cooling.
Fixes:
- Reduce fan speed for support layers to 50-70% (some slicers like OrcaSlicer allow separate fan settings for supports)
- Increase support interface temperature by 5°C (OrcaSlicer has a “support interface temperature” setting)
- Slow down support printing speed to 25-35 mm/s — slower printing means more heat transfer and better layer bonding within the support structure itself
Support Base Adhesion (Support Not Sticking to Bed)
Sometimes the problem isn’t the print-to-support interface but the support-to-bed adhesion. If supports detach from the build plate during printing, everything above them fails too.
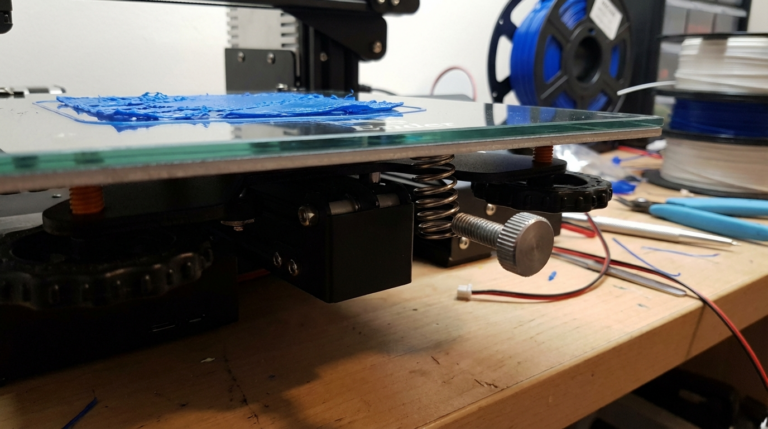
Support structures have a small footprint — thin columns and sparse lattices don’t grip the bed well, especially on smooth surfaces like glass or PEI. Solutions:
Enable support brim. Most slicers offer a “support brim” option that adds a flat rim around the base of each support pillar, dramatically increasing bed contact area. In Cura, check “Enable Support Brim.” In OrcaSlicer, look for “Support base pattern” settings. A 3-5mm brim on support bases solves most detachment issues.
Use a raft for the entire print. If supports consistently detach, a raft provides a large, flat foundation for both the model and all supports. It wastes material and makes the bottom surface rougher, but it’s a reliable solution for difficult prints.
Slow down the first layer of supports. Just like your print’s first layer needs to go slow for good adhesion, support first layers benefit from the same treatment. Set first layer speed to 20-25 mm/s.
Clean your build plate. This sounds obvious, but it’s overlooked constantly. A fingerprint on a PEI sheet can cause a support column to pop off mid-print. Wipe with isopropyl alcohol before every print.
Slicer-Specific Settings
Cura
- Support Z Distance: start at one layer height, reduce if needed
- Support Interface Enable: ON
- Support Interface Density: 80%
- Support Interface Pattern: Lines
- Support Brim Enable: ON (for bed adhesion issues)
- Support Interface Height: 0.4mm (2 layers at 0.2mm)
OrcaSlicer / PrusaSlicer
- Contact Z distance: 0.15-0.2mm (Top) and 0.15-0.2mm (Bottom)
- Interface layers: 3
- Interface spacing: 0.2mm (lower = denser interface)
- Support on build plate only: toggle depending on model geometry
- Support base: Enable if supports are detaching from bed
Bambu Studio
- Support/Object gap: 0.15mm (adjustable)
- Interface loops: 2-3
- Support type: Normal or Tree (switch to Normal if tree supports have weak contact)
Material-Specific Considerations
PETG and supports: PETG is the most problematic material for support adhesion because it bonds to itself too well. If supports fuse to PETG prints, increase Z-distance to 0.25-0.3mm and consider using a different support material (PVA for water-soluble supports, or the “support material” filament options from brands like Primaselect that are designed to separate cleanly).
ABS and supports: ABS supports work well but need an enclosed printer. Without an enclosure, ABS supports warp and detach from the bed, taking your print with them. If you’re printing ABS without an enclosure, add a wide support brim and consider using tree supports (smaller footprint means less warping force).
TPU and supports: Flexible TPU hates supports. The material stretches when you try to remove supports, and they can permanently deform the surface. Print TPU with minimal supports — redesign the model to reduce overhangs, or use water-soluble PVA supports if you have a dual-extruder setup.
When to Skip Supports Entirely
Sometimes the best fix for support problems is eliminating supports altogether. FDM printers can handle:
- Overhangs up to 45° without any support (some printers manage 55-60° with good cooling)
- Bridges up to 50-60mm with proper cooling settings
- Chamfered edges instead of sharp 90° overhangs (a 45° chamfer prints supportless)
Before slicing with supports, try rotating the model. A 90-degree rotation on one axis can transform a support-heavy print into a supportless one. Similarly, splitting a model into two halves and gluing after printing eliminates internal supports that would be impossible to remove anyway.
Diagnostic Flowchart
Still having problems? Work through this:
- Are supports sticking to the bed? If no → add support brim, clean bed, slow first layer
- Is the support interface enabled? If no → enable it, set density to 80%+
- Is the print sticking to the support interface? If no → reduce Z-distance by 0.05mm, reduce cooling
- Are supports fusing to the print? If yes → increase Z-distance by 0.05mm, increase cooling
- Are thin supports breaking mid-print? If yes → increase support density, add support walls
- Is the overhang quality poor despite good adhesion? → increase interface density to 100%, add interface layers
Support settings are a balancing act between adhesion and removability. The goal is supports that hold your print firmly during printing but release cleanly afterward. It takes some experimentation with your specific printer and material, but once you find the sweet spot, save those settings as a profile and you’ll rarely have to think about it again.