3D Printer Auto Bed Leveling Not Working? Here Are the Fixes
Auto bed leveling (ABL) is supposed to be a set-and-forget solution that compensates for an imperfect bed surface. But when it stops working correctly, it can be even more frustrating than manual leveling — because now you’re dealing with both a bad first layer AND a malfunctioning sensor. I’ve spent countless hours diagnosing ABL issues on BLTouch, CR Touch, inductive probes, and strain gauge systems, and in this guide I’ll walk you through every common failure and how to fix it.
How Auto Bed Leveling Works (Quick Overview)
Before troubleshooting, it helps to understand what the system is doing. Auto bed leveling probes the bed surface at multiple points (typically 9-25) and creates a mesh map of the bed’s topology. During printing, the firmware uses this mesh to adjust the Z height in real-time, compensating for dips, bumps, and tilts in the bed.
The critical thing to understand: ABL compensates for bed surface irregularities, but it does NOT set your Z offset. The Z offset (the distance between the probe trigger point and where the nozzle touches the bed) must be calibrated separately. This is the source of the majority of ABL problems.
Common ABL Problems and Fixes
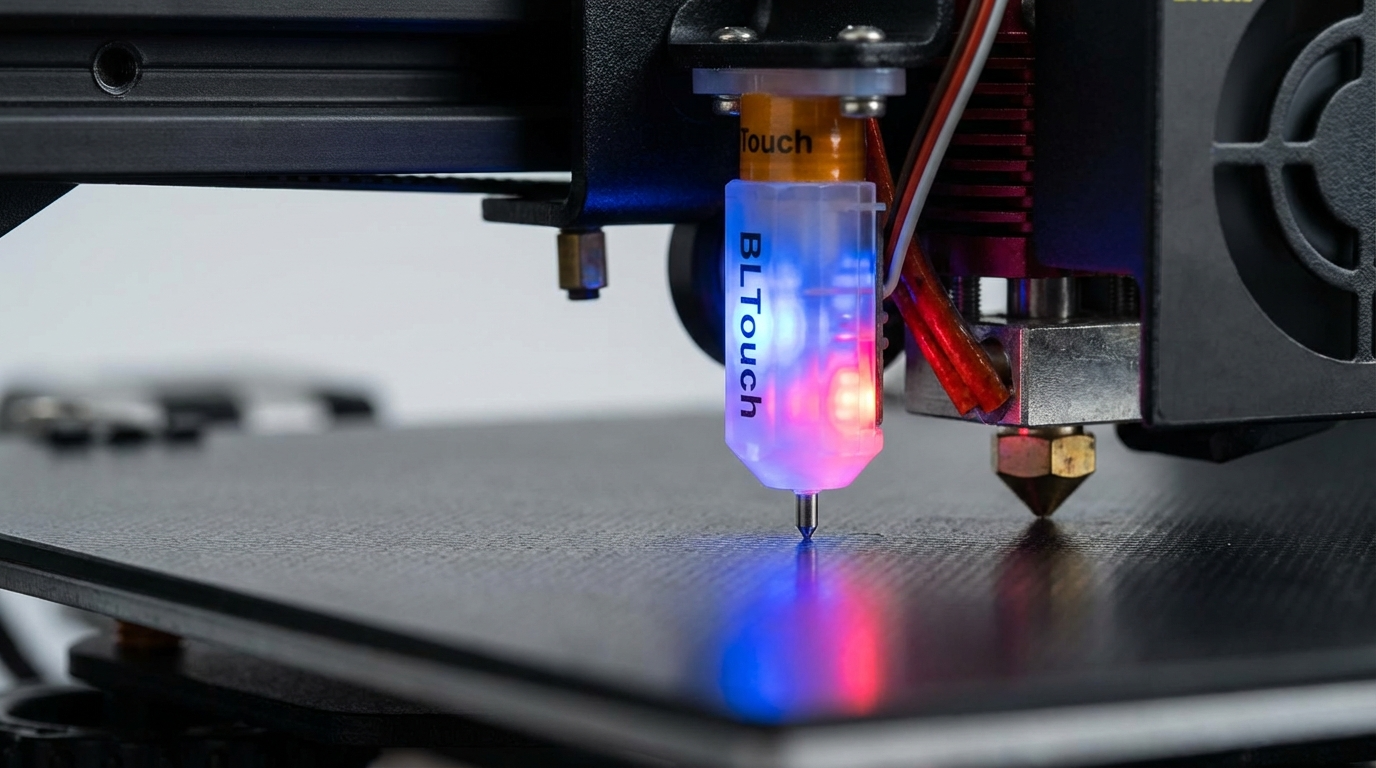
Problem 1: Probe Not Deploying or Retracting (BLTouch/CR Touch)
The probe pin doesn’t push down when probing starts, or it deploys but won’t retract after probing.
Causes and fixes:
- Bent probe pin: The most common physical issue. Remove the pin, straighten it gently with pliers, or replace it. BLTouch replacement pins cost a few dollars. Never run the probe with a bent pin — it gives inaccurate readings.
- Loose grub screw: The tiny screw that holds the probe pin can come loose from vibration. Tighten it gently with the included hex key. Don’t over-tighten — you’ll crack the housing.
- Wiring issue: Check the 5-pin connector at both ends (probe and mainboard). A single loose wire causes erratic behavior. Specifically, swap the black and white wires if the probe deploys but flashes red — this is a common wiring mistake with BLTouch clones.
- Magnet weakening: Over time (years of use), the internal magnet can weaken, causing deployment failures. The pin deploys slowly or doesn’t deploy at all. Replacement is the only fix — magnets don’t re-magnetize easily.
- Firmware misconfiguration: If you recently flashed new firmware, double-check that the BLTouch/CR Touch servo pin and probe pin assignments are correct for your mainboard.
Problem 2: Inconsistent Probe Readings
The probe triggers at different heights each time, giving you a noisy mesh map with unrealistic height variations. You might see a mesh that shows 1-2mm of variation on a bed you know is reasonably flat.
Causes and fixes:
- Loose probe mount: If the probe wiggles even slightly in its mount, readings will vary. Tighten the mounting screws and check for any play. Some printed probe mounts flex under movement — consider a metal mount for better consistency.
- Probe speed too fast: If the probe approaches the bed too quickly, it may trigger late due to the momentum of the pin. Reduce the probe speed (M851 Z speed in Marlin, or probe_speed in Klipper) to 5-7 mm/s for the final approach. The initial fast approach can stay at 10-15 mm/s.
- Vibration from the printer: Running the probe while the part cooling fan is on or while the printer is on an unstable surface introduces noise. Turn off fans during probing and ensure the printer is on a stable, level surface.
- Electrical interference: Inductive probes are sensitive to electrical noise. Route the probe wiring away from stepper motor wires and heater wires. Shielded cables help if interference is persistent.
- Dirty bed surface: Grease, dust, or debris on the bed can affect inductive and capacitive probe readings. Clean the bed with isopropyl alcohol before running ABL.
- Multiple probes per point: Configure your firmware to probe each point 2-3 times and average the results. In Marlin: MULTIPLE_PROBING 3. In Klipper: samples: 3 in your [bltouch] or [probe] section.
Problem 3: Z Offset Wrong After ABL
The mesh looks correct, but the nozzle is either too high (not squishing the first layer) or too low (scraping the bed). This is the most common ABL complaint.
Understanding Z offset:
The Z offset tells the firmware the vertical distance between where the probe triggers and where the nozzle actually touches the bed. Since the probe and nozzle aren’t at the same height, this offset must be calibrated precisely. A typical Z offset for BLTouch is between -1.0 and -3.5mm (negative because the nozzle is below the probe trigger point).
How to calibrate Z offset correctly:
- Home all axes (G28).
- Run the probe (G29 or equivalent).
- Move the nozzle to the center of the bed.
- Disable steppers for Z only, or use the paper test: lower the nozzle with baby steps (0.05mm increments) until a piece of paper has slight resistance when pulled between the nozzle and bed.
- Note the Z position shown on the screen — this is approximately your Z offset.
- Save: M851 Z-X.XX (in Marlin) then M500 to save to EEPROM. In Klipper: PROBE_CALIBRATE, then SAVE_CONFIG.
- Print a first layer test and fine-tune by ±0.05mm until perfect.
Pro tip: Many people set the Z offset once and forget about it. But nozzle changes, bed surface swaps, and temperature changes can all shift the ideal Z offset slightly. Re-calibrate after any hardware change.
Problem 4: ABL Mesh Not Being Applied During Printing
You run the leveling procedure, it completes successfully, but the printer ignores the mesh during actual printing. The first layer varies in height across the bed as if ABL didn’t run at all.
Causes and fixes:
- Missing G29 or M420 S1 in start G-code: This is the most common cause. After G28 (home), the mesh is cleared in Marlin unless you explicitly reload it. Add either G29 (re-probe every print) or M420 S1 (load saved mesh) AFTER the G28 command in your slicer’s start G-code. The order matters — G28 then M420 S1, not the other way around.
- Fade height not set: In Marlin, set ENABLE_LEVELING_FADE_HEIGHT and use M420 S1 Z10 in your start G-code. The Z10 tells the compensation to gradually fade out over the first 10mm of height. Without fade, the compensation applies to every layer, which can cause issues on tall prints.
- Klipper BED_MESH_PROFILE load: In Klipper, you need to explicitly load the mesh profile. Add BED_MESH_PROFILE LOAD=default to your start G-code macro after homing.
- Slicer overriding the mesh: Some slicers add their own G29 or M420 commands that can conflict with your settings. Check your slicer’s start G-code for any ABL-related commands that might be interfering.
Problem 5: Probe Crashes Into Bed or Doesn’t Trigger
The probe descends toward the bed and doesn’t stop, crashing the nozzle into the bed surface. This can damage the bed, nozzle, or probe.
Causes and fixes:
- Broken probe wire: The signal wire from the probe to the mainboard has broken or disconnected. The firmware never receives the trigger signal, so it keeps descending. Check all wiring connections immediately.
- Wrong probe type in firmware: If you configured a BLTouch but installed a CR Touch (or vice versa), the trigger logic may be inverted. Verify the probe type matches your firmware configuration exactly.
- Probe failure: The probe itself may be dead. Test by sending M401 (deploy) and M402 (retract) commands manually. If the probe doesn’t respond, it needs replacement.
- Mainboard pin damaged: If a short circuit occurred, the input pin on the mainboard may be damaged. This requires mainboard repair or replacement of the pin header.
Problem 6: Different Results on Different Bed Surfaces
Your ABL works perfectly on one bed surface but gives wrong readings when you swap to a different surface (e.g., switching from PEI to glass).
Explanation:
- Inductive probes detect metal, so they work through glass but trigger at a different height than on a bare metal bed. The Z offset needs recalibration for each surface.
- BLTouch/CR Touch physically touch the surface, so different surface thicknesses directly affect the Z offset. A glass bed that’s 4mm thick vs a magnetic PEI sheet that’s 1mm thick requires different Z offsets.
- Solution: Save different Z offsets for each bed surface. In Klipper, you can create multiple bed mesh profiles. In Marlin, save different Z offset values and switch via the LCD before printing.
Advanced Troubleshooting: Mesh Visualization
Visualizing your bed mesh helps diagnose problems quickly. Here’s how:
- OctoPrint + Bed Level Visualizer plugin: Generates a 3D visualization of your bed mesh directly in OctoPrint. Shows exactly where your bed is high, low, or tilted.
- Klipper bed mesh graph: Klipper’s CALIBRATE_MESH command with the visualizer in Mainsail/Fluidd shows a live heatmap of your bed surface.
- Manual method: Run G29 and read the raw mesh values from the terminal. Look for patterns — consistent tilt in one direction suggests tramming issues, random variation suggests probe inconsistency.
When to Skip ABL and Manually Level
Not every situation needs auto bed leveling. Consider manual leveling if:
- Your bed is genuinely flat (many modern PEI spring steel sheets are very flat)
- You only print in the center of the bed where variations are minimal
- Your ABL sensor is giving you more headaches than it solves
- You’re comfortable with the paper test and can level in under 5 minutes
A well-leveled flat bed with manual tramming can produce better first layers than a poorly configured ABL system. ABL is a tool, not a magic fix — it works best when the bed is already close to level and the system is properly calibrated.
Maintenance Schedule for ABL Systems
To keep your ABL system reliable, follow this maintenance schedule:
- Every print: Clean the bed surface before probing
- Weekly: Check probe mount tightness, inspect wiring
- Monthly: Run consistency test (probe the same point 10 times, check for variation), recalibrate Z offset
- After hardware changes: Always recalibrate Z offset after changing nozzles, bed surfaces, or updating firmware
- Annually: Replace BLTouch probe pin if worn, check all connectors
Recommended ABL Sensors by Printer Type
| Printer | Recommended ABL | Why |
|---|---|---|
| Ender 3 series | CR Touch | Native support, easy install, metal probe pin |
| Prusa MK3S+ | P.I.N.D.A. 2 (included) | Factory calibrated, firmware integration |
| Voron/Klipper builds | Klicky Probe or Tap | High accuracy, dock system, nozzle probing |
| Bambu Lab | Built-in (strain gauge) | No setup needed, automatic |
| Any printer | BLTouch | Universal, works with any surface |
Final Thoughts
Auto bed leveling is one of the best quality-of-life upgrades in 3D printing, but it requires proper setup and periodic maintenance to work correctly. The vast majority of ABL problems come down to three things: incorrect Z offset, missing mesh loading commands in start G-code, or a loose/damaged probe.
If your ABL system is giving you trouble, work through the problems in this guide systematically. Start with the physical checks (mount tightness, pin condition, wiring), then move to calibration (Z offset, probe speed, multi-probing), and finally verify the software side (start G-code, mesh loading, firmware settings). Most issues resolve with a simple Z offset recalibration or a one-line fix in your start G-code.
A properly calibrated ABL system gives you a perfect first layer every time, on any part of the bed, without manual adjustment. It’s worth the troubleshooting effort to get it right.