3D Printer Bed Wobble: How to Fix Uneven Prints for Good
What Causes a Wobbly 3D Printer Bed?
A wobbling print bed is one of those problems that affects every single print you make but can be maddeningly hard to diagnose. The symptoms are universal — uneven first layers, inconsistent layer heights, random thick and thin spots, and adhesion that works perfectly in one corner but fails in another. The causes, however, vary widely depending on your printer design and how long you’ve been using it.
Before you start tightening bolts at random, let’s systematically identify what’s actually causing your bed to wobble and fix it properly.
Diagnosing the Type of Wobble
Not all bed wobble is the same. Understanding the type of movement helps you target the right fix:
Side-to-Side Play
Push gently on the edge of your bed while it’s at home position. If the bed moves horizontally (left-right or front-back) with the carriage staying still, you have bearing or roller play. This is the most common type on budget printers and is usually the easiest to fix.
Vertical Bounce
Press down on the center of the bed and release. If the bed springs up and down noticeably before settling, your bed springs are either too loose or have lost tension. This creates inconsistent nozzle-to-bed distance that changes during printing as the bed decelerates and accelerates.
Rocking Motion
Try to tilt the bed like a seesaw. If one corner lifts while the opposite drops, you likely have a worn or loose Y-axis rail, bent frame, or uneven carriage mounting. This type creates a diagonal pattern of good and bad adhesion across the bed.
Vibration-Induced Wobble
If your bed seems stable when stationary but wobbles during printing (visible as inconsistent layer patterns), the vibration from the printer’s motors and rapid movements is exciting resonance in the bed assembly. This is more common on lighter beds and printers with tall Y-axis assemblies.

Fix #1: Tighten Your Eccentric Nuts (V-Roller Printers)
If your printer uses V-slot rails with rubber wheels (Ender 3, CR-10, and most budget Cartesian printers), this should be your first check. The eccentric nuts on the bottom of the bed carriage control how tightly the wheels grip the rail.
How to Adjust
- Power off your printer and move the bed to the center of the Y-axis
- Look under the bed carriage — you’ll see three or four wheels riding on the aluminum rail
- One or two of these wheels will have an eccentric nut (the nut has an off-center bore, visible when you look at it from the side)
- Try to spin each wheel with your fingers. If any wheel spins freely without the bed moving, it’s too loose
- Use the included wrench (usually 7mm or 8mm) to turn the eccentric nut in small increments — about 10-15° at a time
- Test after each adjustment: the wheel should roll smoothly but require some effort to spin by hand. The bed should slide along the rail without play but without binding
The sweet spot is snug but smooth. Over-tightening creates flat spots on the wheels and premature wear. Under-tightening allows the bed to wobble. Check this adjustment every 2-3 months, as wheels wear and loosen over time.
Fix #2: Replace Worn Wheels or Bearings
If adjusting eccentric nuts doesn’t eliminate the play, your wheels may be worn out. POM (Delrin) wheels on budget printers are consumable items that typically last 6-12 months of regular use.
Signs of worn wheels:
- Visible flat spots on the wheel surface
- The wheel is no longer perfectly round when you roll it slowly
- Audible clicking or bumping when moving the bed
- Eccentric nut is at maximum tightness but play remains
Replacement wheels are cheap — around $8-12 for a full set. For a more permanent solution, consider upgrading to a linear rail kit (MGN12H) for your Y-axis. Linear rails have essentially zero play and last much longer than wheel systems, though they require more involved installation.
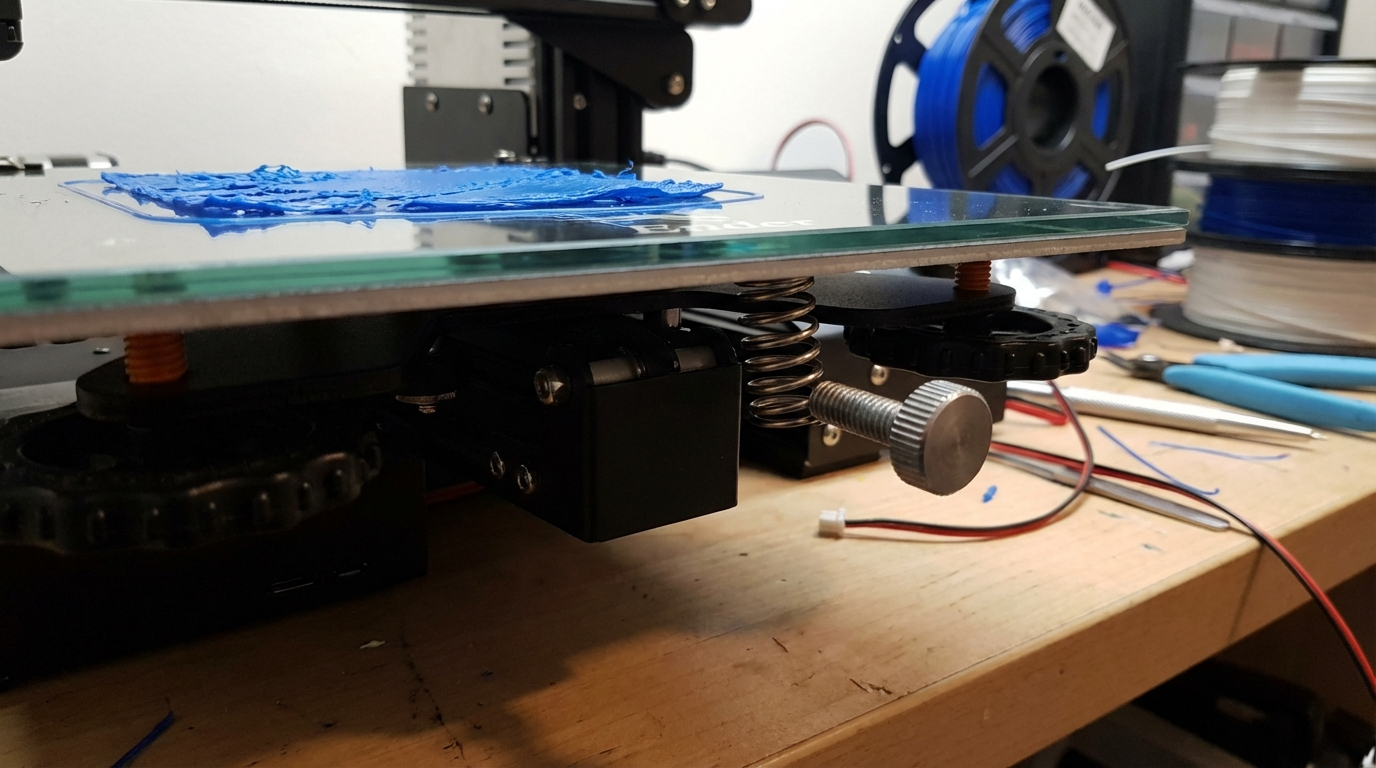
Fix #3: Upgrade Your Bed Springs
The springs that support your print bed do more than just allow leveling — they also absorb and transmit vibration. Stock springs on most printers are flimsy stamped metal that lose tension over time.
Silicone Bed Mounts
The most popular upgrade is replacing springs with solid silicone spacers. Benefits include:
- No tension loss over time — silicone maintains its compression
- Better vibration damping — silicone absorbs vibration instead of transmitting it
- More consistent bed level — once set, it stays set far longer than springs
- Cost: $5-10 for a set of 4
The tradeoff is less adjustment range, so you’ll want to set your Z-offset in firmware rather than relying on large spring compression adjustments. This is actually a good thing — firmware-based leveling is more precise anyway.
Stiffer Aftermarket Springs
If you prefer to keep adjustable springs, the yellow compression springs commonly sold as “3D printer bed springs” are a significant upgrade over stock. They provide about 3x the spring force, which keeps the bed more stable and resistant to vibration.
Fix #4: Check Your Frame for Square and Flatness
A crooked frame causes the entire bed assembly to sit at an angle, creating systematic leveling issues that bed leveling can’t fully compensate for.
Squaring the Frame
- Place a carpenter’s square (or a known-flat right angle) against the frame joints
- Check each 90° joint — vertical to horizontal extrusions should form perfect right angles
- If any joint is off, loosen the bolts at that joint, push the frame square, and re-tighten
- Check the base frame for flatness by placing it on a known-flat surface (granite, glass table)
Many budget printers ship with frames that are close but not perfectly square. Spending 15 minutes squaring your frame during initial setup (or after moving the printer) can eliminate persistent leveling headaches.
Fix #5: Secure Your Print Surface
If your glass bed, PEI sheet, or magnetic flex plate isn’t properly secured, it can shift during printing — especially during rapid bed movements. This looks like wobble but is actually the surface sliding on the heater.
- Glass beds: Use thermal pad clips (at least 4, one per side) or apply a thin layer of thermal pad between the glass and heater. Binder clips alone are not enough — they allow the glass to rock.
- Magnetic sheets: If the magnetic force is weak, the flex plate can partially lift or shift during fast moves. Clean both magnetic surfaces with isopropyl alcohol to restore grip. Replace the magnetic base if it’s lost magnetism.
- PEI spring steel: Ensure the steel sheet is flat. Warped spring steel sheets are surprisingly common and can mimic bed wobble symptoms. Place the sheet on a flat surface and check for rocking.
Fix #6: Belt Tension and Y-Axis Motor
A loose Y-axis belt allows the bed to move slightly during direction changes, creating what looks like wobble in the prints. Here’s how to check and fix it:
- Pinch the belt at the longest unsupported span and pull it sideways
- It should feel firm with 5-10mm of deflection — like a guitar string with moderate tension
- If it’s floppy, tighten the belt tensioner. On printers without a built-in tensioner (many Ender 3 variants), you may need to print a tensioner or manually adjust the motor mount
- Check that the belt teeth are properly seated on the pulley — misaligned teeth cause periodic wobble
Also check the Y-axis stepper motor mounting bolts. If they’re loose, the motor can shift slightly during direction changes, introducing backlash that appears as bed wobble in your prints.

Fix #7: Software Compensation
If you’ve addressed all mechanical issues but still have slightly uneven prints, software can help compensate for remaining imperfections.
Mesh Bed Leveling
Both Marlin and Klipper support mesh bed leveling, which probes the bed at a grid of points and adjusts the Z-height during printing to follow the bed’s actual surface. This compensates for:
- Slight bed warps that can’t be fixed mechanically
- Minor frame deflection
- Inconsistent spring tension across the bed
For Marlin with a probe (BLTouch, CR Touch, inductive), enable AUTO_BED_LEVELING_BILINEAR with at least a 5×5 grid. For Klipper, use BED_MESH_CALIBRATE with a 5×5 or 7×7 probe count for accurate compensation.
Manual Mesh Leveling
If you don’t have a probe, both firmware options support manual mesh leveling where you adjust each point using a paper or feeler gauge. It’s tedious but effective. Run it once, save the mesh, and load it in your start G-code.
Prevention: Keeping Your Bed Stable Long-Term
Once you’ve fixed your bed wobble, these practices will keep it from coming back:
- Monthly check: Wiggle your bed gently in all directions. Any play means it’s time to adjust eccentric nuts or check bearings.
- Clean your rails: Dust and debris on V-slot rails or linear rails accelerate wear. Wipe rails monthly with a dry lint-free cloth, then apply a thin coat of white lithium grease for V-slots or appropriate rail oil for linear rails.
- Level on a stable surface: Your printer should sit on a solid, flat surface. A wobbly desk can make a perfectly calibrated printer produce uneven results.
- Avoid moving your printer: Each time you move your printer, check frame squareness and bed level. Even small bumps can throw things off.
- Re-run mesh leveling periodically: Even with solid mechanical setup, running a fresh bed mesh every 50-100 prints helps maintain consistency as components slowly wear.
When to Consider a Hardware Upgrade
If your printer’s bed wobble keeps returning despite careful maintenance, consider these upgrades in order of impact:
- Linear rail conversion ($30-60) — Eliminates V-wheel play permanently
- Solid bed mounts ($5-10) — Silicone spacers replace springs
- Auto bed leveling probe ($15-40) — BLTouch or CR Touch for mesh compensation
- Upgraded frame ($100+) — Aftermarket aluminum extrusions with better tolerances
Most bed wobble issues can be resolved with the first two upgrades for under $70, which is a fraction of the cost of a new printer and dramatically improves print quality.