3D Printer Enclosure Temperature and Humidity Control: The Complete Guide
Why Enclosure Climate Matters for 3D Printing
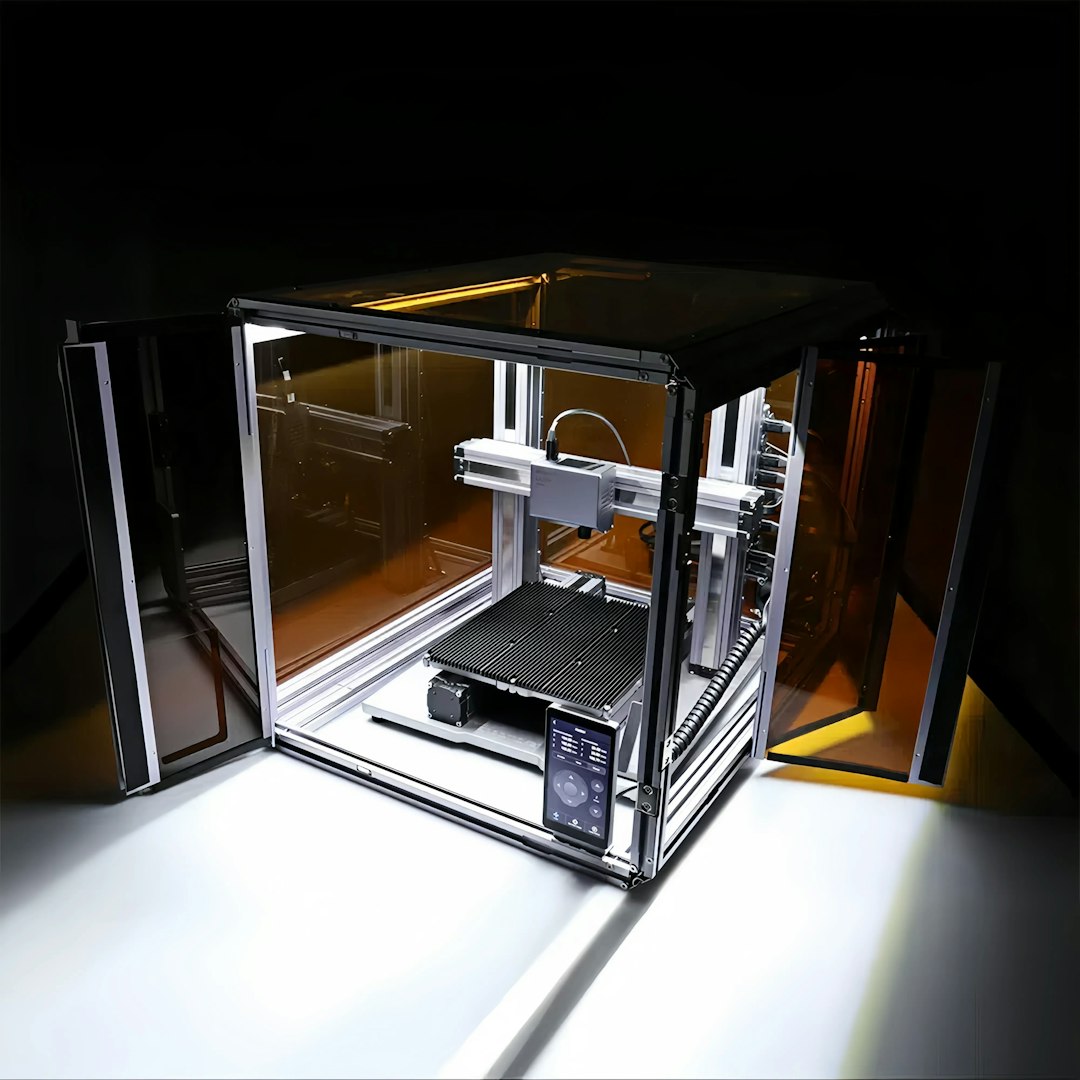
You built an enclosure for your 3D printer. Maybe it’s an IKEA Lack stack, a plywood box, or one of those fancy acrylic setups. The printer is enclosed, air drafts are gone, and ABS stopped warping. Mission accomplished, right?
Not quite. An enclosure without temperature and humidity control is like a house without HVAC — it keeps the rain out, but it doesn’t create a controlled environment. For PLA, this barely matters. For ABS, PETG, Nylon, PC, and any hygroscopic or warp-prone filament, the temperature and humidity inside your enclosure directly affect print quality, adhesion, warping, and material degradation.
This guide covers how to monitor and control both temperature and humidity inside your printer enclosure — from cheap DIY solutions to more sophisticated setups.
Understanding Enclosure Temperature
Why It Matters
Different filaments have different ideal ambient temperatures during printing:
- PLA: Room temperature or slightly below (20-25°C). PLA actually prints worse in hot enclosures — heat creep becomes a real problem above 35°C ambient, and the filament can soften in the extruder path before reaching the hotend.
- PETG: Room temperature to slightly warm (25-35°C). PETG is forgiving and doesn’t need elevated enclosure temps, but consistent temperatures help with large prints.
- ABS: 35-55°C ambient. This is where enclosures become essential. ABS warps because of uneven cooling — the parts of the print exposed to cooler air shrink faster than the parts still warm from the nozzle. Keeping the entire enclosure warm minimizes this temperature gradient.
- Nylon: 40-60°C ambient. Nylon is extremely warp-prone and humidity-sensitive. A warm, dry enclosure is almost mandatory for reliable nylon prints over 50mm tall.
- Polycarbonate: 50-70°C ambient. PC has the worst warping tendency of any common filament. Without an actively heated enclosure at 60°C+, large PC prints will almost certainly warp or crack.
Passive vs. Active Heating
Passive heating relies on the printer’s own heat — the heated bed and hotend warm the enclosure naturally. In a well-insulated enclosure, a 100°C bed can raise ambient temperature to 30-40°C within an hour. This is enough for PETG and modest ABS prints.
Active heating uses an additional heat source to reach and maintain higher temperatures. Options include:
- PTC ceramic heaters ($10-20): These are the most popular DIY option. A 100-200W PTC heater with a small fan circulates warm air inside the enclosure. They self-regulate temperature (output drops as they heat up), making them inherently safer than other heating elements.
- Incandescent light bulbs ($2-5): An old-school trick. A 60-100W incandescent bulb inside the enclosure generates significant heat. It’s crude but effective. Use a dimmer for temperature control.
- Silicone heater pads ($20-40): Mounted to the enclosure wall, these provide consistent, even heating. They’re thin, efficient, and available in various wattages. Best for permanent setups.
- Dedicated enclosure heaters ($50-150): Products like the Sunlu Filadryer S4 or purpose-built enclosure heaters with built-in thermostats. Plug and play, but pricier.
Temperature Control: The Thermostat
Heating an enclosure without temperature control is dangerous and counterproductive. If the enclosure gets too hot, you risk:
- Heat creep in the hotend (filament melting too early)
- Stepper motor overheating and skipping steps
- Electronic component failure (mainboards, drivers)
- Warping of printed parts from excessive heat
- Fire hazard from uncontrolled heaters
DIY Thermostat Options
STC-1000 ($8-12): A simple, cheap relay-based thermostat. You set the target temperature, plug your heater into its outlet, and it cycles the heater on/off to maintain the setpoint. Accurate to about ±1°C. The most popular choice for DIY enclosure heating.
W1209 module ($3-5): Even cheaper, this is a bare circuit board with a relay and temperature probe. Needs a 12V power supply and some wiring, but works well. Good if you’re building a permanent enclosure and want to integrate the control board.
Smart plugs with temperature sensors ($15-30): Some smart home plugs (Shelly, Sonoff TH) have temperature probe inputs and can switch a heater based on temperature readings. Bonus: you can monitor enclosure temperature remotely and get alerts if something goes wrong.
Understanding Enclosure Humidity
Why It Matters
Most 3D printing filaments are hygroscopic — they absorb moisture from the air. The rate of absorption depends on the material and the ambient humidity:
- Nylon: Extremely hygroscopic. Can absorb enough moisture to ruin print quality in 4-8 hours of open air at 60%+ humidity.
- PETG: Moderately hygroscopic. Noticeable quality degradation after 24-48 hours in humid conditions.
- PLA: Slightly hygroscopic. Can handle days of exposure, but will eventually show symptoms (popping, stringing, rough surface).
- ABS: Low moisture absorption, but wet ABS still prints noticeably worse.
- TPU: Very hygroscopic. Ruins quickly in humid environments.
If your enclosure is in a garage, basement, or any room with humidity above 50%, the filament sitting on the spool inside the enclosure is slowly absorbing moisture between prints. Over days and weeks, this adds up.
Target Humidity Levels
For optimal filament storage and printing, you want your enclosure humidity below 25% relative humidity (RH). Below 15% is ideal. For reference, most indoor environments sit at 30-60% RH depending on climate and season.
Humidity Control Solutions
Desiccant (Passive)
The simplest approach: put silica gel packets or a container of indicating silica gel beads inside the enclosure. This works for small, well-sealed enclosures and low-humidity environments. Refresh the silica gel by baking it in an oven at 120°C for 2 hours when it changes color (from orange to green/clear, depending on the type).
Limitation: Desiccant has limited capacity. In a large or poorly sealed enclosure, it saturates within hours and stops working. It’s best as a supplement to other methods, not a standalone solution.
Mini Dehumidifier ($15-40)
Small Peltier-based dehumidifiers designed for closets or small spaces. They draw in moist air, condense the water on a cold surface, and collect it in a reservoir. For a typical 3D printer enclosure (0.1-0.5 cubic meters), a 22W mini dehumidifier can maintain 20-30% RH if the enclosure is reasonably sealed.
These dehumidifiers work best in warmer enclosures — the Peltier effect is more efficient at condensing moisture from warm air than cold air. If your enclosure is actively heated to 40-50°C for ABS, a mini dehumidifier becomes even more effective.
Dry Box Integration
Instead of dehumidifying the entire enclosure, many people use dry boxes for filament storage that feed directly into the printer. The filament stays sealed in a desiccated container with a PTFE tube running from the box to the extruder. This keeps the filament dry regardless of enclosure humidity.
Commercial options include the Sunlu S2, EIBOS Cyclopes, and PolyBox. DIY alternatives using airtight food containers, desiccant, and a PTFE tube fitting work just as well for a fraction of the cost.
Monitoring: What Sensors to Use
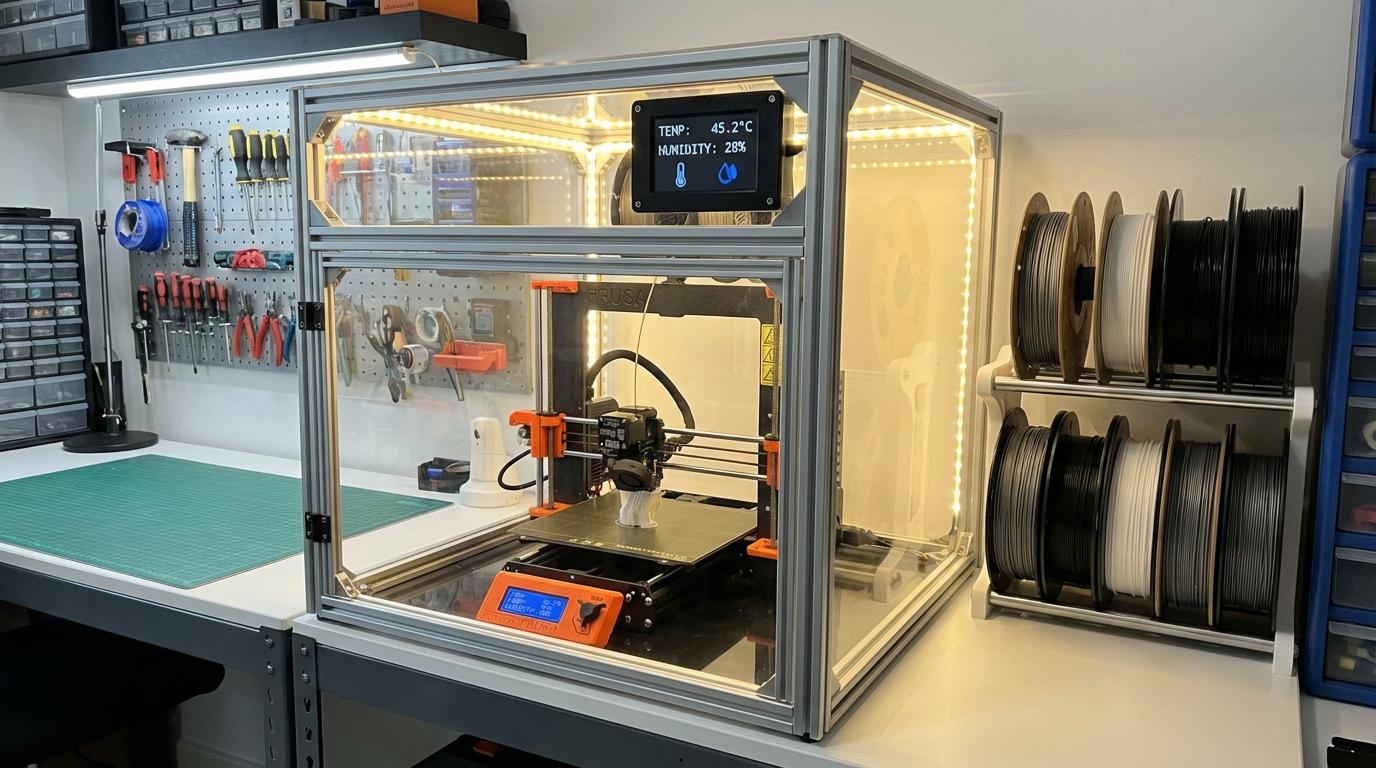
DHT22 / AM2302 ($3-5)
The most common DIY temperature and humidity sensor. Connects to an Arduino, ESP8266/ESP32, or Raspberry Pi. Accuracy: ±0.5°C temperature, ±2% RH humidity. If you’re running OctoPrint or Klipper on a Raspberry Pi, you can display enclosure conditions on the printer’s web interface with a simple plugin.
BME280 ($4-8)
A step up from the DHT22, the BME280 also measures barometric pressure (not useful for printing, but nice for data logging). It’s more accurate (±0.1°C, ±1% RH) and faster to read. Works with the same microcontrollers.
Standalone Hygrometer ($5-10)
If you don’t want to wire anything, a battery-powered digital hygrometer (the kind sold for cigar humidors or terrariums) costs $5-10 and sticks inside the enclosure with a magnet or adhesive. No integration with your printer software, but you can glance at it before starting a print to check conditions.
Putting It All Together: A Complete Enclosure Climate System
Here’s a practical setup for a well-controlled enclosure:
- Insulation: Line the enclosure with 3-5mm foam insulation (XPS or similar). This reduces heat loss and keeps the temperature more stable. Don’t block ventilation ports for electronics — stepper drivers and the mainboard need airflow.
- Heating: Mount a 100-200W PTC heater with a fan inside the enclosure, controlled by an STC-1000 thermostat. Set the target to 45°C for ABS, 55°C for Nylon, or 60°C for PC.
- Humidity control: Use a dry box for filament feeding, plus desiccant packs inside the enclosure as a backup. If your environment is very humid (>60% RH), add a mini Peltier dehumidifier.
- Monitoring: Install a DHT22 or BME280 sensor connected to your Raspberry Pi running OctoPrint/Klipper, or simply put a standalone hygrometer inside.
- Ventilation: Add a small exhaust fan (40mm or 60mm) controlled by a simple on/off switch for when you print PLA. PLA needs cool air, so open the enclosure doors or turn on the exhaust fan to prevent heat buildup.
Common Mistakes
Overheating the Enclosure for PLA
PLA does not benefit from a heated enclosure. In fact, enclosure temperatures above 35-40°C cause heat creep in most hotends, leading to jams. If you print PLA in an enclosure, open the doors or run the exhaust fan.
Ignoring Electronics Cooling
Your printer’s mainboard, stepper drivers, and power supply are rated for specific temperature ranges (usually up to 60-80°C). A heated enclosure puts these components under stress. Route the mainboard and PSU outside the enclosure if possible, or add a small fan to blow cool air over them.
Sealing Too Well
A completely airtight enclosure with a heater is a safety hazard. Heaters can fail in the “on” state, and without any air exchange, temperatures can climb dangerously. Always have some passive ventilation or a thermal fuse as a safety cutoff.
Is It Worth It?
For PLA-only printing: no. An enclosure is nice for noise reduction and keeping kids and pets away from moving parts, but climate control adds complexity you don’t need.
For ABS, Nylon, PC, or any serious engineering filament: absolutely. The difference between controlled and uncontrolled enclosure printing is the difference between reliable, repeatable results and constant warping, cracking, and moisture-related failures. A $30-50 investment in a heater, thermostat, and hygrometer pays for itself in saved filament and reduced frustration.