3D Printer Power Loss Recovery: How to Resume Failed Prints
What Happens When Your 3D Printer Loses Power
It’s every 3D printing enthusiast’s nightmare: you’re 18 hours into a 20-hour print, and the power flickers off. Maybe it’s a storm, a tripped breaker, or your cat stepping on the power strip. Whatever the cause, you’re staring at an incomplete print and wondering if those hours of work are gone forever.
The good news is that power loss recovery is a real feature on many modern 3D printers. The bad news is that it doesn’t always work perfectly, and some printers don’t have it at all. Here’s everything you need to know about recovering prints after power failures.
How Power Loss Recovery Works
Power loss recovery (PLR) — sometimes called “resume print” or “power failure resume” — works by periodically saving the printer’s state to non-volatile storage (usually an SD card or internal flash memory). When power is restored, the printer reads this saved state and attempts to continue from where it left off.
What gets saved:
- Current Z height (layer position)
- Print file position (which line of G-code)
- Nozzle and bed temperature settings
- Fan speed
- Extrusion position (E-steps count)
What doesn’t get saved perfectly:
- Exact X/Y position (the head may have moved during power-off)
- Filament pressure in the nozzle
- Bed adhesion state (part may have popped off during cooling)
Which Printers Have Power Loss Recovery?
Most modern FDM printers include some form of PLR, but the quality varies dramatically:
Excellent PLR implementation:
- Bambu Lab X1C/P1S/A1: Saves state frequently, reliable resume
- Prusa MK4/MK3S+: Saves every layer, one of the most reliable implementations
- Creality K1/K1 Max: Built-in PLR with Klipper firmware
Basic PLR (works sometimes):
- Creality Ender 3 series: Has PLR but it’s hit-or-miss. Saves less frequently than premium printers
- Artillery Sidewinder/Genius: Basic PLR, can have Z-height offset issues
- Anycubic Kobra series: Included but not always reliable
No built-in PLR:
- Most kit printers (Voron, RatRig) unless you add it via firmware
- Older printers running stock Marlin without PLR enabled
- Most resin printers (different technology, different recovery methods)
Step-by-Step: Using Built-In Power Loss Recovery
If your printer has PLR, here’s what to do after a power outage:
- Don’t touch anything. When power returns, the printer should display a “Resume Print?” prompt
- Check the print visually. Is it still stuck to the bed? Has it shifted? If the part popped off or moved, recovery won’t work
- Select “Resume” on the screen. The printer will home X and Y, then carefully move to the last saved Z position
- Watch the first few resumed layers carefully. You may see a slight line or blob where the print paused — this is normal
- If the resume fails (layer shift, nozzle crashing into print), abort immediately to prevent damage
Critical warning: If the print has been off for a long time and the bed has fully cooled, there’s a risk the part has contracted and popped off the build plate. Check adhesion before resuming.
Manual Recovery: When Auto-Resume Fails
If your printer doesn’t have PLR, or if the auto-resume fails, you can attempt a manual recovery. This is more advanced and doesn’t always produce a perfect result, but it can save a multi-day print.
What you need:
- The original G-code file
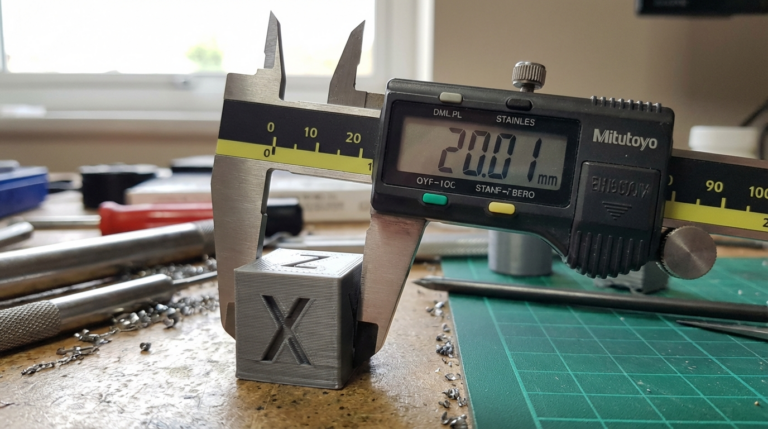
- A way to measure the exact height of the incomplete print (digital calipers)
- A text editor for modifying G-code
The process:
- Measure the print height: Use calipers to measure the exact height of the printed portion. Let’s say it’s 42.6mm
- Find the corresponding layer: In your G-code, search for the Z-move command closest to that height. For 0.2mm layers, that’s around layer 213 (42.6 ÷ 0.2)
- Create a modified G-code: Copy everything from the start of the file (header, start G-code) down to the temperature and setup commands. Then skip to the layer you identified and copy everything from there to the end
- Add a Z-hop: Before the first move command in your modified file, add a command to raise Z high enough to clear the existing print (e.g., G1 Z50 F300)
- Home carefully: Include G28 X Y (home X and Y only — do NOT home Z, as this would crash the nozzle into your print)
- Heat up: Add temperature commands for nozzle and bed
- Resume: Move to the first X/Y position of the resume layer, lower Z to the correct height, and let the G-code take over
This method has about a 50-60% success rate. The main failure modes are slight Z-height mismatch (causing poor layer adhesion at the join line) and X/Y offset from homing differences.
Enabling PLR in Marlin Firmware
If your printer runs Marlin but doesn’t have PLR enabled, you can activate it by recompiling the firmware. Here’s what to change in Configuration_adv.h:
Uncomment or add these lines:
#define POWER_LOSS_RECOVERY— enables the feature#define PLR_ENABLED_DEFAULT true— turns it on by default#define POWER_LOSS_PIN -1— uses software detection (or specify your pin if you have a power-loss detection circuit)#define POWER_LOSS_STATE HIGH— trigger state for the power loss pin
After recompiling and flashing, Marlin will periodically save print state to the SD card. The trade-off is slightly slower printing (due to SD card writes) and increased SD card wear.
Enabling PLR in Klipper
Klipper doesn’t have built-in PLR in the same way Marlin does, but there are community solutions:
- klipper-backup plugin: Saves state to disk periodically
- Custom macros: Many Klipper users write SAVE_STATE macros that log the current position to a file every N layers
- OctoPrint integration: The “Octolapse” and “PrintRecovery” plugins can provide basic resume functionality
The Klipper community generally recommends using a UPS (uninterruptible power supply) instead of relying on software recovery, since Klipper’s architecture makes clean state saving during a sudden power loss challenging.
Prevention: UPS for 3D Printers
The best solution to power loss isn’t recovery — it’s prevention. A UPS (Uninterruptible Power Supply) gives your printer enough time to either finish the current layer or perform a controlled shutdown.
What size UPS do you need?
- Most FDM printers draw 200-350W during printing
- A 600VA/360W UPS provides about 5-10 minutes of runtime
- A 1000VA/600W UPS provides about 10-20 minutes
- A 1500VA/900W UPS provides about 20-40 minutes
For most users, a 1000VA UPS ($80-120) is the sweet spot. It gives you enough time to:
- Safely park the print head
- Save the current state
- Optionally pause and wait for power to return
Popular UPS choices for 3D printing:
- APC Back-UPS 1000VA — reliable, widely available ($100-130)
- CyberPower CP1000PFCLCD — pure sine wave, better for electronics ($120-150)
- APC Back-UPS 600VA — budget option, enough for short outages ($60-80)
Important: Make sure you get a UPS with a pure sine wave or simulated sine wave output. Some cheap square-wave UPS units can damage printer power supplies.
Smart Power Solutions
If you want to go beyond a basic UPS, consider these setups:
- UPS + OctoPrint: Configure OctoPrint to detect UPS battery status and automatically pause the print when running on battery
- Smart plug monitoring: Use a smart plug with power monitoring to track your printer’s power consumption and get alerts on your phone if power drops
- Automated shutdown scripts: Write a script that detects UPS battery level and sends a controlled pause/park command to the printer before the battery dies
What to Do After a Failed Recovery
If recovery doesn’t work — the print shifted, the nozzle gouged the surface, or adhesion failed — here are your options:
- Glue it: If the print separated cleanly at a layer line, you can potentially print only the missing top portion and glue the two pieces together with CA glue or epoxy
- Reprint with risk mitigation: Start the print again, but this time use a UPS and enable PLR
- Split the model: For very large prints, consider splitting the model into sections using software like Meshmixer or Luban, so that each section takes less time and a power failure only costs you a fraction of the total
Final Recommendations
Power loss during 3D printing is frustrating but manageable. Here’s my priority list for protecting your prints:
- Enable PLR if your printer supports it (check firmware settings)
- Buy a UPS — a $100 investment that saves hours of wasted prints and filament
- Save your G-code files so you can attempt manual recovery if needed
- Split large prints into sections when possible
- Print overnight only with UPS protection — most outages happen during storms, which are more common at night
A little preparation goes a long way. Most experienced 3D printer operators have a UPS running their setup — it’s one of those upgrades that pays for itself the first time it saves a 30-hour print.