3D Printer Screen Blank or Not Working? How to Fix It
When Your 3D Printer Screen Goes Dark
You power on your 3D printer and nothing happens — the screen stays completely blank. Or maybe it was working fine mid-print and suddenly went dark. A blank or non-responsive display is a surprisingly common issue, and while it looks scary, most causes are fixable without replacing the entire board.
This guide covers every reason your 3D printer screen might go blank and walks you through systematic troubleshooting to get it working again.
Quick Checks Before You Panic
Before diving into hardware diagnosis, rule out the obvious:
- Check the power supply. Is the PSU switch on? Is the power cable fully seated? Try a different outlet. Some printers have a voltage selector switch (110V/220V) — make sure it’s set correctly for your region.
- Check for LED indicators. Most mainboards have a small LED that lights up when powered. If the board LED is off, the problem is power delivery, not the screen itself.
- Listen for fans. If the PSU fan or mainboard fan spins but the screen is blank, you know the printer has power — the problem is specifically with the display.
- Try a hard reset. Unplug the printer completely, wait 30 seconds, and plug it back in. Capacitors need time to discharge, and some firmware glitches clear on a full power cycle.
Ribbon Cable and Connection Issues
The most common cause of a blank screen is a loose or damaged ribbon cable connecting the display to the mainboard. These flat, flexible cables are fragile and can work loose from vibration during printing.
How to Check
- Power off and unplug the printer.
- Open the electronics enclosure (usually the bottom panel).
- Locate the ribbon cable running from the mainboard to the screen.
- Carefully disconnect and reconnect the cable at both ends, ensuring it’s fully seated.
- Check for any visible damage — bent pins, cracked connectors, or cuts in the cable.
On many Creality printers (Ender 3, CR-10), the screen cable uses a flat ribbon with a friction-fit connector. These are notorious for working loose. Push the cable firmly into the connector until it clicks or seats completely.
Testing the Cable
If reseating doesn’t work, try gently bending the cable at different points while powering on. If the screen flickers when you touch a certain spot, the cable has an internal break at that point and needs replacement. Replacement cables are available for most popular printers for $5-15.
Firmware Corruption
A corrupted firmware flash can leave the screen blank because the display initialization code doesn’t execute properly. This often happens after a failed firmware update or a power loss during flashing.
Signs of Firmware Issues
- Screen went blank immediately after a firmware update
- Screen shows garbled text or partial display before going blank
- The printer was working fine before a power outage
The Fix
- Download the correct firmware from your printer manufacturer’s website. Make absolutely sure you have the right version for your exact printer model and board revision.
- Format a MicroSD card as FAT32 with 4096 byte allocation.
- Copy the firmware .bin file to the root of the SD card. For many boards, the filename must be different from the previously flashed file — rename it to something like “firmware-fix.bin”.
- Insert the SD card and power on. The board should flash automatically (some boards show a flashing LED during this process).
- Wait 1-2 minutes, then power cycle.
If your printer uses a separate display board with its own firmware (like the Creality DWIN displays), you may need to update the display firmware separately. Check your printer’s documentation for the display update procedure.
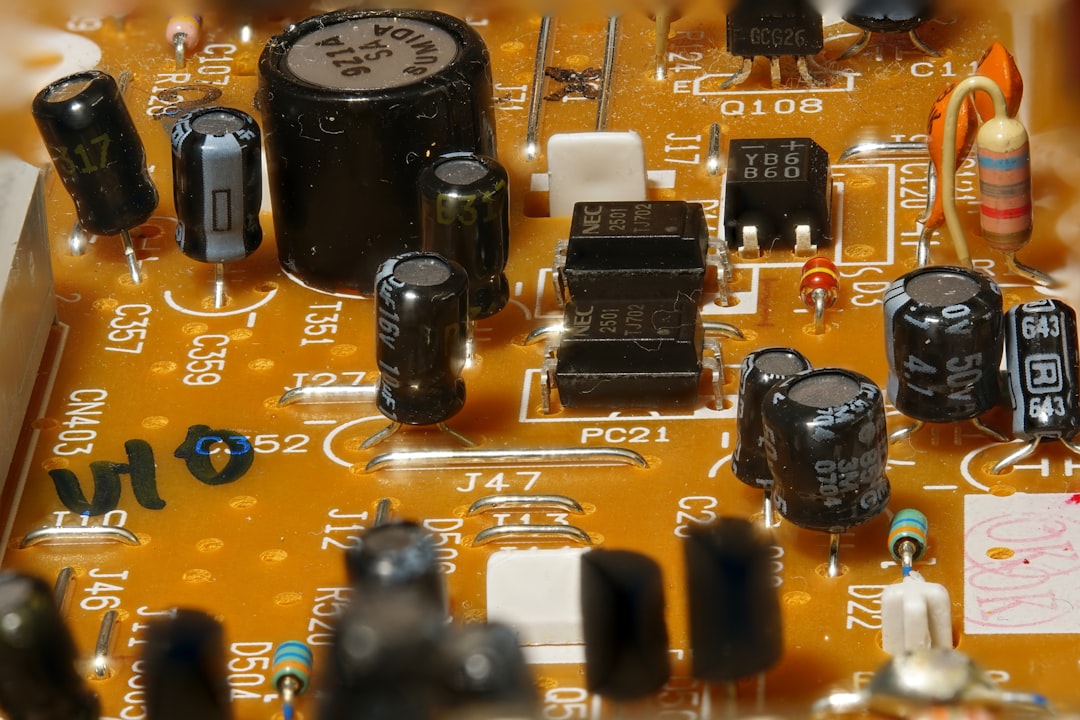
Mainboard Failure
If the power supply works but the mainboard doesn’t light up, or lights up but no component responds, you may have a failed mainboard. Common causes include:
- Blown MOSFET: A shorted heating element can blow the MOSFET that controls it, sometimes taking out other components on the board.
- Voltage regulator failure: The 5V or 3.3V regulator that powers the display and processor can fail, leaving the board partially functional.
- Water or condensation damage: Moisture on the PCB can cause shorts. Look for any signs of corrosion, water spots, or burned traces.
- Electrostatic discharge: Touching the board without proper grounding can damage sensitive components.
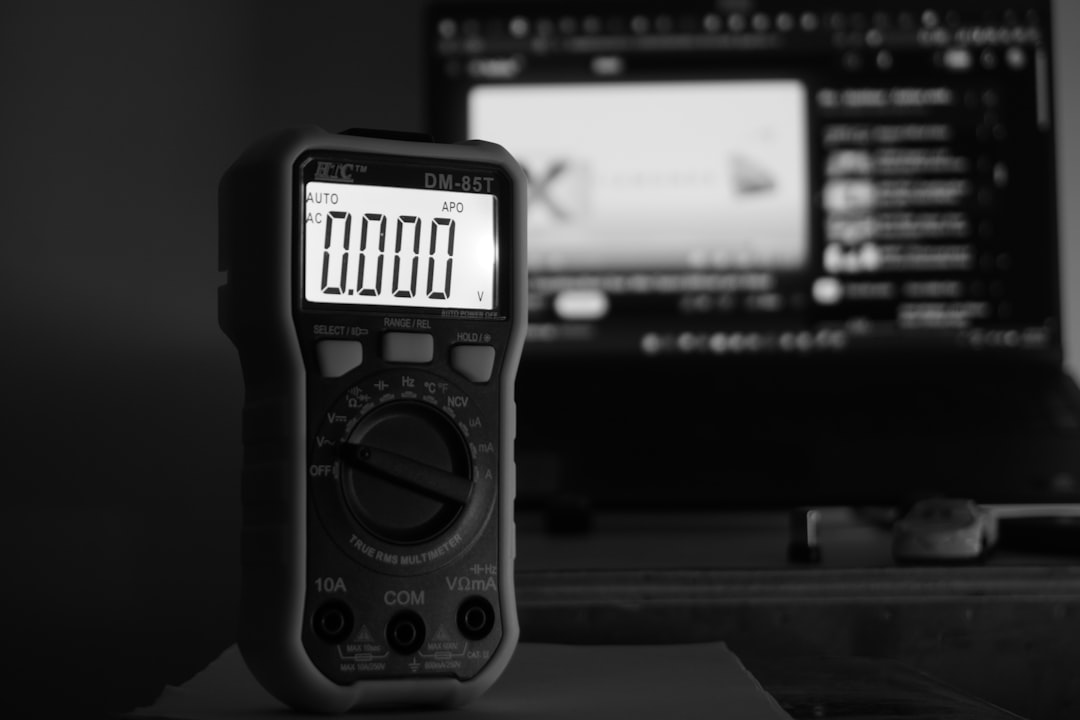
Diagnosing Board Problems
If you have a multimeter, check these voltages with the printer powered on:
- PSU output: Should read 24V (or 12V on older printers) between V+ and V- terminals.
- 5V rail: Check the USB port pins or any 5V test point on the board. Should read 4.8-5.2V.
- 3.3V rail: Check near the processor. Should read 3.2-3.4V.
If 24V is present but 5V is missing, the voltage regulator has likely failed. Some users have successfully replaced the regulator (it’s usually a small SOT-223 package component), but for most people, a replacement board is the practical solution.
Display Board Failure
Sometimes the mainboard is fine but the display unit itself has failed. This is more common with touchscreen displays than simple LCD/encoder setups.
How to Test
- If your printer supports USB connectivity, try connecting via USB and controlling it through a host program like Pronterface or OctoPrint. If the printer responds to commands via USB but the screen stays blank, the display is the problem.
- If you have another printer with a compatible display, try swapping screens as a test.
- Check if the display backlight turns on (look at the screen from an angle in a dark room). If the backlight works but nothing displays, the LCD driver or data connection has failed.
Replacement Options
Most printer displays cost $15-40 for replacement. Many makers take this opportunity to upgrade — the BTT TFT35 and BTT TFT50 are popular upgrades that offer touchscreen and classic mode, compatible with many 8-bit and 32-bit boards.
Specific Printer Troubleshooting
Creality Ender 3 / Ender 3 V2 / Ender 3 S1
The most common issue is the ribbon cable connector on the 4.2.2 or 4.2.7 mainboard. The connector is fragile and can crack if forced. Check the cable at both the board end and the screen end. If the connector is damaged, a replacement board is often needed.
Prusa MK3S+ / MK4
Prusa displays rarely fail outright. A blank screen usually indicates a firmware issue. Try re-flashing through the SD card. If that fails, check the display cable routing — the MK3S cable can get pinched in the Einsy enclosure.
Bambu Lab P1S / X1C
These printers use a touchscreen connected via a dedicated cable. If the screen goes blank, try the firmware recovery procedure: hold the power button for 10 seconds for a hard reset. If that fails, contact Bambu support — the display assembly on these printers is integrated and not easily user-replaceable.
Artillery / Sidewinder
Artillery printers use a TFT touchscreen with a separate ribbon cable. These cables route through the Y-axis cable chain and can get damaged over time. Inspect the cable for any kinks or wear, especially at the cable chain entry/exit points.
Preventive Measures
- Secure cables properly. Use cable clips or zip ties to prevent ribbon cables from vibrating loose. Leave a small service loop rather than pulling cables taut.
- Use a UPS or surge protector. Power spikes can damage electronics. A basic surge protector costs $10 and can save your mainboard.
- Keep the electronics enclosure clean. Dust buildup can cause shorts over time, especially in humid environments. Blow out the enclosure with compressed air every few months.
- Back up your firmware settings. Before any update, save your current configuration (especially calibration values like e-steps and PID settings). If an update goes wrong, you’ll have a known-good configuration to fall back to.
- Avoid touching the PCB without grounding yourself. Touch a grounded metal surface first, or wear an ESD strap.
When to Replace vs. Repair
If your printer is a budget model (under $300) and the mainboard has failed, a replacement board often makes more sense than component-level repair. A compatible 32-bit board like the BTT SKR Mini E3 costs $25-40 and often comes with better stepper drivers than the original.
For more expensive printers, contact the manufacturer first — many offer warranty replacements or discounted parts. Component-level repair is viable if you have soldering skills and can identify the specific failed component.
Final Thoughts
A blank screen is usually one of the easier problems to diagnose because the causes are relatively limited: power, cable, firmware, board, or display. Work through them systematically starting with the simplest (power check, cable reseat) and you’ll typically find the answer within the first few steps. The fix is almost always a cable reseat, firmware reflash, or an affordable replacement part — not a whole new printer.