3D Printer Cooling Fan Not Working? Here Is How to Fix It
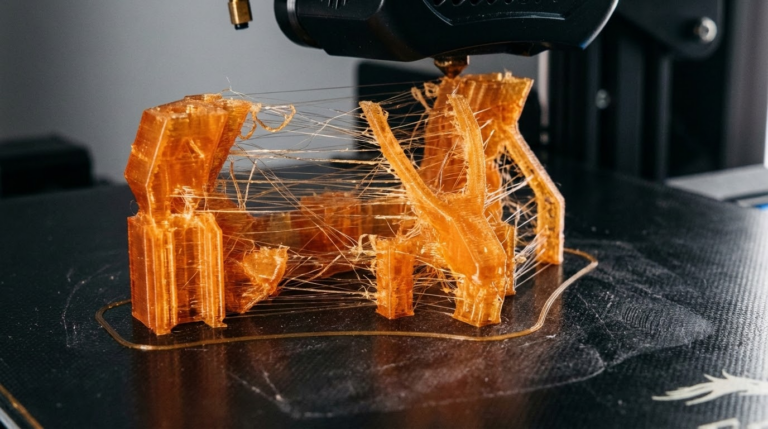
Your 3D printer’s cooling fan is one of those components you don’t think about — until it stops working. When the part cooling fan fails or underperforms, you’ll see drooping overhangs, messy bridges, stringing, and an overall decline in print quality that can drive you absolutely crazy. The good news? This is one of the easier problems to diagnose and fix.
In this guide, I’ll walk you through every possible reason your 3D printer cooling fan isn’t working properly, and exactly how to get it spinning again — or when it’s time to replace it altogether.
Why Your 3D Printer Cooling Fan Matters
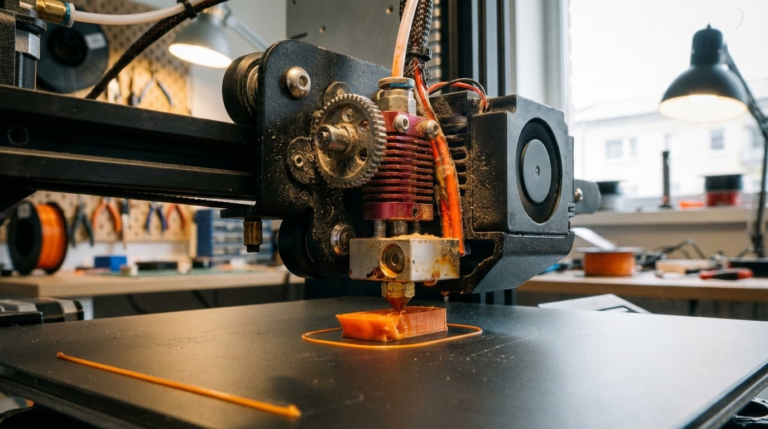
Before we dive into troubleshooting, let’s quickly establish why this little fan is so important. The part cooling fan (sometimes called the print cooling fan) blows air directly onto freshly extruded filament. This rapid cooling solidifies the plastic quickly, which is essential for:
- Clean overhangs — Without cooling, overhanging sections droop and curl
- Sharp bridges — Bridging across gaps requires instant solidification
- Fine details — Small features need the filament to hold shape immediately
- Preventing heat creep — Adequate airflow keeps the cold zone cold
Most FDM printers have two types of fans: a hotend cooling fan (always on, keeps the heatsink cool) and a part cooling fan (controlled by your slicer, cools the printed layers). Problems with either one can cause different issues, so identifying which fan is misbehaving is step one.
Symptom Check: Is Your Cooling Fan Actually Broken?
Before tearing anything apart, let’s confirm the fan is actually the problem. Here are telltale signs:
- Fan doesn’t spin at all during printing
- Fan spins but makes grinding, clicking, or rattling noises
- Fan spins at reduced speed (visibly slower than normal)
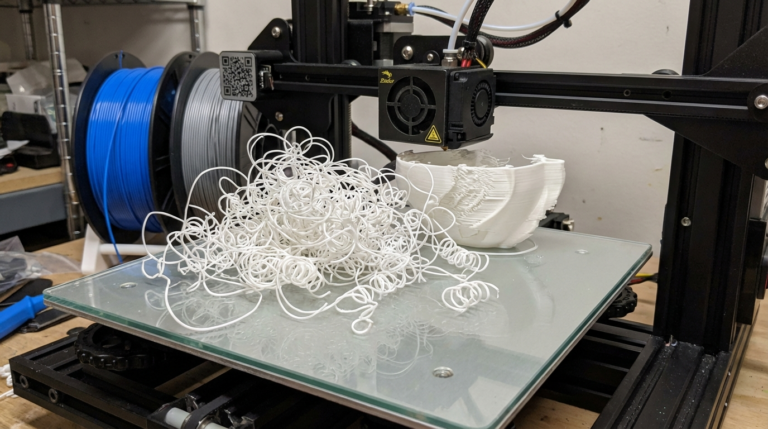
- Print quality dropped suddenly — especially on overhangs and bridges
- Fan runs intermittently — starts and stops on its own
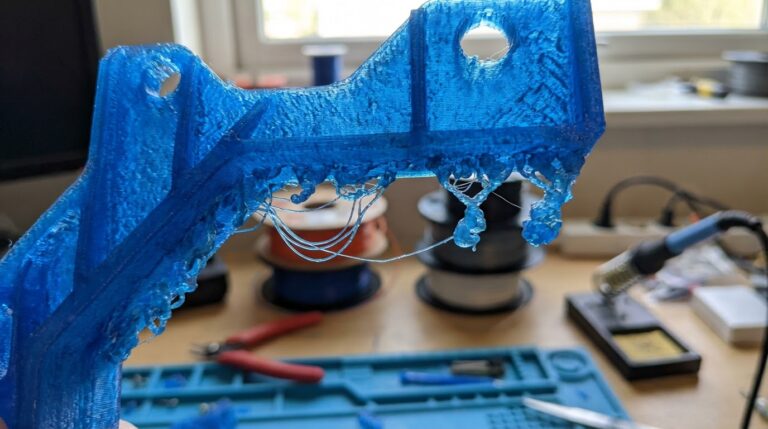
If you’re seeing droopy overhangs and poor bridging but the fan appears to spin normally, the issue might be a clogged or misaligned fan duct rather than the fan itself. More on that later.
Common Causes and Fixes
1. Fan Is Disabled in Slicer Settings
This sounds obvious, but it catches more people than you’d think. Your slicer controls when and how fast the part cooling fan runs, and the settings vary by filament type.
How to check:
- In Cura: Look for “Fan Speed” under the Cooling section. Default for PLA is usually 100%.
- In PrusaSlicer/OrcaSlicer: Check “Cooling” tab → “Fan speed” settings
- Make sure “Enable Print Cooling” is checked
- Check the “Initial Fan Speed” and “Regular Fan Speed at Layer” settings
Important note: Some filaments like ABS and ASA require the fan to be OFF or very low (0-20%). If you recently switched filament profiles, your fan might be intentionally disabled. PLA and PETG generally want high fan speeds (80-100% for PLA, 50-70% for PETG).
2. Loose or Disconnected Wiring
Vibration is a constant companion in 3D printing. Over time, fan connectors can work themselves loose. This is the most common physical cause of fan failure.
How to fix:
- Turn off your printer and unplug it
- Trace the fan wire from the fan to the control board
- Check the connector at the board — push it firmly into its socket
- Check any inline connectors in the cable run
- Look for pinched, frayed, or broken wires — especially where cables move with the printhead
If the wire insulation is damaged but the copper is intact, you can wrap it with electrical tape as a temporary fix. For a permanent solution, solder the break and use heat shrink tubing.
3. Dead Fan Motor (Burned Out Bearings)
Fans have a finite lifespan. Budget 3D printer fans often use sleeve bearings that wear out after 1,000-3,000 hours of printing. When the bearing fails, the fan may:
- Make a loud grinding noise before stopping completely
- Work only when the printer is in certain orientations
- Spin freely when flicked but not start on its own
The fix: Replace the fan. This is cheap ($5-15) and straightforward. When buying a replacement:
- Match the voltage (most printers use 24V, some older ones use 12V)
- Match the size (common sizes are 4010, 4020, 5015 for blower fans)
- Consider upgrading to a ball-bearing fan for longer lifespan
- Dual ball bearing fans last 50,000+ hours vs. 10,000 for sleeve bearings
4. Blown MOSFET or Damaged Control Board
If the fan connector has power (you can check with a multimeter — should read 24V or 12V DC when the fan should be running) but the fan is confirmed good, the issue might be on the control board. The MOSFET that switches the fan on and off can fail.
Diagnosis:
- Set fan speed to 100% in your slicer or through the printer’s menu
- Use a multimeter to check voltage at the fan connector on the board
- If you get 0V when it should be running, the MOSFET may be dead
- Try plugging the fan into a different fan header on the board (if available)
Fix: If the MOSFET is blown, you can replace it (requires soldering skills) or use an external MOSFET module. For many hobbyists, replacing the whole board is easier and safer — especially since modern boards like the SKR Mini E3 or BTT Manta are affordable and a significant upgrade.
5. Clogged or Misaligned Fan Duct
Sometimes the fan works fine, but the air isn’t reaching the print. Fan ducts can get:
- Clogged with dust and filament debris — Clean with compressed air
- Warped from heat exposure — Replace (consider printing a better duct design)
- Knocked out of alignment — Reposition so airflow hits the nozzle area
If you’re running a stock fan duct, consider upgrading to a community-designed alternative. Popular options include the Hero Me Gen7, Satsana, and Briss Moto. These improve airflow distribution and can dramatically improve print quality even with the same fan.
6. Firmware or G-code Issues
In rare cases, a firmware update or configuration change can disable the fan output. If the fan stopped working after a firmware flash:
- Check your firmware pin assignments (fan_pin configuration in Marlin or Klipper)
- In Klipper, verify your
[fan]section in printer.cfg has the correct pin - In Marlin, check
Configuration_adv.hfor fan pin definitions - Try sending
M106 S255via a terminal (OctoPrint, Pronterface) to force the fan on
When to Upgrade Your Cooling System
If you’re replacing a dead fan anyway, it’s worth considering a complete cooling upgrade. Signs you’d benefit from better cooling:
- You print a lot of PLA or PETG (high cooling demand)
- Your printer struggles with small details and overhangs even with the fan at 100%
- You’re running a high-flow hotend that pushes more plastic per second
- The stock fan is a small axial fan (4010) rather than a blower (5015)
A 5015 blower fan moves significantly more air than a 4010 axial fan. Paired with a well-designed duct, this can transform your print quality. Budget around $10-25 for a quality blower fan and print the duct yourself.
Hotend Fan vs. Part Cooling Fan: Don’t Confuse Them
A quick but critical distinction. Your hotend cooling fan (the one blowing on the heatsink) should run whenever the hotend is warm. If THIS fan fails, you’ll get heat creep — filament softens too high up in the hotend, causing jams and clogs.
Symptoms of hotend fan failure are different from part cooling fan failure:
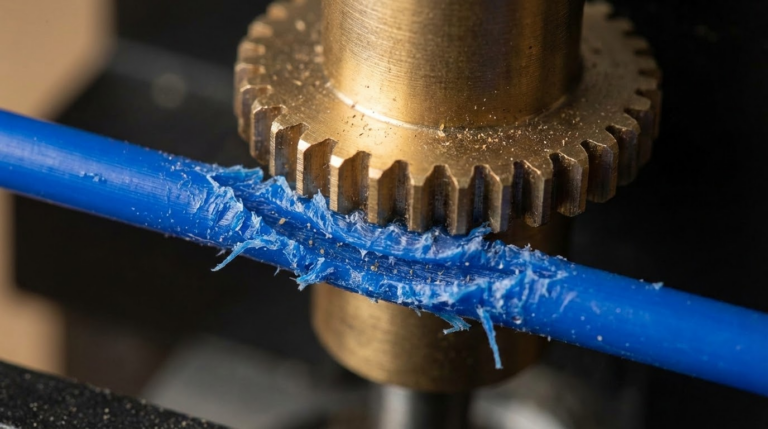
- Clogs that happen 20-60 minutes into a print
- Filament grinding at the extruder gear
- The heatsink feels hot to the touch (it should stay cool)
If your hotend fan dies, stop printing immediately. Continuing to print without hotend cooling will almost certainly result in a complete hotend jam that’s a pain to clean up.
Prevention: Keeping Your Fans Running
A few simple habits will extend your fans’ lifespan considerably:
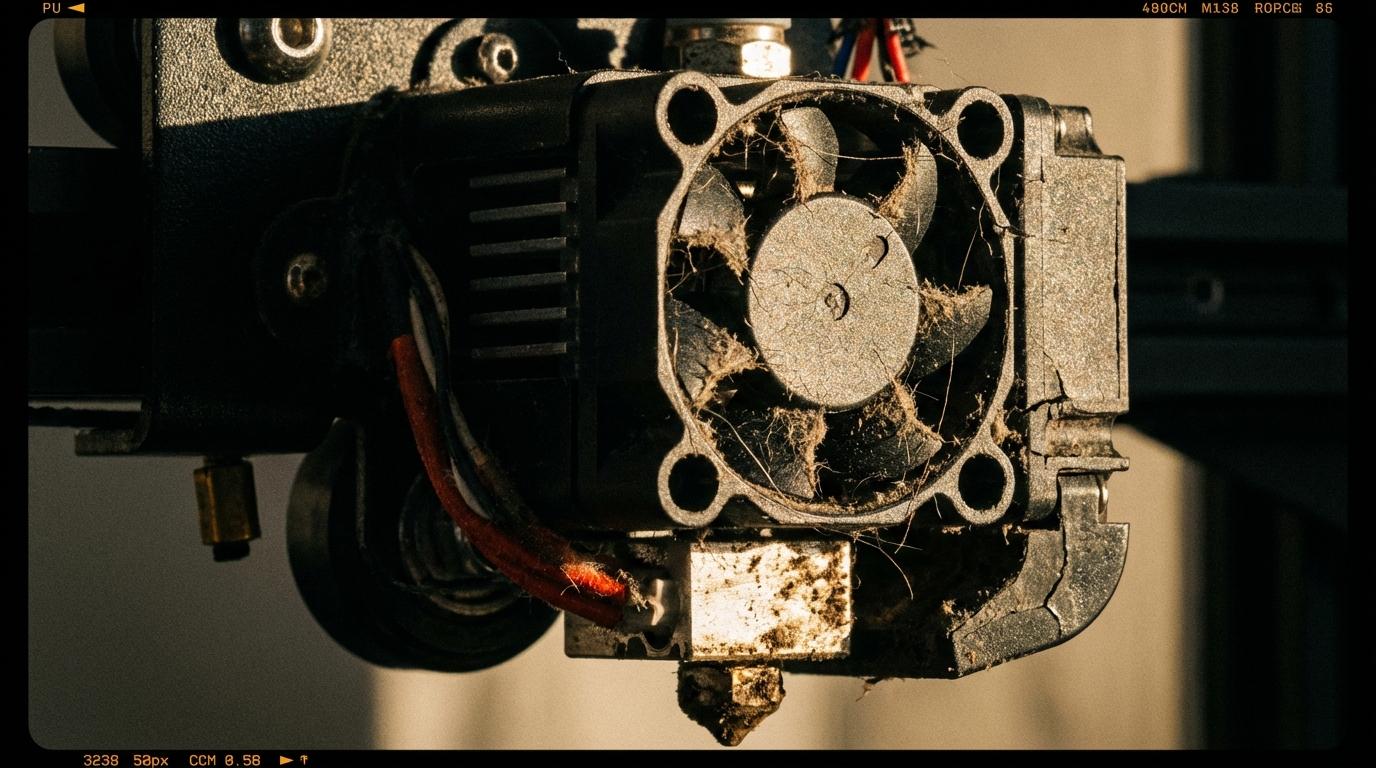
- Blow out dust monthly — Use compressed air to clear dust from fan blades and ducts
- Check connectors quarterly — Push them in firmly, look for corrosion or looseness
- Listen for bearing noise — A grinding fan is warning you it’s about to die
- Don’t run fans at minimum speed constantly — Low voltage can actually wear bearings faster on some fan types
- Keep your printer in a relatively dust-free environment — Dust is the number one fan killer
Wrapping Up
A non-working cooling fan is frustrating but rarely catastrophic. In most cases, the fix is either a loose wire (free), a slicer setting change (free), or a replacement fan ($5-15). The key is diagnosing which fan is the problem, confirming it’s not just a software setting, and replacing it with a quality unit that’ll last.
If you’re replacing your fan, take the opportunity to upgrade your duct while you’re at it. A good cooling system is one of the single biggest quality improvements you can make to a budget 3D printer, and it costs almost nothing.
Got questions about your specific printer’s cooling system? Drop a comment below — I’ve probably torn apart the same model at some point.