3D Print Warping: How to Fix It Once and For All
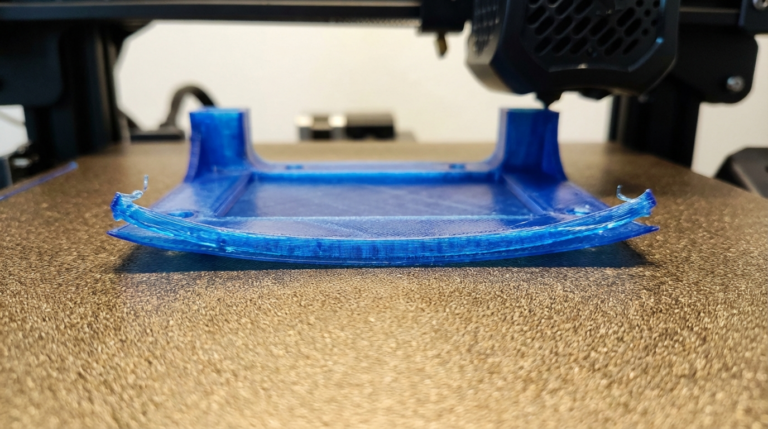
If you’ve spent any time with FDM printing, you’ve seen it: that frustrating moment when your print’s corners start curling up off the bed like a dried-out leaf. Warping ruined more of my early prints than I’d like to admit. After years of trial, error, and a whole lot of wasted filament, I’ve nailed down exactly what causes warping and — more importantly — how to fix it for good.
In this guide, I’ll walk you through every proven method I use to prevent and fix warping on 3D prints. Whether you’re running an Ender 3, a Prusa, or any other FDM machine, these tips apply across the board.
What Causes 3D Print Warping?
Warping happens because of uneven cooling. When molten plastic hits the build plate, it starts to cool and contract. If some areas cool faster than others — especially the edges and corners of your print — the material shrinks unevenly. That differential shrinkage pulls the corners up off the bed.
Materials with higher shrinkage rates (like ABS and Nylon) warp far more aggressively than something like PLA. But even PLA can warp on larger prints or in drafty rooms.
Here are the main culprits:
- Bed temperature too low or uneven
- Poor first-layer adhesion
- Drafts or cold ambient temperatures
- Bed not properly leveled
- No enclosure on high-temp materials
- Print cooling fan too aggressive on first layers
Step 1: Dial In Your Bed Temperature
This is the single biggest lever you have. For PLA, I run my bed at 60°C. For PETG, 75-80°C. ABS needs 100-110°C. But here’s the thing most people miss: the temperature your display shows and the actual surface temperature can differ by 5-10°C depending on your bed sensor placement.
I picked up a cheap infrared thermometer (about $15) and it changed everything. Point it at the actual print surface and verify the temperature across different zones of the bed. Most beds have a hot center and cooler edges. If you notice a big temperature gradient, a PEI spring steel sheet can help distribute heat more evenly.
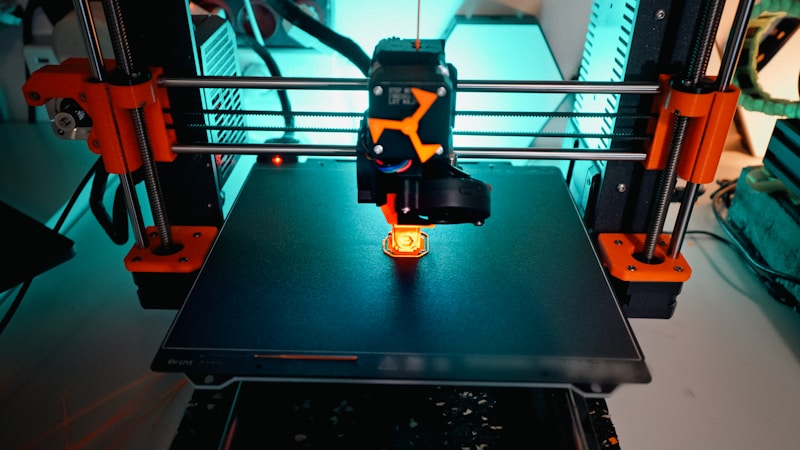
Photo by Jakub Żerdzicki on Unsplash
Step 2: Get Your First Layer Right
A solid first layer is your foundation. If it’s not sticking well, nothing else matters. Here’s my checklist:
- Level the bed carefully. I use the paper method as a starting point, then fine-tune with a live first-layer test print. You want the filament to be slightly squished — not transparent-thin, not rounded like a tube.
- Slow down the first layer. I print my first layer at 20-25 mm/s regardless of what the rest of the print runs at. Slower speed gives the plastic more time to bond to the surface.
- Increase first-layer line width. Bumping this to 120-150% of your nozzle diameter gives more surface contact area.
- Use a brim. For any print with a small footprint or sharp corners, a brim of 5-10mm adds a ton of hold-down force. I use brims on probably 60% of my prints.
Step 3: Choose the Right Bed Surface
I’ve gone through just about every bed surface out there. Here’s my honest take:
- PEI (smooth): My go-to for PLA and PETG. Clean it with isopropyl alcohol between prints. Once the oils from your fingers build up, adhesion tanks.
- PEI (textured): Excellent for PETG because parts release easier when cool. Not as grippy for PLA in my experience.
- Glass + glue stick: Old school but it works. The Elmer’s purple glue stick trick is still solid for ABS.
- Painter’s tape: Fine for PLA in a pinch. I used this for my first year of printing before upgrading.
- Garolite (G10): If you print a lot of nylon, this stuff is magic. Nothing else comes close for nylon adhesion.
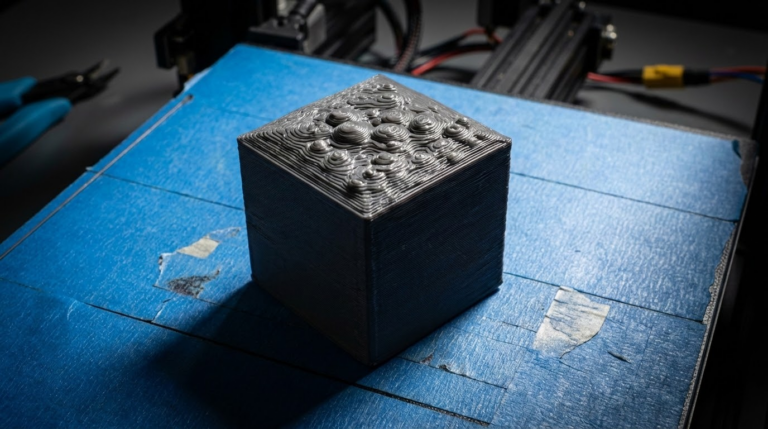
Photo by Kadir Celep on Unsplash
Step 4: Control Your Environment
Drafts are the silent killer of good prints. I learned this the hard way when I moved my Ender 3 next to a window one summer. Prints that worked perfectly before suddenly started warping on one side — the side facing the window.
For PLA, you can usually get away with an open printer as long as it’s not in a drafty spot. But for ABS, ASA, Nylon, or Polycarbonate, you absolutely need an enclosure. You don’t have to spend a fortune on this. I built my first enclosure from an IKEA LACK table stack — total cost was about $40.
The goal is to keep the ambient temperature around the print stable. With an enclosure, the trapped heat creates a consistent environment. Some people even add a small space heater inside the enclosure for ABS — I’ve done it and it works, but be careful with fire safety.
Step 5: Tune Your Cooling Fan
Most slicers default to 100% fan speed right from the start. That’s way too aggressive. Here’s what I do:
- First 3-4 layers: Fan off completely (0%)
- Layers 4-6: Ramp up gradually to your target speed
- Target fan speed: 100% for PLA, 30-50% for PETG, 0% for ABS
In Cura, you can set this under “Cooling” → “Regular Fan Speed at Layer.” I usually set it to layer 4 with a gradual ramp-up. This lets those crucial bottom layers bond fully before any cooling air hits them.
Step 6: Use Adhesion Helpers
Sometimes the print geometry itself is fighting you. Large flat surfaces, thin parts, and sharp corners are all warp-prone. Besides brims, here are a few other tricks:
- Raft: A raft creates a thick base under your print that absorbs the warping stress. I use rafts as a last resort because they waste material and leave a rough bottom surface, but they work.
- Mouse ears: Small discs placed at corners in your slicer. They work like targeted brims where you need them most. Cura has plugins for this, and PrusaSlicer supports paint-on brims.
- Glue stick or hairspray: A thin layer of Aqua Net hairspray or Elmer’s glue stick provides an extra adhesion layer. I keep a can of Aqua Net next to every printer.
Step 7: Adjust Your Slicer Settings
Beyond the basics, these slicer tweaks can make a real difference:
- Lower infill on large flat parts. High infill creates more internal stress as it cools. Dropping from 20% to 10% on a big flat piece can reduce warping.
- Increase wall count. More perimeters give the bottom layers more hold. I use 3-4 walls minimum on warp-prone parts.
- Reduce print speed. Faster printing means more heat differential between layers. Slowing from 60mm/s to 40-45mm/s can help on troublesome prints.
- Elephant’s foot compensation. This is a separate issue from warping, but the first-layer squish that helps adhesion can cause bulging at the base. Most slicers have a compensation setting — 0.1-0.2mm usually does it.
Material-Specific Warping Tips
PLA
PLA is the most forgiving material. If you’re getting warping with PLA, it’s almost always a bed leveling or temperature issue. Clean your bed with IPA, confirm your bed temp is actually hitting 60°C, and add a brim. That solves it 95% of the time.
PETG
PETG warps less than ABS but more than PLA. Run the bed at 75-80°C, use a textured PEI sheet, and keep the fan at 30-50%. PETG sticks almost too well to smooth PEI — you can damage the surface pulling parts off. Textured PEI is the move here.
ABS / ASA
You need an enclosure. Period. Bed at 100-110°C, nozzle at 240-250°C, fan off, and let the enclosure warm up for 10-15 minutes before starting a print. ABS slurry (ABS scraps dissolved in acetone) brushed on the bed is the best adhesion method I’ve found for ABS.
Nylon
Nylon is the warping champion. Enclosure is mandatory. Garolite G10 bed surface is the best option. Dry your filament before printing — wet nylon warps even worse. Bed at 60-70°C (lower than you’d think). And use a brim on everything.
When Nothing Works: Design Changes
Sometimes the design itself is the problem. If you keep getting warping on a specific model, consider:
- Adding fillets to sharp bottom corners
- Hollowing out thick solid sections
- Splitting the part and printing in sections
- Reorienting the part so the largest flat surface isn’t on the bed
I’ve redesigned parts more times than I can count specifically to reduce warping. It’s not giving up — it’s smart engineering.
My Go-To Anti-Warp Workflow
After all these years, here’s my standard process for any new print:
- Clean the bed with IPA
- Verify bed level with a test pattern
- Set appropriate bed temp for the material
- First layer: slow (20mm/s), squished, no fan
- Add a brim if the footprint is small or has sharp corners
- Gradual fan ramp-up starting at layer 4
- Enclosure for anything that isn’t PLA
Following this checklist, I honestly can’t remember the last time I had a serious warping failure. It took me a couple years of frustration to get here, but once you nail these fundamentals, warping stops being a problem and starts being a solved one.
Got a specific warping situation that these tips don’t cover? Drop a comment below — I’ve probably run into it at some point and I’m happy to help troubleshoot.