Metal-Filled Filament 3D Printing Guide: Settings, Post-Processing, and Best Brands
What Is Metal-Filled Filament?
Metal-filled filament is exactly what it sounds like: a standard thermoplastic base (usually PLA) mixed with fine metal powder. The result is a filament that prints on any FDM 3D printer but produces parts with a distinctly metallic look, feel, and weight. When post-processed with sanding and polishing, metal-filled prints can be nearly indistinguishable from cast metal objects.
These filaments are available in several metal types: bronze, copper, iron, stainless steel, brass, and aluminum. The metal content typically ranges from 40% to 80% by weight, which gives the prints a satisfying heft that pure plastic simply can’t replicate. An iron-filled print, for example, can even develop a natural rust patina over time if left untreated.
Metal-filled filament is popular for decorative objects, art pieces, cosplay props, jewelry prototypes, architectural models, and functional items like knobs, handles, and fixtures where a metallic appearance is desired without the cost of actual metal fabrication. In this guide, I’ll cover everything you need to know to print successfully with metal-filled filaments, from settings to post-processing.
Types of Metal-Filled Filament
Bronze Fill
The most popular metal-filled filament. Bronze powder in a PLA matrix creates a warm, golden-brown finish. When polished, bronze fill produces a gorgeous patina that looks like aged bronze casting. It’s the easiest metal fill to work with and the most forgiving of printing errors.
Best for: Statues, busts, decorative items, vintage-looking hardware, jewelry prototypes.
Copper Fill
Similar to bronze fill but with a redder, more copper-like tone. Copper-filled prints develop a beautiful green verdigris patina when treated with oxidizing agents like liver of sulfur or salt water. This makes it perfect for creating artificially aged pieces.
Best for: Steampunk props, decorative piping, art sculptures, aged/patina effects.
Iron/Steel Fill
Iron-filled filament has a dark, industrial look and is the heaviest of the common metal fills. The most unique property of iron fill is that it can actually rust — deliberately or accidentally. You can create controlled rust patterns using vinegar and salt solutions, producing a weathered industrial aesthetic.
Best for: Industrial props, weathered effects, functional hardware with an industrial look.
Aluminum Fill
Aluminum-filled filament produces a lighter, cooler-toned metallic finish. It’s noticeably lighter than bronze or iron fills but still heavier than unfilled PLA. The finish is more subtle and modern compared to the warm tones of bronze.
Best for: Modern decor, tech accessories, scale models, industrial design prototypes.
Brass Fill
Brass fill sits between bronze and copper in tone, with a brighter, more yellow-gold appearance. It polishes to a high shine more easily than bronze fill and is excellent for creating gold-like effects without gold leaf or paint.
Best for: Faux-gold decorative items, musical instrument replicas, ornate fixtures.
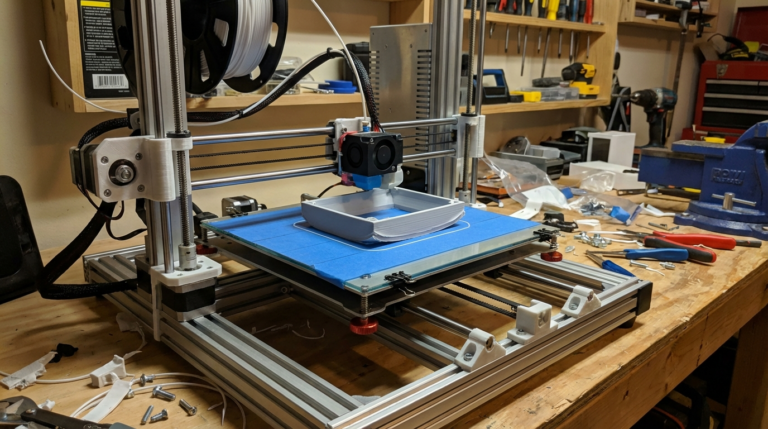
Print Settings for Metal-Filled Filament
Metal-filled filaments require different settings than standard PLA. The metal particles affect flow characteristics, cooling behavior, and surface finish in important ways.
Nozzle Temperature
Most metal-filled filaments print at standard PLA temperatures (195-220°C), but the metal particles act as a heat sink, requiring slightly higher temperatures for consistent flow. Start at 210°C and increase by 5°C increments if you see under-extrusion or poor layer adhesion.
Recommended range: 205-225°C (varies by brand and metal type).
Bed Temperature
Standard PLA bed temperature works fine: 50-60°C. Metal-filled filaments adhere well to PEI, glass, and BuildTak surfaces. Use a glue stick on smooth surfaces if you have adhesion problems — the extra weight of metal-filled prints can sometimes cause them to detach from the bed during fast travel moves.
Print Speed
Slow down. The metal particles in the filament create more friction in the extruder and nozzle, and the heavier material benefits from slower deposition for better layer adhesion.
Recommended: 30-45 mm/s for best quality. You can push to 50-60 mm/s once you’ve dialed in your settings, but surface quality degrades at higher speeds because the metal particles don’t flow as smoothly as pure plastic.
Layer Height
Metal fills look best at slightly taller layer heights (0.2-0.3mm) because the surface texture masks the layer lines. This is the opposite of most filaments, where thinner layers look better. The metal particles create a natural grain that works in your favor at normal or slightly above-normal layer heights.
Retraction Settings
Use gentle retraction. Metal particles can cause jams in the nozzle during aggressive retraction moves. Start with:
- Retraction distance: 2-4mm (direct drive) or 4-6mm (Bowden)
- Retraction speed: 25-35 mm/s (slower than standard PLA)
- Minimum travel before retraction: 2mm
Cooling
Metal particles absorb and retain heat, so the filament cools slightly slower than pure PLA. Use moderate cooling: 60-80% fan speed after the first few layers. Full 100% cooling can work but may cause layer adhesion issues with some brands.
⚠️ The Nozzle Problem: Brass Won’t Survive
This is the single most important thing to know about metal-filled filaments: they will destroy a brass nozzle. The metal particles are abrasive — much harder than the brass that standard nozzles are made from. A brass nozzle printing metal fill will wear out within 100-200 grams of filament, and as it wears, your print quality deteriorates as the nozzle bore enlarges.
You must use a hardened nozzle. Your options:
- Hardened steel nozzle ($8-15): The standard recommendation. Lasts thousands of hours with abrasive filaments. Slightly lower thermal conductivity than brass, so you may need to increase temperature by 5-10°C.
- Ruby-tipped nozzle ($60-90): A brass body with a ruby insert at the tip. Combines the thermal conductivity of brass with the abrasion resistance of ruby. Expensive but excellent.
- Tungsten carbide nozzle ($30-50): Extremely hard-wearing with good thermal properties. Increasingly popular as prices have dropped.

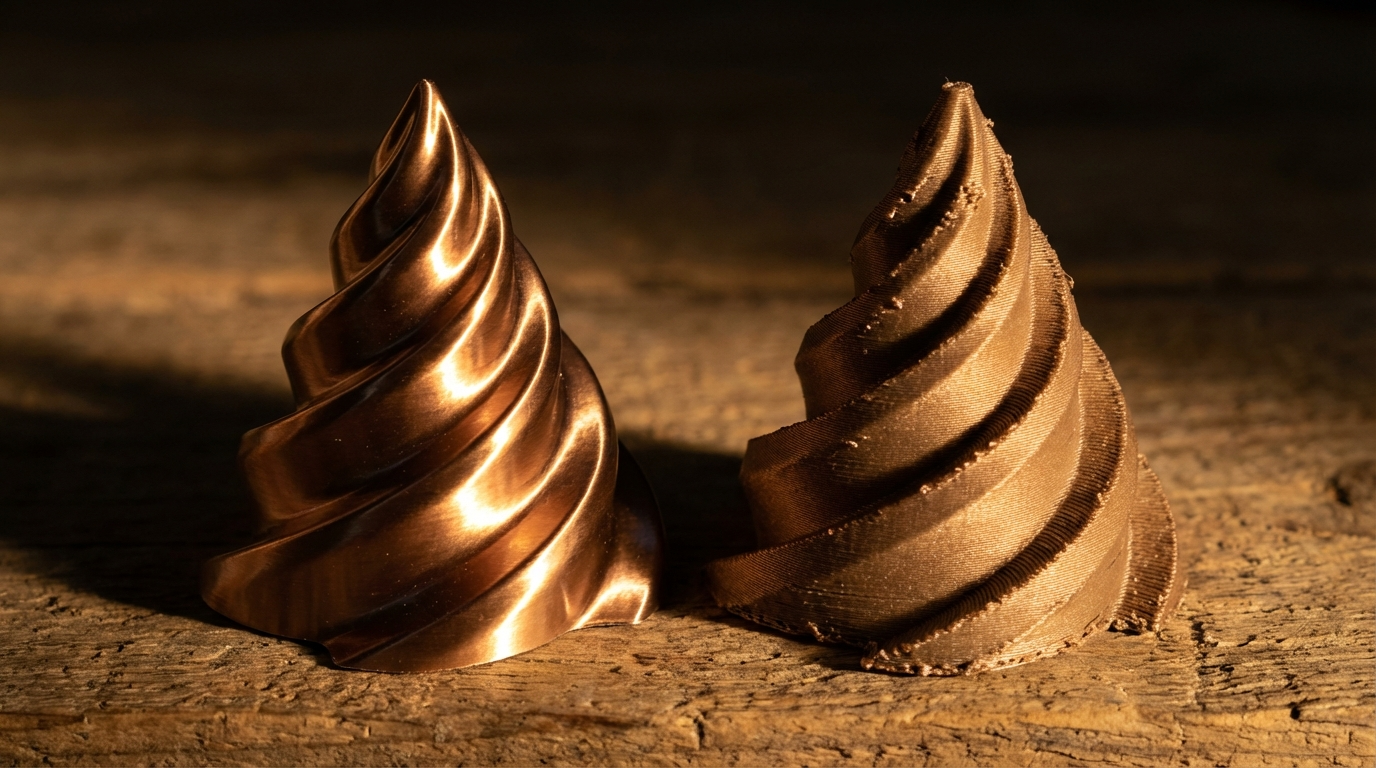
Post-Processing: Where the Magic Happens
Here’s the truth about metal-filled filament: a fresh print looks okay, but a post-processed print looks incredible. The gap between raw and finished is larger with metal fills than any other filament type. Post-processing is not optional if you want results that actually look metallic.
Step 1: Sanding
Start with 200-grit sandpaper to remove the worst layer lines and surface imperfections. The metal particles will start to show through as you remove the top layer of PLA. Progress through 400, 600, and 800-grit for an increasingly smooth, metallic surface.
For the best results, wet sand with 1000-1500 grit as a final step. This produces a surface that’s smooth enough to take a polish.
Step 2: Polishing
After sanding, apply metal polish (Brasso works great for bronze and brass fills) with a soft cloth. Use circular motions and let the polish do the work. With bronze fill, you’ll see the surface transform from a dull, plasticky appearance to a genuine metallic sheen.
For the highest shine, use a rotary tool with a polishing compound. This step takes the finish from “metallic” to “wait, is that actually metal?”
Step 3: Patina and Aging Effects
This is where metal-filled filament really sets itself apart. Because the prints contain actual metal particles at the surface, you can create real chemical patinas:
- Bronze/Copper green patina: Apply liver of sulfur solution, ammonia fumes, or a vinegar/salt mixture. The copper particles oxidize and develop a natural verdigris (green patina) over hours to days.
- Iron rust: Spray iron-filled prints with a mixture of vinegar, salt, and hydrogen peroxide. Real rust forms within hours, creating an authentic weathered metal look.
- Brass darkening: Use brass blackening solution or liver of sulfur for an antique, aged brass effect.
Step 4: Sealing
After achieving your desired finish, seal the surface to prevent further oxidation (unless you want ongoing patina development). Options include:
- Clear lacquer spray (matte or gloss)
- Renaissance wax (museum-grade, non-yellowing)
- Clear epoxy resin (for a glass-like finish over the metallic surface)
Common Problems and Solutions
Nozzle Clogging
Metal particles can accumulate in the nozzle, especially at the tip. If you experience partial clogs, perform a cold pull between prints. If clogs are frequent, increase your nozzle temperature by 5°C and reduce retraction distance.
Inconsistent Extrusion
Some metal-filled filaments have inconsistent particle distribution, causing intermittent under-extrusion. Increase flow rate by 5-10% and use a larger nozzle (0.5mm or 0.6mm) to reduce clog risk. A bigger nozzle also helps the metal particles flow more smoothly.
Brittleness
Metal-filled parts are more brittle than standard PLA due to the metal particles disrupting the plastic matrix. Prints with thin walls or fine features are especially prone to breaking. Design with thicker walls (1.2mm minimum) and use 3+ perimeters. For functional parts, consider infill of 40%+ with a strong pattern like cubic or gyroid.
Extruder Grinding
The increased weight and friction of metal filaments can cause extruder gear grinding, especially with weak extruder springs. Increase extruder tension slightly and make sure your filament path is as straight as possible. Direct drive extruders handle metal fills better than Bowden setups.
Best Metal-Filled Filament Brands
Not all metal fills are created equal. The best brands have consistent metal particle distribution, reliable flow characteristics, and post-process well:
- Proto-pasta: The original and still one of the best. Their bronze, copper, and iron fills are industry standards. Consistent quality, excellent post-processing results.
- ColorFabb: Their bronzeFill, copperFill, and steelFill are premium options with very high metal content. Slightly more expensive but outstanding polished finish.
- SainSmart: A budget-friendly option that still delivers good results. Their bronze fill is particularly popular among hobbyists.
- The Virtual Foundry: For the most extreme metal content (up to 90% metal by weight). These filaments can even be sintered in a kiln to produce actual metal parts, though this requires specialized equipment.
Quick Reference: Recommended Settings
- Nozzle: Hardened steel, 0.4-0.6mm (0.6mm preferred)
- Temperature: 205-225°C nozzle, 50-60°C bed
- Speed: 30-45 mm/s
- Layer height: 0.2-0.3mm
- Retraction: 2-4mm at 25-35 mm/s (direct drive)
- Cooling: 60-80% fan speed
- Flow rate: 100-110%
- Infill: 20-40% (higher for functional parts)
- Walls: 3-4 perimeters minimum
Metal-filled filament bridges the gap between plastic 3D printing and actual metalwork. With the right settings and some post-processing patience, you can create prints that genuinely fool people into thinking they’re holding a cast bronze or forged iron piece. Just remember to swap out that brass nozzle first.