Heated Bed Temperature for PLA, PETG, and ABS: Complete Guide
Your heated bed temperature might be the single most important setting you’re not paying enough attention to. Set it too low and your prints won’t stick. Set it too high and you’ll get elephant’s foot, difficult removal, or even material degradation. Every filament has a sweet spot, and finding it makes the difference between fighting your printer and enjoying it.
In this guide, I’ll give you the exact heated bed temperatures for PLA, PETG, and ABS — the three most popular 3D printing materials — along with the reasoning behind each recommendation so you can troubleshoot when things don’t go according to plan.
How Heated Beds Work
A heated bed is essentially a large resistive heater underneath your build surface. When current flows through it, it generates heat that warms the build plate. The purpose is twofold: improve first-layer adhesion by keeping the bottom of your print warm, and reduce warping by minimizing the temperature difference between the bottom and top of your print.
Most heated beds use a PCB heater (printed circuit board with copper traces acting as the heating element) or a silicone heating pad. PCB heaters are cheaper and come standard on most budget printers. Silicone pads heat more evenly and reach higher temperatures, making them the upgrade choice for ABS and other high-temp materials.
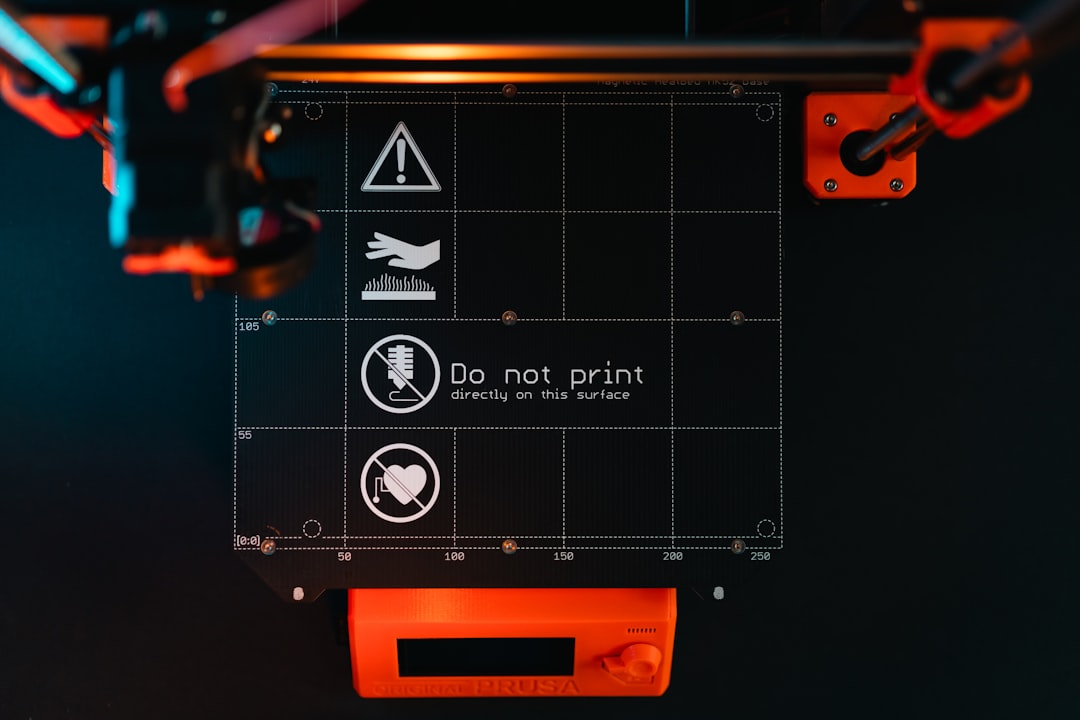
The build surface sits on top of the heater — whether it’s a magnetic PEI sheet, glass plate, or specialty surface. The surface material affects how much of the heater’s temperature actually reaches the print, which is why your bed’s reported temperature and the actual surface temperature can differ by 5-15°C depending on the setup.

PLA Bed Temperature: 55-65°C
PLA (Polylactic Acid) is the most forgiving filament when it comes to bed temperature. Its glass transition temperature is around 55-60°C, which means it starts softening right around where we set our bed temp. This is actually ideal — the bottom layer stays soft enough to grip the surface without the rest of the print becoming gooey.
My recommended starting point: 60°C
At 60°C, PLA adheres well to almost any clean surface — PEI, glass with adhesive, BuildTak, you name it. It’s warm enough to promote bonding but cool enough that prints release easily once the bed cools to room temperature.
When to go lower (55°C):
- Small prints that don’t need strong adhesion
- When you’re getting elephant’s foot (the first layer spreads too much)
- On textured PEI where adhesion is already strong
- In a warm room where the ambient temperature contributes to bed warmth
When to go higher (65°C):
- Large, flat prints prone to corner lifting
- On smooth glass without adhesive (glass needs more heat for PLA)
- In a cold room (below 18°C/65°F)
- When using PLA+ or modified PLA blends that are slightly more heat-resistant
Common PLA bed temp mistakes:
Running PLA at 70°C or higher. I see this recommendation online sometimes, and it’s almost always too hot. At 70°C, you’ll notice prints are hard to remove, the first layer deforms, and dimensional accuracy suffers. PLA’s glass transition is too close to this temperature — the bottom layers stay too soft throughout the print.
Another mistake: printing PLA on a cold bed. While PLA can technically print without a heated bed, adhesion is unreliable. On a 20°C surface, PLA sticks to some spots and not others, leading to partial first-layer failures. The $2-3 in electricity for heating the bed is well worth the reliability.
PETG Bed Temperature: 70-85°C
PETG (Polyethylene Terephthalate Glycol-modified) needs significantly more heat than PLA. Its glass transition temperature is around 80°C, so we need to get the bed into that neighborhood to achieve proper adhesion.
My recommended starting point: 80°C
At 80°C, PETG adheres firmly to PEI surfaces. In fact, it can adhere too firmly — PETG is known for bonding permanently to smooth PEI if the bed is too hot or if you press the first layer too hard. This is why many people prefer textured PEI for PETG.
When to go lower (70-75°C):
- On smooth PEI to prevent over-adhesion (PETG can rip chunks out of smooth PEI)
- When using glue stick as a release agent on glass or smooth PEI
- Small prints that don’t need maximum grip
- When you notice the first layer is too squished and transparent (over-adhesion)
When to go higher (85°C):
- Large prints showing corner warping
- On glass beds where PETG needs extra help sticking
- When printing thick-walled functional parts that generate more internal stress
- In cold environments
The PETG adhesion paradox:
PETG has a weird relationship with bed adhesion. On smooth PEI at high temperatures, it bonds so strongly that it can damage the surface when you remove the print. On glass at low temperatures, it doesn’t stick at all. The solution depends on your surface:
- Smooth PEI: Use 70-75°C with a thin layer of glue stick (acts as a release agent)
- Textured PEI: Use 80°C directly — the texture prevents over-bonding while maintaining grip
- Glass: Use 80-85°C with hairspray or glue stick for adhesion
ABS Bed Temperature: 95-110°C
ABS (Acrylonitrile Butadiene Styrene) is the most demanding of the three when it comes to bed temperature. With a glass transition temperature around 105°C, ABS needs serious heat to stay put.
My recommended starting point: 100°C
At 100°C, ABS adheres well to most surfaces when combined with proper adhesion helpers. I almost always use either ABS juice (ABS dissolved in acetone) on glass or print directly on clean PEI at this temperature.
When to go lower (95°C):
- Small prints with minimal warping risk
- When using ABS juice or slurry (the chemical bond compensates for lower heat)
- Inside an enclosure where ambient temperatures are already elevated
- When your heated bed struggles to reach higher temperatures reliably
When to go higher (105-110°C):
- Large prints or prints with significant flat surfaces
- Without an enclosure (more heat compensates for the cooler air)
- On bare glass without adhesion helpers
- In cold workshops or garages
Important ABS bed considerations:
Not all heated beds can reach 110°C. Budget printers with PCB heaters and magnetic surfaces often max out at 90-100°C. If you’re serious about ABS printing, check your bed’s actual temperature capability. An underpowered bed that claims 110°C but actually delivers 90°C at the surface will give you endless adhesion problems.
ABS also benefits enormously from bed soak time. Don’t start printing the moment the bed reports 100°C. Let the bed sit at temperature for 5-10 minutes before printing. This allows the heat to distribute evenly across the entire surface, including the edges where your heater is weakest. That extra wait time eliminates a surprising number of adhesion failures.
Temperature by Surface Type
Your build surface material changes the equation. Here are adjusted recommendations for common surfaces:
PEI (Smooth)
- PLA: 55-60°C
- PETG: 70-75°C (use glue stick as release agent!)
- ABS: 100-105°C
PEI (Textured/Powder-Coated)
- PLA: 55-60°C
- PETG: 80-85°C (safe without release agent)
- ABS: 100-105°C
Glass (Borosilicate)
- PLA: 60-65°C (with glue stick or hairspray)
- PETG: 80-85°C (with glue stick or hairspray)
- ABS: 105-110°C (with ABS juice)
BuildTak / Specialty Sheets
- PLA: 55-60°C
- PETG: 75-80°C
- ABS: Not recommended (adhesive sheets may degrade at ABS temperatures)
Diagnosing Temperature-Related Problems
Learn to read the signs. Your prints are telling you whether the bed is too hot or too cold:
Bed too cold — symptoms:
- First layer not sticking, especially at corners and edges
- Print pops off the bed mid-print
- Corners lifting and curling (warping)
- First layer looks stringy or doesn’t merge into a solid sheet
Bed too hot — symptoms:
- Elephant’s foot: the first few layers bulge outward like the print is melting at the base
- Print is extremely difficult to remove when bed cools
- Bottom surface is rough or deformed
- First layer is too transparent and thin (over-squished from soft material)
- Stringing increases near the bed surface
Uneven bed temperature — symptoms:
- First layer sticks in the center but not at the edges (or vice versa)
- Warping on one side only
- Inconsistent first-layer thickness across the bed
Pro Tips for Bed Temperature Management
Use a first-layer temperature offset. Most slicers let you set a different bed temperature for the first layer. I often run my bed 5°C hotter for the first layer, then drop to the standard temperature afterward. This gives maximum adhesion during the critical first layer without keeping the entire print too warm.
Preheat longer than you think. Digital readouts show the average temperature of the heater, not the surface. Give your bed an extra 5-10 minutes after it reports reaching target temperature. This is especially important for glass beds, which are thermal insulators and take longer to transfer heat to the top surface.
Check with an IR thermometer. If you have persistent adhesion issues, verify your bed’s actual surface temperature with an infrared thermometer. You might be surprised — some printers read 10-15°C higher than the actual surface temperature. If your bed says 60°C but the surface is only 48°C, no wonder PLA won’t stick.
Consider a magnetic spring steel PEI sheet upgrade. If you’re still using a stock bed surface, upgrading to a magnetic spring steel sheet with PEI coating is one of the best investments you can make. The spring steel flexes for easy print removal, and PEI provides excellent adhesion with all three materials at their recommended temperatures.
Quick Reference Card
Bookmark this section for quick access when you’re at your printer:
PLA: 55-65°C (start at 60°C) | Fan: full | Enclosure: not needed
PETG: 70-85°C (start at 80°C) | Fan: 50% | Enclosure: optional
ABS: 95-110°C (start at 100°C) | Fan: off | Enclosure: strongly recommended
When in doubt, start at the middle of the range for your material and adjust based on results. Too much adhesion? Drop 5°C. Not enough? Raise 5°C. Simple as that.
Getting your bed temperature right eliminates a huge category of printing problems. Combine proper temperature with a clean surface and good first-layer calibration, and you’ll spend a lot less time troubleshooting and a lot more time printing.