How to Fix First Layer Problems on Your 3D Printer
The first layer is everything. Get it right, and the rest of the print takes care of itself. Get it wrong, and you’re coming back to a spaghetti monster or a print that popped off the bed three hours into a twelve-hour job.
I’d estimate that 70% of all failed prints I’ve dealt with — mine and other people’s — trace back to a bad first layer. Adhesion issues, uneven extrusion, elephant’s foot, gaps between lines, warping corners. These all start at layer one.
The good news: first layer problems are entirely fixable, and once you dial in your setup, you rarely have to touch it again. Here’s every first layer issue I’ve encountered and how to solve each one.
Problem 1: Print Doesn’t Stick to the Bed
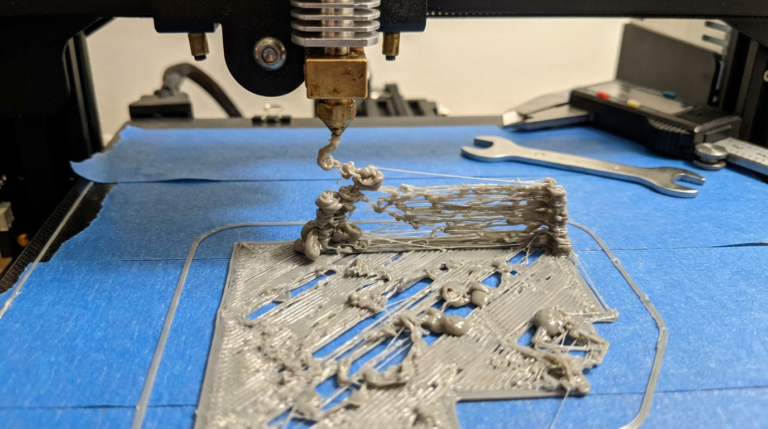
This is the most common first layer problem by a wide margin. You start a print, walk away, come back to find the model detached from the bed — either completely separated or curled up at the edges.
Cause: Nozzle Too Far from the Bed
The single most frequent cause. If the nozzle is even 0.1mm too high, the first layer gets deposited onto the bed without being pressed into it. It sits on top like a loose strand instead of being squished flat. No squish = no adhesion.
Fix: Lower your Z-offset. You want the first layer to be visibly squished — not smeared flat, but pressed enough that adjacent lines merge together without gaps. On most printers, the sweet spot is around 0.05-0.1mm closer to the bed than you think.
Here’s my test: print a single-layer square (20x20mm) and look at it. The top should be smooth with no visible gaps between lines. The bottom should look slightly glossy where the plastic was pressed into the bed surface. If you can see individual lines with gaps between them, your nozzle is too high.
Cause: Dirty or Contaminated Bed Surface
Fingerprints, dust, residual adhesive, and oil from your skin all create a barrier between the filament and the bed surface. PEI sheets are especially sensitive to contamination — a single thumbprint can cause adhesion failure in that exact spot.
Fix: Clean your bed before every print. I use 99% isopropyl alcohol (IPA) and a lint-free cloth. Spray it on, wipe it off. For stubborn residue on PEI, use a small amount of dish soap and warm water, then rinse and dry completely.
Every 20-30 prints, do a deep clean with acetone (only on bare PEI or glass — acetone damages some coatings). This strips off the accumulated film that IPA alone can’t fully remove.
Cause: Bed Temperature Too Low
Different filaments need different bed temperatures for proper adhesion. Too cold, and the first layer cools and contracts before it can bond to the surface.
| Filament | Bed Temperature |
|---|---|
| PLA | 55-65°C |
| PETG | 75-85°C |
| ABS | 95-110°C |
| TPU | 50-60°C |
| Nylon | 70-90°C |
| ASA | 95-110°C |
If you’re at the low end of the range and having adhesion issues, bump it up 5°C. PLA is particularly forgiving — it sticks well to PEI at 60°C for almost every brand.
Cause: Wrong Bed Surface for Your Material
Not all bed surfaces work with all materials:
- PEI (smooth): Excellent for PLA, good for PETG (use a release agent or textured PEI instead — PETG bonds too well to smooth PEI and can rip chunks out).
- PEI (textured): Great all-rounder. Works with PLA, PETG, TPU, ABS. My default recommendation.
- Glass: Good for PLA and ABS with adhesive (glue stick or hairspray). Poor for PETG.
- BuildTak / FR4: Good adhesion for most materials, but wears over time.
If you’re printing PETG directly on smooth PEI without a release agent and getting adhesion problems, switch to textured PEI. If you’re on glass, apply a thin layer of glue stick — it acts as both an adhesion promoter and a release agent.
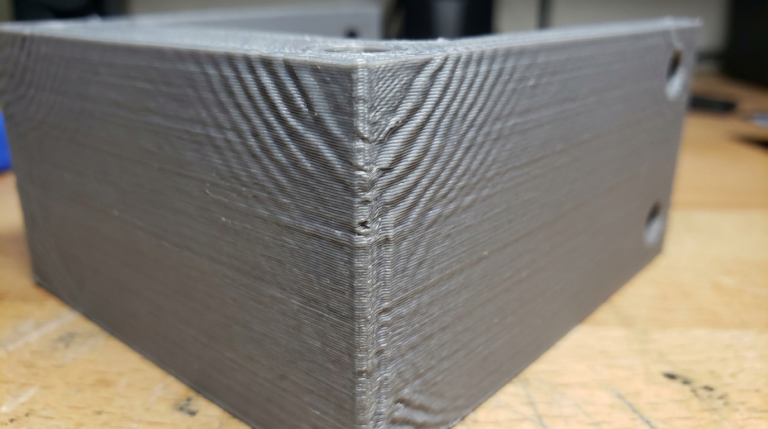
Problem 2: First Layer Is Too Squished (Elephant’s Foot)
The opposite of poor adhesion. Your first layer sticks great, but the bottom of the print bulges outward. The first few layers are wider than the rest of the print, creating a visible “foot” at the base.
Cause: Nozzle Too Close to the Bed
If you’ve lowered your Z-offset aggressively for adhesion, you might have gone too far. The nozzle presses the first layer so flat that the plastic spreads outward, making the bottom wider than designed.
Fix: Raise your Z-offset slightly — 0.02-0.05mm increments until the squish is even but not excessive. You want the first layer to be pressed into the bed, not steamrolled.
Cause: Bed Temperature Too High
Excessive bed temperature keeps the first few layers soft for too long. Soft plastic spreads under the weight of layers above it.
Fix: Lower bed temperature by 5-10°C. For PLA on PEI, you can often go as low as 50°C and still get good adhesion without elephant’s foot.
Slicer Fix: Elephant’s Foot Compensation
Most slicers have a specific setting for this. In Cura, it’s “Initial Layer Horizontal Expansion” — set it to -0.1 to -0.2mm. In PrusaSlicer/OrcaSlicer, it’s “Elephant foot compensation” — same range. This intentionally shrinks the first layer outline to compensate for the spreading.
Problem 3: Gaps Between First Layer Lines
You can see the bed surface between the lines of your first layer. The extrusion paths aren’t touching each other, leaving visible gaps that create a weak foundation.
Cause: Nozzle Too High (Again)
Yes, this shows up as a different symptom. When the nozzle is too far from the bed, lines don’t squish enough to overlap with adjacent paths. Lower your Z-offset.
Cause: Under-Extrusion
If your Z-offset is correct but you still see gaps, the extruder might not be pushing enough plastic. Common causes:
- Extruder tension too loose. The gear isn’t gripping the filament firmly enough. Tighten the tension arm.
- Partially clogged nozzle. Not fully blocked, but restricted enough to reduce flow. Do a cold pull or replace the nozzle.
- Wrong filament diameter in slicer. Make sure your slicer is set to 1.75mm (or 2.85mm if that’s your filament). Sounds obvious, but I’ve seen this catch people after switching between printers.
Cause: First Layer Speed Too Fast
Faster first layers mean less time for plastic to flow and settle. The extruder literally can’t push filament fast enough to maintain a full bead at high speeds.
Fix: Slow down the first layer. I use 20mm/s for the first layer on most prints, regardless of what speed the rest of the print runs at. In Cura, set “Initial Layer Speed” to 20mm/s. In PrusaSlicer, it’s “First layer speed.”
Cause: First Layer Width Too Narrow
A wider first layer extrusion overlaps more with adjacent lines, filling gaps and improving adhesion. Most slicers default to 100% line width for the first layer.
Fix: Increase first layer line width to 120-150% of your nozzle diameter. For a 0.4mm nozzle, set the first layer width to 0.48-0.6mm. This squishes more plastic out per line, closing gaps between paths.
Problem 4: First Layer Warping / Corners Lifting
The print starts fine, but after a few layers, the corners or edges curl upward off the bed. This is especially common with ABS, ASA, and Nylon, but even PLA can warp on large flat prints.
Cause: Temperature Differential
Warping is caused by uneven cooling. The top of the print cools and contracts while the bottom is still warm and expanded. This differential creates internal stress that curls the edges upward.
Fix for ABS/ASA/Nylon: Use an enclosure. These materials require stable ambient temperature. Printing ABS in an open room is asking for warping. Even a simple cardboard box or plastic tub over the printer helps significantly.
Fix for PLA: Reduce cooling fan speed for the first 3-5 layers. In Cura, set “Initial Fan Speed” to 0% and “Fan Speed Ramp-up Layers” to 4. This gives the first layers time to bond before aggressive cooling kicks in.
Cause: Bed Not Hot Enough
Warping and poor adhesion are related. A hotter bed keeps the bottom layers warm, reducing the temperature gradient that causes curling.
Fix: Increase bed temperature by 5-10°C. For ABS, I run the bed at 105°C with an enclosure. For large PLA prints that warp, bumping from 55°C to 65°C usually solves it.
Cause: No Brim or Raft
For parts with small bed contact area (tall, narrow models), the adhesion force might not be enough to resist warping stress.
Fix: Add a brim. A 5-10mm brim adds significant surface area and holds the edges down. I use a brim on any print wider than 100mm or taller than 150mm as a precaution.
Problem 5: Uneven First Layer (Some Areas Good, Some Bad)
Part of the first layer looks perfect, while other areas are too squished or have gaps. The bed surface isn’t uniformly the same distance from the nozzle.
Cause: Bed Not Level
Despite what manufacturers claim, beds are rarely perfectly flat or perfectly level out of the box. Manual bed leveling with paper or a feeler gauge gets you close, but small variations across the bed are normal.
Fix for manual leveling: Use a 0.1mm feeler gauge at all four corners and the center. Adjust until the gauge has the same slight drag at every point. Then print a first-layer calibration test that covers the entire bed and fine-tune from there.
Fix for auto bed leveling (ABL): Most modern printers have ABL (BL-Touch, CR-Touch, inductive probe, strain gauge). Make sure it’s enabled and running before each print. If unevenness persists with ABL active, the bed might be warped beyond what software correction can fix.
Cause: Warped Bed
Aluminum and steel beds can warp over time, especially with repeated heating cycles. A bed that’s 0.2mm higher in the center than the edges will produce an uneven first layer even with ABL compensation.
Fix: Get a PEI spring steel sheet if you don’t have one. Spring steel is flexible and flat, and it sits on top of a magnetic base that can accommodate minor warps in the underlying aluminum. For severely warped beds, a glass plate is the flattest option.
Bed Leveling: The Master Skill
Good bed leveling solves most first layer problems at once. Here’s my method:
- Heat the bed to printing temperature before leveling. Thermal expansion changes the bed geometry, so leveling cold is inaccurate.
- Home all axes and disable steppers (or use the leveling wizard if your printer has one).
- Use a 0.1mm feeler gauge at each adjustment point. A sheet of paper works but is less precise.
- Adjust each corner until you feel the same slight drag everywhere.
- Print a calibration pattern — a single-layer grid or square at each corner and center.
- Fine-tune Z-offset based on the calibration print. Adjust in 0.02mm increments.
For printers with automatic bed leveling, you still need to set the Z-offset correctly. The ABL probe measures the bed topology, but the Z-offset determines how close the nozzle gets for that first layer.
Z-Offset: The One Number That Matters Most
Z-offset is the distance between the nozzle tip and the bed when the printer thinks it’s at Z=0. Too high = poor adhesion. Too low = elephant’s foot and potential bed damage.
How to Set Z-Offset
- Start with a known-good starting point (usually from your printer’s default calibration).
- Begin a print and watch the first layer go down.
- If lines aren’t squished enough: decrease Z-offset by -0.02mm (nozzle moves closer).
- If lines are too flat/smeared: increase Z-offset by +0.02mm (nozzle moves farther).
- Adjust live during the first layer if your printer supports babystepping (most do).
The perfect first layer looks like this: lines are visibly wider than the nozzle diameter, adjacent lines merge together seamlessly, and the top surface has a slight sheen. No gaps between lines, no excessive squishing at the edges.
First Layer Settings Summary
| Setting | Recommended Value |
|---|---|
| First Layer Speed | 20mm/s |
| First Layer Height | 0.2-0.3mm |
| First Layer Width | 120-150% of nozzle |
| First Layer Temperature | +5°C above normal |
| First Layer Flow | 100-105% |
| Bed Temp (PLA) | 55-65°C |
| Bed Temp (PETG) | 75-85°C |
| Fan Speed (First Layer) | 0% |
| Fan Ramp-up | 3-5 layers |
When All Else Fails: Adhesion Helpers
If you’ve nailed bed leveling, Z-offset, temperature, and speed — but still have occasional adhesion issues on tricky prints — these helpers bridge the gap:
Glue stick (PVA-based): Thin layer on the bed. Works on glass and PEI. Acts as both adhesion promoter and release agent for PETG.
Hairspray (Aqua Net or similar): Light spray on glass beds. Cheap and effective for PLA and ABS.
Magigoo: Premium adhesion product. Expensive but works well for demanding materials like Nylon and PC.
Painter’s tape: Blue 3M tape works in a pinch on any surface. Replace it frequently.
In my experience, a clean textured PEI sheet with proper Z-offset and bed temperature needs zero adhesion helpers for PLA, PETG, and TPU. I only reach for glue stick when printing Nylon or very large ABS parts.
The first layer is a solved problem in 2026. Between auto bed leveling, PEI build surfaces, and precise Z-offset control, there’s no reason to fight it. Clean your bed, dial your Z-offset, and get on with the rest of the print.