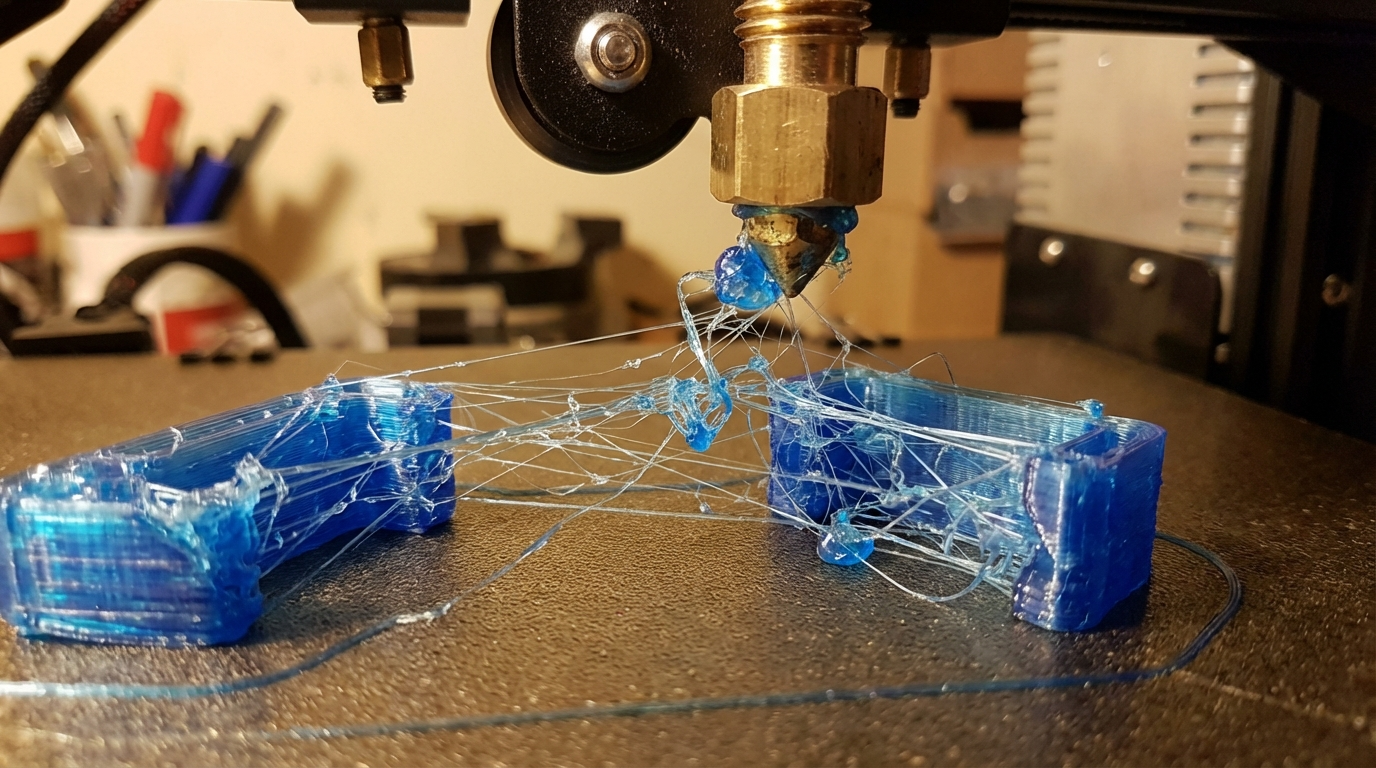
TPU Stringing Too Much – How to Fix It Complete Guide
If you’ve ever printed with TPU and pulled your part off the bed only to find it covered in fine, hair-like strings, you know the frustration. TPU stringing is one of the most common issues when working with flexible filaments, and it can turn an otherwise perfect print into a fuzzy mess. The good news? It’s fixable. In this guide, we’ll walk through every proven method to reduce or eliminate TPU stringing on your 3D printer.
Why Does TPU String So Much?
Before jumping into fixes, it helps to understand why TPU is so prone to stringing in the first place. Unlike rigid filaments such as PLA or PETG, TPU is a thermoplastic elastomer — essentially a rubbery plastic. This gives it some properties that make stringing worse:
- High viscosity when melted: TPU doesn’t flow as cleanly as PLA. It tends to ooze from the nozzle even when the extruder isn’t actively pushing filament.
- Elasticity: The flexible nature of TPU means it compresses in the extruder path. When the extruder motor reverses for retraction, the filament stretches instead of pulling back cleanly.
- Lower retraction tolerance: Aggressive retraction settings that work great for PLA can cause jams with TPU, so you’re working with a narrower window of effective settings.
Understanding these factors is key because it means we can’t just crank up retraction and call it a day. TPU requires a more nuanced approach.
Step 1: Dial In Your Retraction Settings
Retraction is still the first line of defense against stringing, even with TPU. The trick is finding the sweet spot — enough retraction to pull molten filament away from the nozzle tip, but not so much that you jam the hotend.
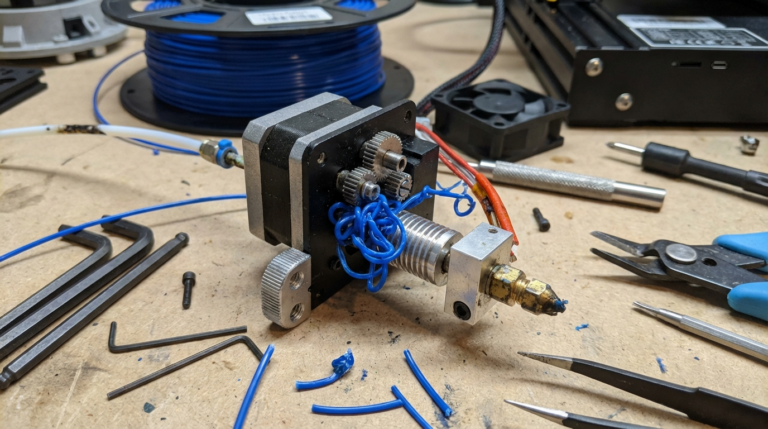
Direct Drive Extruders
If you’re running a direct drive setup (which is strongly recommended for TPU), start with these settings:
- Retraction distance: 0.5–2.0 mm
- Retraction speed: 20–30 mm/s
Direct drive extruders have a short filament path between the gear and the nozzle, which means even small retractions can be effective. Start at 1.0 mm and adjust in 0.25 mm increments. If stringing persists, increase slightly. If you start getting jams or underextrusion after travel moves, back off.
Bowden Tube Extruders
Printing TPU on a Bowden setup is harder, but not impossible. The long tube between the extruder and hotend means the flexible filament compresses and stretches within the tube, making retraction much less effective.
- Retraction distance: 3.0–6.0 mm
- Retraction speed: 20–25 mm/s
Some Bowden users find that disabling retraction entirely and relying on other methods (like travel speed and coasting) actually produces better results than fighting the tube compression. It depends on your specific setup, so experiment both ways.
Step 2: Lower Your Print Temperature
Temperature has a massive effect on stringing with any filament, and TPU is no exception. Higher temperatures make the filament more fluid, which means it oozes more during travel moves.
Most TPU filaments print between 210°C and 240°C. If you’re experiencing stringing:
- Start by dropping your temperature by 5°C from your current setting.
- Print a stringing test model (a simple two-tower test works well).
- Continue dropping in 5°C increments until stringing improves or you start seeing underextrusion and poor layer adhesion.
The sweet spot for most TPU brands tends to be around 215–225°C, but this varies. NinjaTex, for example, likes the lower end, while some shore 95A filaments need the higher range for proper flow.
Step 3: Increase Travel Speed
This one is counterintuitive but effective. When your nozzle moves faster between print areas, there’s less time for molten filament to ooze out and create strings. The nozzle crosses the gap quickly enough that any tiny strand gets pulled thin and either breaks or becomes nearly invisible.
Try setting your travel speed to 150–200 mm/s. Yes, even if your print speed is only 25 mm/s. Travel moves don’t involve extrusion, so the printer can handle higher speeds without affecting print quality. Most modern printers with 32-bit boards handle this without issues.
Step 4: Enable Coasting
Coasting is a slicer feature that stops extruding slightly before the end of each line segment. The idea is that residual pressure in the nozzle will push out enough filament to complete the line, and by the time the nozzle lifts for a travel move, that pressure has been relieved — reducing ooze.
In Cura, you’ll find this under Experimental → Enable Coasting. Start with a coasting volume of 0.064 mm³ and adjust from there. In PrusaSlicer, the equivalent feature is under Printer Settings → Extruder → Retraction when tool is disabled, though the implementation differs slightly.
Coasting works particularly well with TPU because it addresses the root cause — pressure buildup — rather than trying to mechanically retract a stretchy filament.
Step 5: Use Combing (Cura) or Avoid Crossing Perimeters
If your slicer supports it, enable combing mode (Cura) or “avoid crossing perimeters” (PrusaSlicer). These features change the travel path so the nozzle moves within the printed area rather than crossing open gaps.
When the nozzle travels over already-printed surfaces, any ooze deposits onto the existing print rather than creating visible strings in mid-air. It’s not a perfect solution — it can increase print time and sometimes leave small blobs — but for TPU it’s often a worthwhile tradeoff.
In Cura, set Combing Mode to “Within Infill” for the best balance of stringing reduction and surface quality.
Step 6: Dry Your Filament
Wet TPU is a stringing nightmare. TPU is hygroscopic, meaning it absorbs moisture from the air over time. When wet filament hits the hot nozzle, the moisture turns to steam, creating bubbles and dramatically increasing ooze and stringing.
Signs your TPU might be wet:
- Popping or crackling sounds during printing
- Rough, bubbly surface texture
- Stringing that won’t go away no matter what settings you try
- Inconsistent extrusion width
Dry your TPU at 50–60°C for 4–6 hours using a filament dryer or a conventional oven (use an oven thermometer to verify temperature — many ovens are inaccurate at low temperatures). After drying, store it in a sealed container with desiccant packets.
If you print TPU regularly, consider printing directly from a dry box. Several commercial options exist, or you can build one from a food storage container, some PTFE tubing, and a pack of silica gel.
Step 7: Print a Stringing Test
Don’t waste time and filament printing full models while dialing in your settings. Use a dedicated stringing test model instead. The classic design features two thin columns separated by a gap — this forces the printer to make travel moves between them, revealing any stringing issues quickly.
You can find stringing test models on Thingiverse or Printables. Print time is usually under 10 minutes, so you can iterate rapidly through different setting combinations.
Keep a log of what you tested and the results. It might seem tedious, but TPU tuning often involves small incremental changes, and without notes you’ll end up re-testing combinations you’ve already tried.
Step 8: Check Your Nozzle and PTFE Tube
Sometimes the stringing culprit isn’t your settings at all — it’s your hardware. A worn nozzle with a slightly enlarged opening will ooze more. A gap between the PTFE tube and the nozzle creates a pocket where filament accumulates and then seeps out unpredictably.
Check for:
- Worn nozzle: If you’ve been printing with the same brass nozzle for months, especially with abrasive filaments, it might be time for a replacement. A fresh 0.4mm nozzle is cheap insurance.
- PTFE gap: On hotends like the Creality stock design, the PTFE tube needs to be seated firmly against the nozzle. If there’s even a tiny gap, you’ll get buildup that causes oozing. Reassemble the hotend with the nozzle hot, pushing the PTFE tube down firmly.
- Heat creep: If the cold end of your hotend gets too warm, filament softens too early and creates pressure irregularities. Make sure your heatsink fan is running at 100% and the thermal paste between the heatsink and heat break is intact.
Step 9: Slow Down Your Print Speed
While we want fast travel speeds, the actual print speed for TPU should be slow. Printing too fast creates excessive pressure in the nozzle, and that pressure has to go somewhere — usually out the nozzle during travel moves, causing strings.
Recommended print speeds for TPU:
- Direct drive: 20–35 mm/s
- Bowden: 15–25 mm/s
- First layer: 10–15 mm/s
Yes, it’s slow. TPU printing is a patience game. Trying to rush it almost always results in worse quality and more stringing. Put on a podcast and let the printer do its thing.
Step 10: Post-Processing — The Quick Fix
Even with perfect settings, some minor stringing with TPU is almost unavoidable. The good news is that light strings are easy to clean up:
- Heat gun: A quick pass with a heat gun on low setting melts away fine strings instantly. Keep the gun moving to avoid deforming the part. This is the fastest method for large surfaces.
- Lighter: A quick flick of a lighter flame across the surface removes strings effectively. It sounds crude, but it works surprisingly well for small parts.
- Manual removal: For thicker strings, a pair of flush cutters or a craft knife handles cleanup easily. TPU’s flexibility actually makes this easier than with rigid filaments since you can bend the part to access tight spots.
Recommended Settings Summary
Here’s a quick reference table for TPU stringing reduction settings. Use these as starting points and adjust based on your specific printer and filament brand:
- Temperature: 215–225°C (start low, increase if underextruding)
- Retraction distance (direct drive): 0.5–2.0 mm
- Retraction distance (Bowden): 3.0–6.0 mm
- Retraction speed: 20–30 mm/s
- Print speed: 20–35 mm/s
- Travel speed: 150–200 mm/s
- Coasting: Enabled, 0.064 mm³
- Combing: Within Infill
Final Thoughts
TPU stringing is frustrating, but it’s a solvable problem. The key is understanding that you can’t treat TPU like PLA — it needs its own approach. Start with retraction and temperature, then work through the other optimizations one at a time. Dry your filament, check your hardware, and don’t be afraid to use post-processing as a final step.
Most importantly, keep notes on what works for your specific setup. Every printer is a little different, and the settings that eliminate stringing on one machine might need tweaking on another. Once you’ve dialed in your TPU profile, save it — you’ll be glad you did the next time you need to print something flexible.