How to Reduce 3D Print Time Without Losing Quality
The Print Time Problem
You slice a model, check the estimated time, and see 14 hours. The immediate instinct is to crank up the speed, but that usually leads to ringing, layer adhesion issues, and a print that looks like it went through a blender. There’s a better way.
Reducing print time without sacrificing quality is about working smarter with your slicer settings — not just moving the printhead faster. The biggest time savings come from settings most people never touch: layer height strategy, infill optimization, wall count, and adaptive layers.
The Big Three: Settings That Save Hours
1. Increase Layer Height (Strategically)
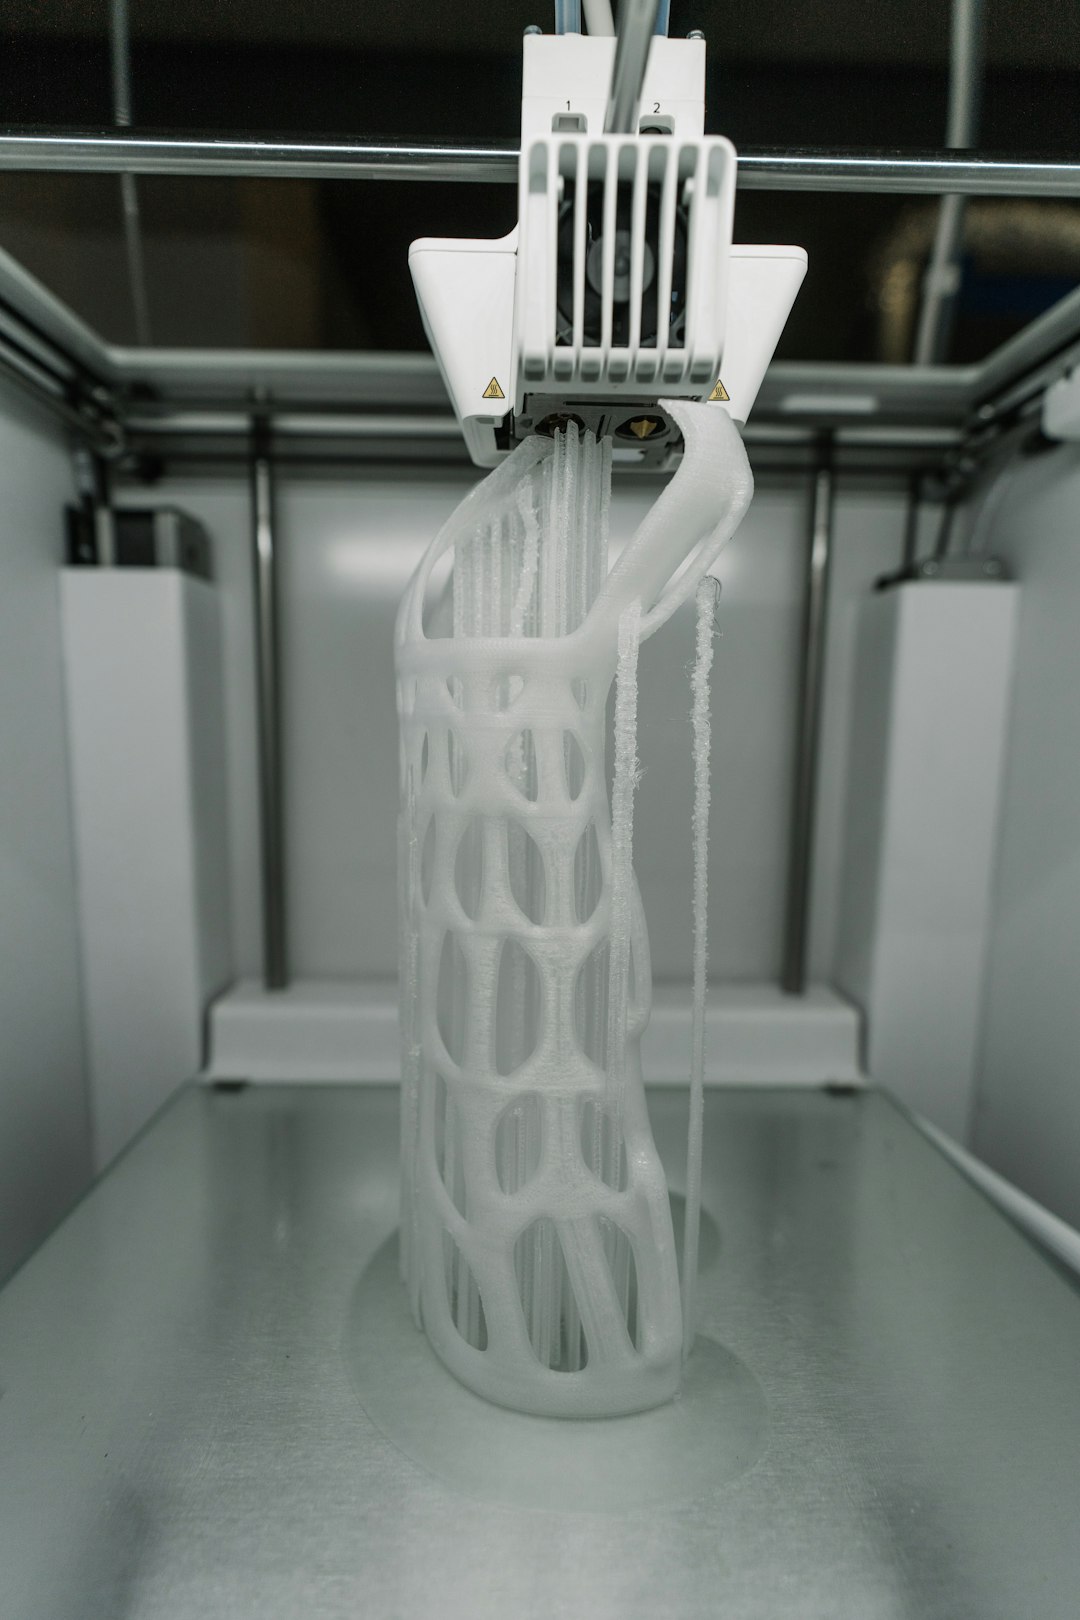
Layer height is the single biggest factor in print time. Going from 0.2mm to 0.28mm layers cuts print time by about 30% — and on most parts, you can barely tell the difference. The rule of thumb: your layer height can go up to 75% of your nozzle diameter. With a standard 0.4mm nozzle, that’s 0.3mm max.
But here’s the real trick: adaptive layer heights. Both Cura and PrusaSlicer support this feature, and it’s incredibly effective. The slicer analyzes your model and uses thinner layers only where the surface angle needs them (like gentle curves and slopes), while using thick layers on vertical walls and flat sections.
On a model with mixed geometry — say a figurine with a smooth face but straight body — adaptive layers can save 20-40% time while keeping all the detail exactly where it matters. In Cura, enable “Use Adaptive Layers” under Experimental. In PrusaSlicer, it’s the “Variable layer height” option.
2. Optimize Infill
Most people set infill to 20% and forget about it. But infill is one of the biggest time consumers, and there’s almost always room to optimize.
- Reduce percentage: Unless you need structural strength, 10-15% infill is plenty for decorative objects. For many prints, even 5% works fine.
- Change the pattern: Lines/rectilinear is faster than grid, gyroid, or cubic. Lightning infill (Cura) is the fastest of all — it only builds support structure where the top surface needs it.
- Increase infill line width: Set infill line width to 150% of your nozzle size. The lines are thicker but there are fewer of them, saving significant time.
- Gradual infill steps: In Cura, “Gradual Infill Steps” reduces infill density in the middle of your part while keeping it dense near top and bottom surfaces. Smart and fast.
3. Reduce Wall Count
The default 2-3 walls (perimeters) is overkill for many prints. If your model doesn’t need to be strong, try 2 walls. For purely decorative items, even 1 wall can work if you increase infill slightly to compensate.
Each wall you remove saves one complete outline pass per layer. On tall prints with many layers, that adds up to significant time. For a 200-layer print, cutting from 3 walls to 2 saves 200 complete perimeter loops.
Speed Settings That Actually Work
Inner Wall Speed vs. Outer Wall Speed
Your outer wall determines surface quality. Your inner walls are invisible. Set inner wall speed 50-100% faster than outer wall speed. If your outer walls print at 40 mm/s, inner walls can safely run at 60-80 mm/s with no visible quality impact.
Infill Speed
Infill is hidden inside the part, so it can go fast. Most printers handle infill at 80-120 mm/s without issues, even when outer walls are at 40-50 mm/s. If you’re on a high-speed printer like a Bambu Lab or Voron, infill can go much faster.
Travel Speed
Travel moves (when the nozzle moves without extruding) can usually be maxed out. 150-250 mm/s travel speed is common and doesn’t affect print quality at all — the nozzle isn’t touching the print during travel. Just make sure you have good retraction settings to prevent stringing during fast travels.
Acceleration and Jerk
On shorter segments, the printer never reaches its set speed because acceleration limits kick in. Increasing acceleration from the typical 500 mm/s² to 1000-2000 mm/s² can significantly reduce print time on models with lots of small features. Just watch for ringing — if you see ghosting artifacts near corners, back off.
Model-Level Optimizations
Orientation Matters
Print orientation affects time more than you’d think. A tall, thin object printed upright has many more layers than the same object printed on its side. If the part doesn’t need vertical strength, laying it flat can cut time dramatically. A 150mm tall cylinder with 0.2mm layers = 750 layers. On its side, it might only be 300 layers.
Smart Support Usage
Supports add 20-40% to print time. Minimize them by orienting the model to reduce overhangs. Use tree supports instead of normal supports — they use less material and print faster. In Cura, organic (tree) supports can save 30% time compared to normal supports on complex models.
Shell Prints and Vase Mode
For decorative items like vases, planters, and lampshades, vase mode (spiral contour) is unbeatable. It prints the entire object as a single continuous spiral with no retractions, no infill, and no travel moves. A vase that takes 3 hours normally can finish in 45 minutes in vase mode.
The Diminishing Returns Zone
Not every optimization is worth the effort. Here’s what to skip:
- Don’t reduce top/bottom layers below 3-4: You’ll get pillowing and visible infill
- Don’t print outer walls too fast: Surface quality degrades noticeably above 60-80 mm/s on most printers
- Don’t eliminate cooling: Part cooling is essential for overhangs and bridges regardless of speed
- Don’t skip skirt/brim to save 30 seconds: If adhesion fails 4 hours in, you’ve lost everything
Quick Reference: Time-Saving Settings by Priority
- Adaptive layers ON — 20-40% time saved, minimal quality loss
- Lightning infill at 10-15% — 15-30% time saved
- Inner walls at 1.5-2x outer wall speed — 10-15% saved
- Infill at 150% line width — 10-20% saved
- Reduce walls to 2 — 5-15% saved (depends on model)
- Increase travel speed to 200+ — 5-10% saved
- Optimize orientation — varies wildly, sometimes 50%+
Stack these together and it’s not unusual to cut a 10-hour print down to 5-6 hours with identical (or near-identical) visual quality. The key is making informed tradeoffs rather than just cranking everything up and hoping for the best.