Thermal Runaway Error: Causes, Fixes, and Safety Checks
By Mike Reynolds
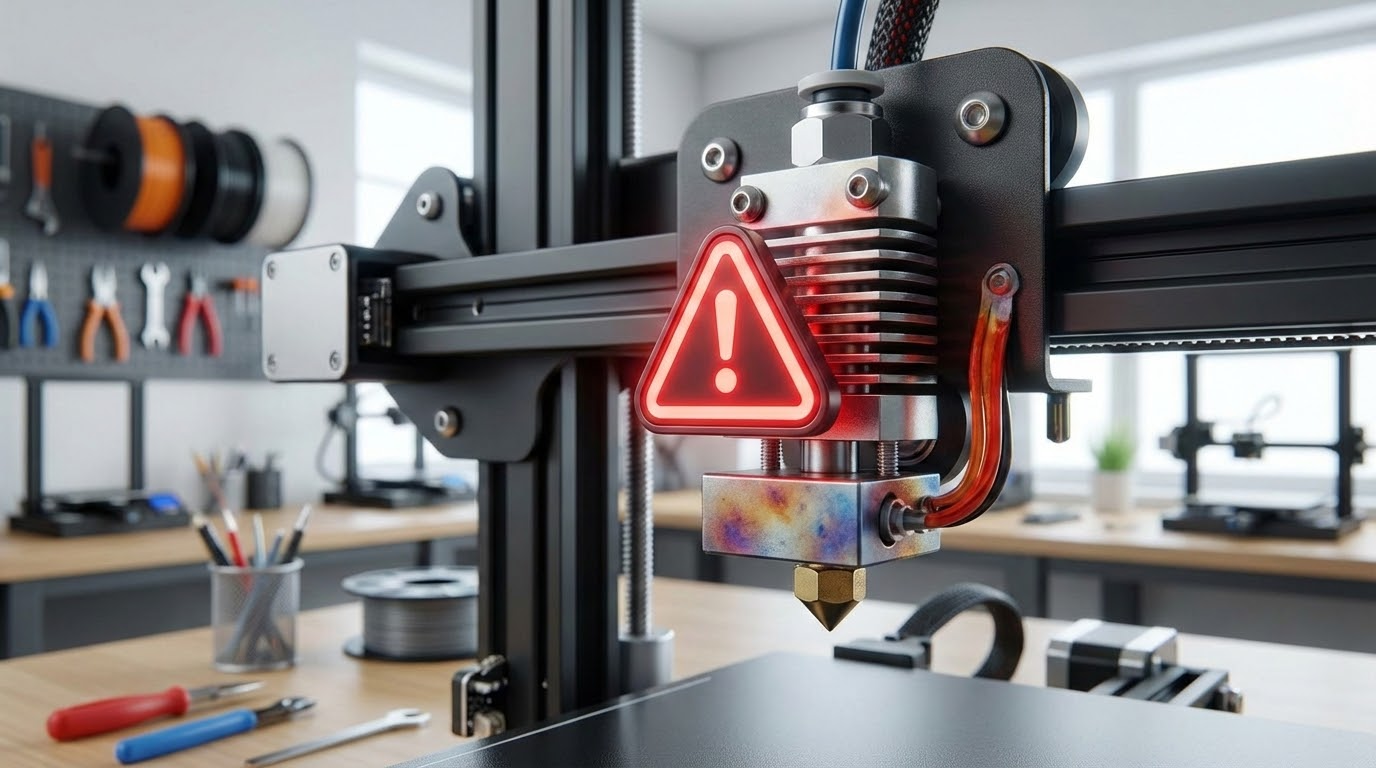
Thermal runaway is the most serious warning your 3D printer can throw. It means the printer thinks the hotend or bed temperature is out of control—either heating when it shouldn’t or failing to heat when it should. Good firmware will shut the printer down to prevent a fire. If you see “Thermal Runaway” or “Heating Failed” on your screen, stop and fix it. In this guide I’ll show you the exact causes, how to diagnose them safely, and how to fix the problem for good.
What Thermal Runaway Actually Means
Thermal runaway is a safety error triggered when the temperature reported by the thermistor doesn’t behave as expected. If the firmware commands heat and the temperature doesn’t rise, or if it rises too fast or too far, it assumes something is wrong and stops the printer.
This is a good thing. It prevents a damaged thermistor or loose heater from overheating and creating a fire risk.
Common Causes of Thermal Runaway
- Loose or damaged thermistor (most common).
- Broken thermistor wire from repeated bending.
- Heater cartridge slipping out of the hotend block.
- Bad power supply causing temperature drops.
- Firmware safety thresholds too strict after upgrades.
- Cooling fan blowing directly on the heater block.
Safety First: What to Do Right Now
- Power off the printer and let it cool.
- Do a visual inspection before powering it back on.
- Never bypass thermal runaway protection in firmware.
Step‑by‑Step Diagnostic Checklist
1) Inspect the Thermistor
The thermistor is the tiny glass‑bead sensor that reports temperature. If it’s loose, it will read cooler than reality and the printer will keep heating until it trips a runaway error. Check that the thermistor is seated correctly and secured by the screw or clamp.
2) Check Thermistor Wiring
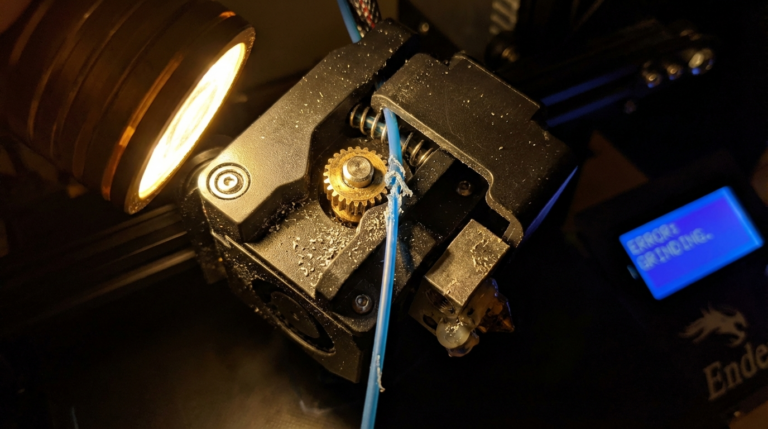
Thermistor wires are thin and fragile. Look for frayed insulation, pinch points, or a wire that has broken inside the sheath. Wiggle the wires gently while watching the temperature screen; if the temperature jumps wildly, the thermistor or wiring is failing.
3) Verify Heater Cartridge Seating
The heater cartridge must be fully inserted into the block and secured. If it’s loose, it will heat unevenly or fail to heat, triggering errors. Tighten the set screw, but don’t crush the cartridge.
4) Inspect Hotend Sock and Fan Ducts
A missing silicone sock or a fan duct aimed at the heater block can pull heat away too quickly. That can trigger a “heating failed” warning. Make sure the part cooling fan doesn’t blast the block directly.
5) Check the Power Supply
If the heater can’t maintain temperature under load, the power supply might be sagging. Look for lights dimming or fans slowing when the bed and hotend are both heating. A weak PSU can mimic thermal runaway symptoms.
Fixes That Usually Solve It
Replace the Thermistor
Thermistors are cheap and often the fastest fix. If your printer is more than a year old or you’ve had a few hotend swaps, replacing the thermistor is a smart move.
Reseat the Heater Cartridge
Remove the hotend cover, slide the cartridge fully into the block, and tighten the set screw. If the cartridge has a burned spot or damaged insulation, replace it.
Re‑route Wiring for Strain Relief
Most thermal runaway errors happen after a long print when wires have been flexing. Add strain relief so the wires bend gently, not sharply, at the hotend.
Update or Re‑tune Firmware (If Needed)
If you’ve upgraded your hotend or thermistor type, make sure the firmware is configured for the correct sensor. A mismatch can cause inaccurate readings and false runaway errors.
Thermal Runaway on the Heated Bed
All the same rules apply to the heated bed. Check the bed thermistor, wiring, and bed heater connections. A bed heater cable that’s frayed near the hinge is a very common failure point.
Why You Should Never Disable Thermal Runaway
Some guides tell you to disable the protection in firmware. Don’t. It’s the only thing standing between a failed thermistor and a dangerous overheat. Fix the root cause instead.
Advanced Troubleshooting
Run a PID Tune
If temperatures overshoot or oscillate, the PID values may be off. Run a PID autotune from your printer’s menu or via a terminal (M303 for Marlin). This stabilizes heating and reduces false errors.
Check Connector Health
On some control boards, the screw terminals for the bed heater can loosen or burn. Look for discoloration or melted plastic. If you see damage, replace the connector or board.
Measure Thermistor Resistance
If you have a multimeter, check thermistor resistance at room temperature. Most 100K thermistors read around 100K ohms at 25°C. A wildly different reading indicates a bad sensor.
FAQ: Thermal Runaway
Does thermal runaway always mean a fire risk?
Not necessarily, but it indicates a safety system detected abnormal heating. Treat it seriously and fix it before printing again.
Can a bad part cooling fan cause it?
Yes. If the fan blows directly on the heater block, the hotend may never reach target temperature and trigger an error. Adjust the duct or replace the fan.
What if it happens only after 2–3 hours?
That’s a classic sign of wiring fatigue. As the head moves, the wires flex until a connection breaks. Inspect and re‑route the harness.
Final Checklist
- Thermistor seated and secure
- Thermistor wire intact and strain‑relieved
- Heater cartridge fully inserted
- Fan ducts not cooling the heater block
- PSU stable under load
Thermal runaway is scary, but it’s almost always a simple hardware issue. Fix the sensor, secure the heater, and you’ll be back to safe, reliable printing.
How to Replace a Thermistor (Quick Guide)
- Heat the hotend to 180–200°C and remove filament.
- Power off and let the hotend cool just enough to handle safely.
- Remove the hotend cover and locate the thermistor screw or clamp.
- Carefully loosen the screw and slide the thermistor out.
- Route the new thermistor wire the same way as the old one.
- Insert the bead fully into the thermistor hole and tighten gently.
- Power on and verify stable temperature readings.
Don’t over‑tighten the thermistor screw. It’s easy to crush the glass bead or short the wires.
Heated Bed Thermal Runaway: Extra Notes
The bed is heavier and slower to heat, which can trigger false errors if your firmware is configured too aggressively. If you upgraded to a larger bed or changed your insulation, consider re‑tuning PID and ensuring the bed thermistor is firmly taped or clamped to the underside.
Also check the bed cable where it flexes every time the bed moves. That hinge point is a known failure spot on many printers.
Case Study: “Thermal Runaway After Fan Upgrade”
I once installed a higher‑power part cooling fan and duct on a printer that had been stable for months. Suddenly, the hotend wouldn’t reach temperature and threw a runaway error. The fix was simple: the new duct was blasting the heater block. I trimmed the duct, added a silicone sock, and rerouted airflow. The error disappeared instantly.
Preventing Thermal Runaway in the Future
- Use strain relief: Zip ties and cable chains prevent wire fatigue.
- Keep a spare thermistor: They’re cheap and save downtime.
- Check hotend screws monthly: Vibration can loosen them.
- Don’t overtighten connectors: Crushed wires fail faster.
Error Codes and What They Mean
Different printers show different messages, but the basics are the same:
- Thermal Runaway: Temperature deviated too far from target.
- Heating Failed: Temperature did not increase fast enough.
- Mintemp/Maxtemp: Thermistor reading out of safe range.
If you see Mintemp or Maxtemp errors, immediately inspect thermistor connections. Those often indicate a broken wire or a short.
Testing After the Fix
Once you’ve repaired the hardware, run a controlled heat test. Set the hotend to 200°C and the bed to 60°C, then let the printer sit for 10–15 minutes. The temperature should stabilize within a few degrees and stay there. If it drifts or drops, recheck the wiring and the heater cartridge seating.
For an extra sanity check, print a small calibration cube. A short print will reveal any lingering temperature instability without wasting hours of filament.
One more tip: if you recently switched from a 40W to a 60W heater cartridge, your firmware may be tuned for slower heating. A faster heater can overshoot target temperature and trip safeguards. In that case, redo PID tuning and verify the heater power value in firmware.
Thermal runaway errors can feel scary, but they’re usually a sign your printer is protecting itself. Treat the warning as a helpful mechanic, not an enemy. Fix the wiring, secure the sensors, and your printer will go back to being boring—and boring is good.
If you ever smell burning plastic or see smoke, cut power immediately. That’s rare, but it’s why these safety systems exist.