Manual vs Mesh Bed Leveling: Which Is Better for Your 3D Printer?
The Bed Leveling Problem Every Printer Owner Faces
Your first layer is everything. Get it wrong and no amount of slicer tweaking saves the print. Get it right and you’re set for hours of worry-free printing. At the heart of that first layer is bed leveling — making sure the nozzle maintains a consistent distance from the build surface across the entire print area.
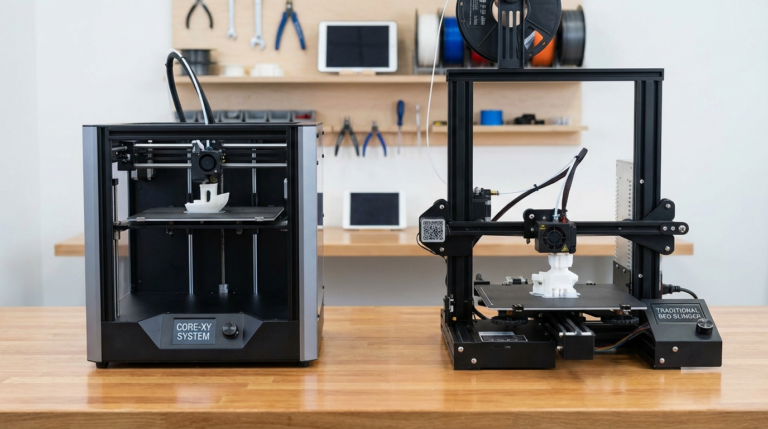
For years, manual bed leveling was the only option. You’d twist knob after knob, slide a piece of paper under the nozzle, and repeat until your patience ran out. Then automatic bed leveling (ABL) probes appeared, promising to solve the problem forever. But did they? Let’s break down both approaches — what they actually do, where they shine, and where they fall short.
How Manual Bed Leveling Works
Manual leveling is conceptually simple. Your print bed sits on three or four adjustable spring-loaded screws. By turning these screws, you raise or lower each corner of the bed until the entire surface sits at a uniform distance from the nozzle.
The classic technique uses a piece of standard printer paper (roughly 0.1mm thick) as a feeler gauge:
- Home all axes so the nozzle is at a known Z position.
- Disable stepper motors (or use the LCD to move axes manually).
- Move the nozzle to each corner of the bed.
- Slide the paper between nozzle and bed.
- Adjust the corner screw until you feel slight resistance — the paper should drag but not tear.
- Repeat all corners 2-3 times (adjusting one corner affects the others).
- Check the center for good measure.
This process takes 5-15 minutes depending on your experience and how far off things are. It needs repeating every few prints as thermal cycling and vibration gradually shift the springs.
Pros of Manual Leveling
- No additional hardware needed. Every FDM printer comes with adjustment screws. A sheet of paper is your only tool.
- No firmware complexity. Nothing to configure, no probe offsets to calculate, no compatibility issues.
- Works on any surface. Glass, PEI, magnetic flex plates — doesn’t matter. Paper works on all of them.
- Teaches you your printer. Manually leveling forces you to understand how your bed behaves, where it flexes, and how thermal expansion affects things.
Cons of Manual Leveling
- Time-consuming and repetitive. You’ll do this hundreds of times over a printer’s life.
- Human error. The “right amount of drag” on paper is subjective. Two people get different results.
- Can’t compensate for warped beds. If your bed has a dip in the center or a high corner, no amount of screw adjustment fixes that — you can only tilt the plane.
- Degrades over time. Springs compress, vibrations shift things, thermal cycling changes the gap. You need to re-level regularly.
How Automatic Mesh Bed Leveling Works
Mesh bed leveling uses a probe — typically an inductive sensor, BLTouch/CRTouch servo probe, or strain gauge — to measure the distance between the nozzle and bed at multiple points across the surface. The firmware then creates a mesh map of the bed’s topology and compensates in real-time during printing by adjusting the Z-axis on the fly.
A typical mesh leveling sequence:
- The printer homes all axes.
- The probe touches the bed at a grid of points (commonly 3×3, 4×4, 5×5, or even 7×7).
- Each point records the exact Z height.
- Firmware builds a mesh — a mathematical surface representing the bed’s actual shape.
- During printing, the firmware interpolates between mesh points and adjusts Z height continuously.
This entire process takes 1-5 minutes depending on grid density and probe speed. Many printers run it automatically before every print via a G29 command in the start G-code.
Types of Probes
BLTouch / CRTouch: A small servo-actuated pin that physically touches the bed. Works on any surface — metal, glass, PEI, tape. Most popular choice for retrofitting older printers. Accuracy: ±0.005mm. Cost: $15-40.
Inductive probes (PINDA, SuperPINDA): Detect metal surfaces without contact. Very fast and durable (no moving parts), but only work with metal build plates. If you use glass or non-metallic surfaces, these won’t probe correctly. Used by Prusa printers. Accuracy: ±0.01mm. Cost: $10-25.
Strain gauge / load cell: Measures force on the nozzle itself as it touches the bed. The nozzle IS the probe. Most accurate method since there’s zero offset between the measurement point and the actual nozzle tip. Used in Prusa MK4, Bambu Lab printers. Cost: built into the printer design.
Capacitive probes: Detect changes in capacitance near surfaces. Work on most materials but can be affected by humidity and surface conditions. Less common in consumer printers.
Pros of Mesh Leveling
- Compensates for warped beds. This is the killer feature. Real beds are never perfectly flat — they have bowls, dips, and high spots. Mesh leveling handles all of it.
- Consistent results every time. A probe doesn’t have “good days” and “bad days.” It measures the same way each run.
- Saves enormous time. Especially for printer farms or frequent use. Run the probe once and print.
- Better first layers. Continuous Z compensation means the first layer is uniform even across large prints that span the entire bed.
- Can detect problems. A drastically skewed mesh tells you something is wrong — a loose screw, a warped bed, or a shifted gantry.
Cons of Mesh Leveling
- Probe offset calibration. The probe isn’t at the nozzle position — there’s an X/Y offset that must be configured correctly. Wrong offset means the mesh doesn’t align with actual printing.
- Additional cost and complexity. Retrofitting a probe means wiring, firmware configuration (Marlin or Klipper), and potentially mounting brackets.
- Probe-specific limitations. Inductive probes don’t work on glass. BLTouch pins can bend. All probes can be affected by temperature if probed cold and printed hot.
- False sense of security. Mesh leveling compensates for minor imperfections — it doesn’t fix a bed that’s wildly out of level. You still need the bed roughly level so the mesh stays within compensation range.
- Firmware setup. Enabling mesh leveling in Marlin requires editing configuration files and recompiling. Klipper makes it easier but still needs configuration.
Manual vs Mesh: Real-World Comparison
Let me cut through the theoretical discussion and share what actually matters for different situations.
If you print occasionally (1-2 times a week): Manual leveling is fine. Level it once, print a few things, re-level next session. The time investment is minimal because you’re not printing constantly.
If you print daily or run a farm: Mesh leveling is almost mandatory. Running G29 before each print costs you 2 minutes and guarantees a good first layer. Multiply that time savings across hundreds of prints and it’s enormous.
If your bed is warped: Mesh leveling is the only real solution. A warped bed with manual leveling means you compromise — maybe the corners are good but the center is too high, or vice versa. Mesh leveling just compensates for the warp and moves on.
If you want to learn: Start with manual leveling. Understanding what “too close” and “too far” look like builds intuition that serves you even after you install a probe. Many experienced makers can eyeball first-layer height by sound alone — and they learned that skill from manual leveling.
The Hybrid Approach: Best of Both Worlds
Here’s what most experienced 3D printing enthusiasts end up doing — and what I recommend:
- Rough-level manually. Get the bed approximately level using the corner screws. This only needs doing when something changes (new bed surface, reassembly, etc.).
- Use mesh leveling for fine compensation. Run a mesh probe before prints to handle the remaining imperfections.
- Replace springs with silicone spacers. Standard springs compress and shift over time. Silicone spacers maintain tension far longer, reducing how often you need to manually adjust. They cost about $5 for a set of four.
- Probe at printing temperature. Thermal expansion affects bed shape. If you probe cold but print hot, the mesh is inaccurate. Heat the bed to printing temperature, wait 5 minutes for thermal stabilization, then probe.
This approach takes 90% of the hassle out of bed leveling while maintaining the best possible first-layer quality. The manual level handles the gross alignment, the probe handles the fine details, and the silicone spacers keep things from drifting between sessions.
Setting Up Mesh Leveling in Klipper
Klipper has made mesh bed leveling significantly easier to configure compared to Marlin. Here’s a minimal configuration:
[bltouch]
sensor_pin: ^PC14
control_pin: PA1
x_offset: -40
y_offset: -10
z_offset: 1.5

[bed_mesh]
speed: 120
horizontal_move_z: 5
mesh_min: 10, 10
mesh_max: 220, 220
probe_count: 5, 5
algorithm: bicubic
After configuring, run BED_MESH_CALIBRATE from the console. Klipper probes the grid, generates the mesh, and applies it. You can save the mesh profile with BED_MESH_PROFILE SAVE=default so it loads automatically.
Add BED_MESH_CALIBRATE to your print start macro and you’re set. Every print begins with a fresh mesh.
Setting Up Mesh Leveling in Marlin
Marlin requires editing Configuration.h before compiling:
- Enable your probe type:
#define BLTOUCH - Set probe offsets:
#define NOZZLE_TO_PROBE_OFFSET { -40, -10, -1.5 } - Enable auto bed leveling:
#define AUTO_BED_LEVELING_BILINEAR - Set grid size:
#define GRID_MAX_POINTS_X 5 - Enable fade height (optional):
#define ENABLE_LEVELING_FADE_HEIGHT
Fade height is a useful feature — it gradually reduces mesh compensation as Z increases, so only the first few millimeters are affected. This prevents mesh compensation from introducing artifacts on taller prints.
Which Grid Density Should You Use?
More points means more accuracy but longer probe times. Here’s a practical guide:
- 3×3 (9 points): Minimum useful grid. Fine for beds under 200mm that are roughly flat. Fast — under 1 minute.
- 5×5 (25 points): Sweet spot for most printers. Captures enough detail for slightly warped beds without taking too long. About 2-3 minutes.
- 7×7 (49 points): Use for large beds (300mm+) or significantly warped surfaces. Takes 4-6 minutes but provides excellent compensation.
- 10×10 (100 points): Overkill for most situations. Only useful for very large format printers or quality-critical production work.
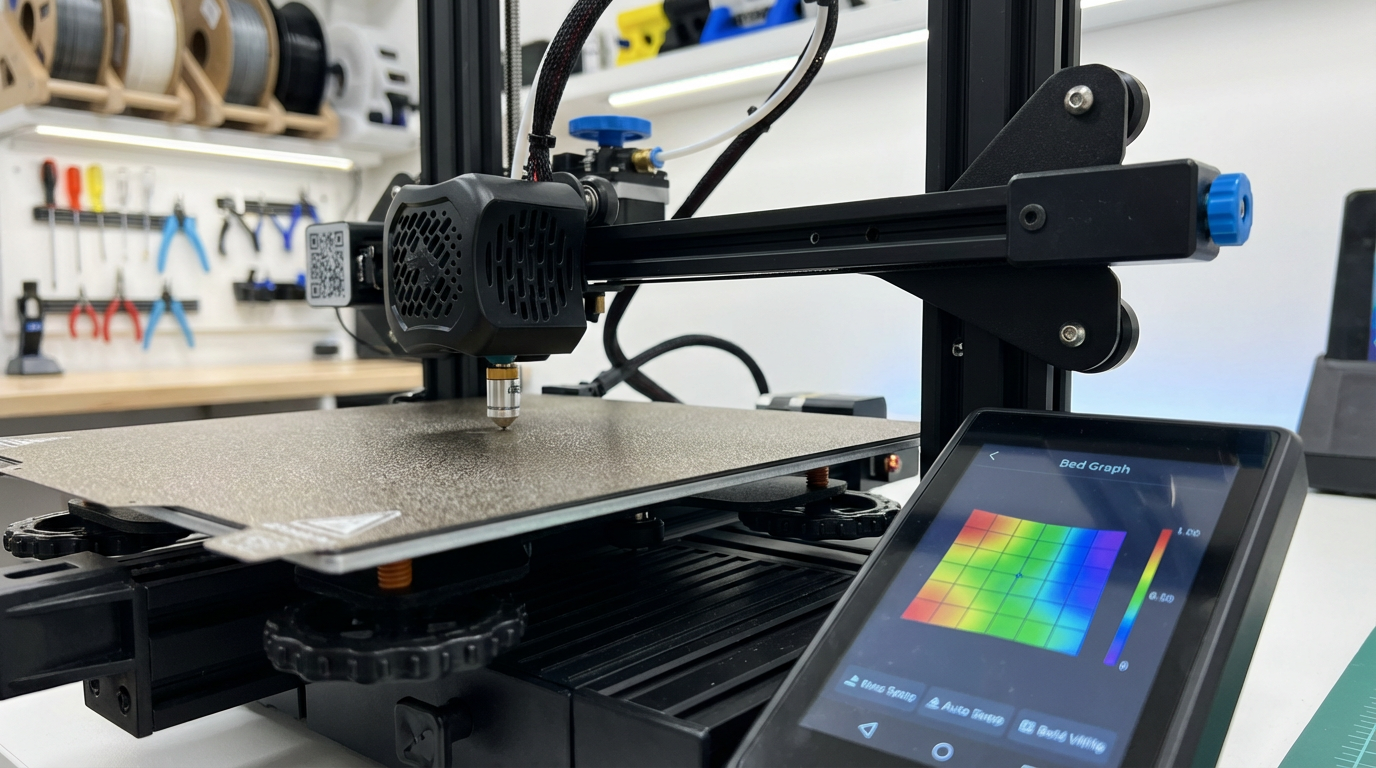
I run 5×5 on my 235mm bed and it catches everything. The mesh shows a characteristic bowl shape — about 0.15mm lower in the center than the edges — that would be impossible to fix with manual leveling alone.
Bottom Line
Manual bed leveling works. Millions of great prints come off manually-leveled printers every day. But mesh bed leveling works better, more consistently, and with less ongoing effort. If your printer doesn’t have a probe and you’re happy with your results, there’s no urgent need to change. But if you’re fighting first-layer issues, printing frequently, or want to eliminate one more variable from your workflow — a $20 BLTouch and thirty minutes of setup will change your printing life.
The technology has matured to the point where mesh leveling isn’t a luxury anymore. It’s a quality-of-life upgrade that pays for itself in saved time and reduced frustration within the first week of use.