How to Fix Rough Top Surface on 3D Prints: Causes and Solutions
What Causes Rough Top Surfaces?
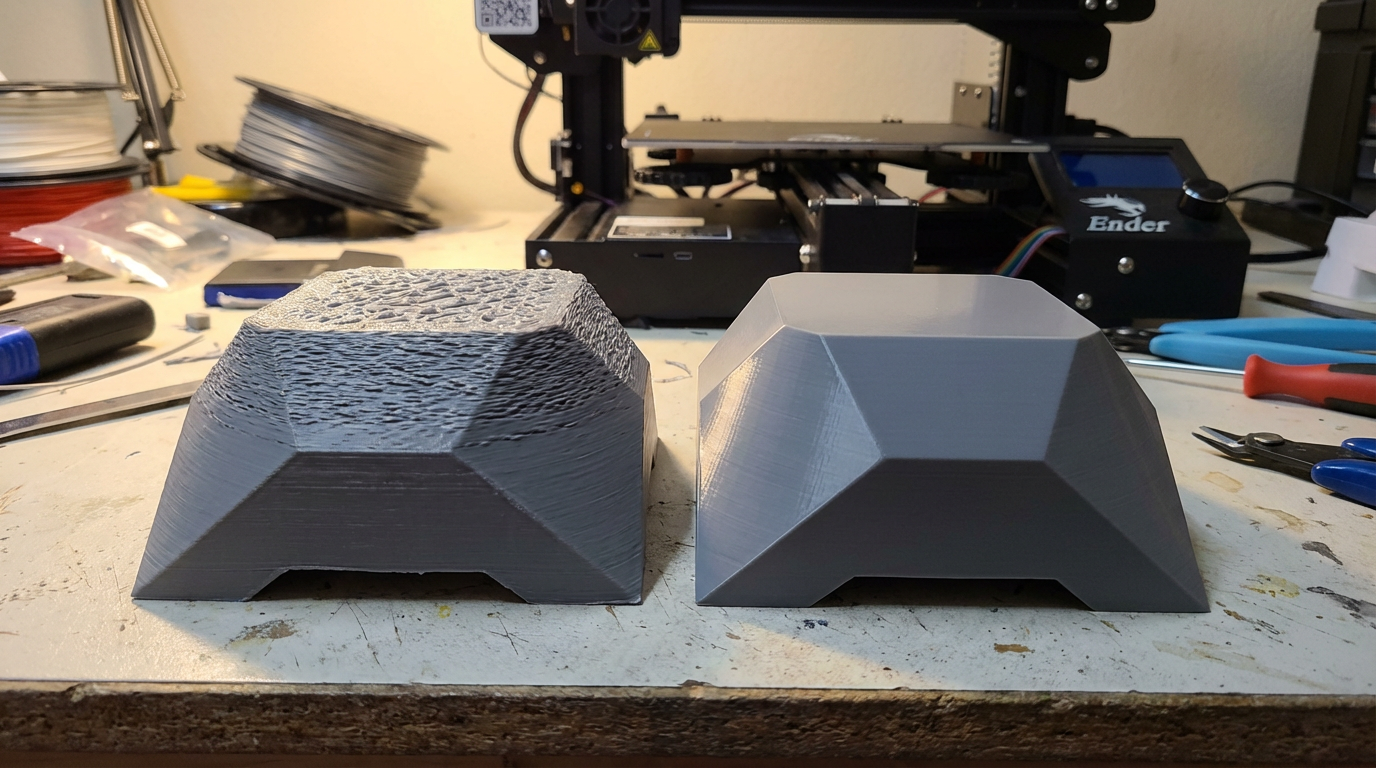
You’ve been patient. Your 3D print ran for hours without a hitch — good adhesion, clean walls, no stringing. Then you pull it off the bed and flip it over (or inspect the top) and there it is: a rough, uneven top surface that looks like the printer gave up on the last few layers. Bumps, gaps, visible infill pattern bleeding through, or a texture that resembles orange peel instead of the smooth finish you expected.
Rough top surfaces are one of the most common 3D printing quality issues, and the good news is they’re almost always fixable with settings changes — no hardware modifications needed. Let’s walk through every cause and its fix.
Cause 1: Not Enough Top Layers
This is the single most common reason for rough tops, and the easiest to fix. If you don’t have enough solid top layers, the infill pattern underneath shows through. The top layers try to bridge over the infill gaps, but with too few layers, they can’t fully cover them.
The fix: Use a minimum of 5-6 top layers for 0.2mm layer height. For 0.12mm layer height, use 8-10 top layers. The general rule: your top solid section should be at least 1mm thick regardless of layer height.
- 0.1mm layer height → 10 top layers (= 1mm)
- 0.16mm layer height → 7 top layers (= 1.12mm)
- 0.2mm layer height → 5-6 top layers (= 1.0-1.2mm)
- 0.28mm layer height → 4-5 top layers (= 1.12-1.4mm)
In Cura, this setting is “Top Layers” under the Shell section. In PrusaSlicer/OrcaSlicer, it’s “Top solid layers” under Layers and Perimeters. Some slicers also offer “Top thickness” where you set the measurement in millimeters directly — set it to 1.2mm and the slicer calculates the layer count automatically.
Cause 2: Under-Extrusion on Top Layers
Even with enough top layers, under-extrusion creates gaps and rough texture. The top layers are essentially bridging over infill, which means they don’t have continuous support underneath. If extrusion is even slightly insufficient, these unsupported spans show it first.
The fix: Calibrate your flow rate (extrusion multiplier). Print a single-wall cube and measure wall thickness with calipers. If walls are thinner than expected, increase flow rate. A well-calibrated flow rate eliminates most top surface roughness.
Additionally, many slicers let you set flow rate specifically for top layers. If your walls look fine but tops are rough, bump “Top surface flow” to 105-110% as a targeted fix. In Cura, this setting is under “Top Surface Skin Flow.” OrcaSlicer has “Top surface flow ratio.”
Cause 3: Infill Density Too Low
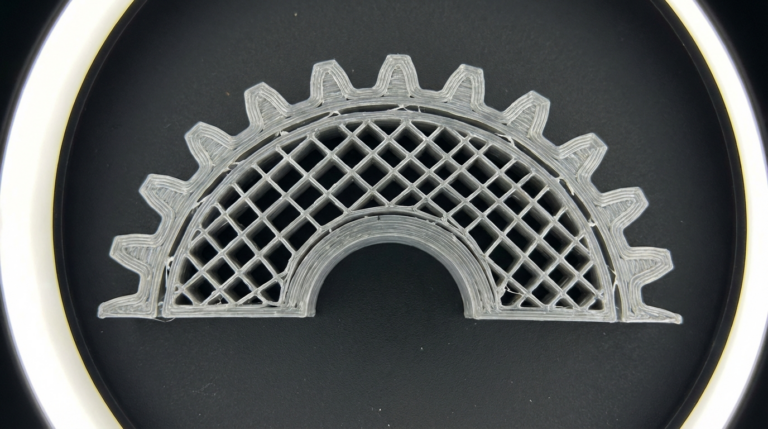
Top layers bridge over infill. If your infill is too sparse, each top layer has to bridge a longer gap. At 10% infill, those gaps are substantial. The first top layer sags into the void, the second layer partially covers the sag, and it takes several more layers to build a flat surface.
The fix: Increase infill to at least 15-20% for prints where top surface quality matters. Alternatively, use a denser infill pattern near the top. Cura offers “Gradual Infill Steps” which increases infill density approaching the top — you get lightweight interiors with dense support where it matters.
Infill pattern also affects this. Gyroid and cubic infill provide more uniform support for top layers than lines or grid patterns. Grid creates directional support — strong in two directions but leaves diamond-shaped voids. Gyroid spreads support more evenly in all directions.
Cause 4: Cooling Issues
Top surfaces need adequate cooling to solidify properly. Each top layer is deposited over partially-filled space, and if it doesn’t cool quickly enough, it sags before the next layer arrives. This creates a bumpy, uneven surface.
The fix:
- Ensure part cooling fan is at 100% for PLA top layers (most slicers do this by default).
- For PETG, increase fan to 50-60% specifically for top layers if your slicer allows per-feature fan control.
- Enable “Minimum Layer Time” in your slicer — this forces the printer to slow down on small layers so the fan has time to cool them. Set it to 10-15 seconds.
- Check that your fan duct actually blows air on the print. Some stock fan ducts only cool one side of the nozzle. Aftermarket fan ducts (Hero Me, Satsana, FANG) provide 360° cooling.
Cause 5: Printing Too Fast on Top Layers
Speed kills quality on top surfaces. Fast printing means the extruder is depositing material while moving quickly over unsupported areas. The plastic doesn’t have time to settle and bond with the layer below before the nozzle moves on.
The fix: Slow down top layer speed to 20-30mm/s, even if you print everything else at 100mm/s+. This gives each line time to bond and flatten. Every major slicer has a separate speed setting for top/bottom layers:
- Cura: “Top Surface Skin Speed” (also called “Top Layers Speed” in some versions)
- PrusaSlicer: “Top solid infill speed” (set to 0 for auto, or specify a value)
- OrcaSlicer: “Top surface speed”
I run my top layers at 25mm/s regardless of what the rest of the print does. The time difference is minimal (top layers are usually a small portion of total print time) and the quality improvement is dramatic.
Cause 6: Ironing Not Enabled
Ironing is a slicer feature that passes the hot nozzle over the top surface a second time with minimal extrusion, essentially “ironing” the plastic smooth. It adds 10-20% to print time but produces glass-smooth top surfaces.
The fix: Enable ironing in your slicer settings. Recommended settings:
- Ironing pattern: Zigzag (most consistent results)
- Ironing flow: 10-15% (just enough to fill micro-gaps, not enough to over-extrude)
- Ironing speed: 15-20mm/s (slow for best results)
- Ironing spacing: 0.1mm (fine passes for smooth finish)
- Iron only highest layer: Enable this to avoid ironing internal top surfaces (saves time)
Ironing works best on flat, horizontal surfaces. It’s less effective on curved or angled tops. For models with large flat areas — boxes, plaques, nameplates — ironing is transformative. For organic shapes, it provides marginal improvement.
One caveat: ironing can occasionally cause surface blemishes if the flow rate is too high. If you see tiny ridges or bumps after enabling ironing, reduce the ironing flow to 8-10%.
Cause 7: Wet Filament
Moisture in filament creates steam bubbles during extrusion, which leave tiny pits, bumps, and rough texture on surfaces. Top layers are especially affected because they’re the most visible and any surface imperfection is immediately noticeable.
Symptoms of wet filament:
- Popping or sizzling sounds during printing
- Tiny bubbles visible in extruded lines
- Rough, pitted surface texture
- Inconsistent extrusion width
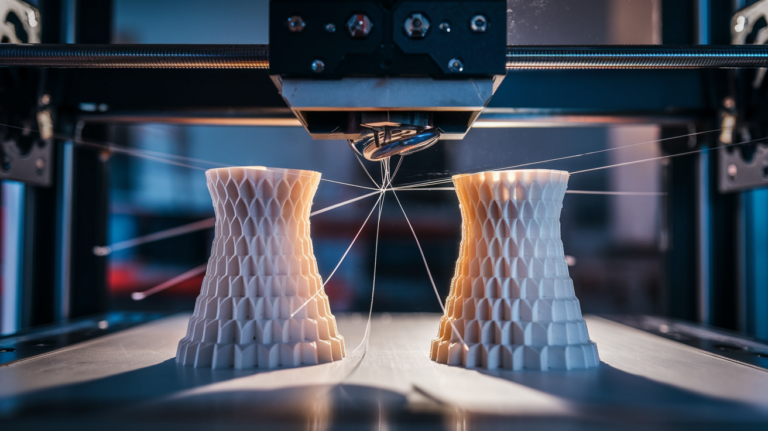
- Stringing that wasn’t there before
The fix: Dry your filament. PLA: 45°C for 4-6 hours. PETG: 65°C for 6-8 hours. ABS: 80°C for 4-6 hours. Use a dedicated filament dryer, food dehydrator, or your printer’s heated bed under a box (makeshift but works). Going forward, store filament in sealed bags with desiccant packets.
Cause 8: Temperature Too High
Excessive hotend temperature makes plastic too runny. On top layers, runny plastic doesn’t hold its shape — it pools, creates uneven surfaces, and shows more imperfections. You might also see discoloration or a glossy-but-bumpy texture.
The fix: Run a temperature tower test to find the optimal temperature for your filament. For top surface quality specifically, the lower end of the acceptable range usually produces better results because the plastic holds its shape immediately after extrusion. If your filament works at 195-215°C, try 200°C for the best top finish.
Cause 9: Inconsistent Extrusion (Mechanical Issues)
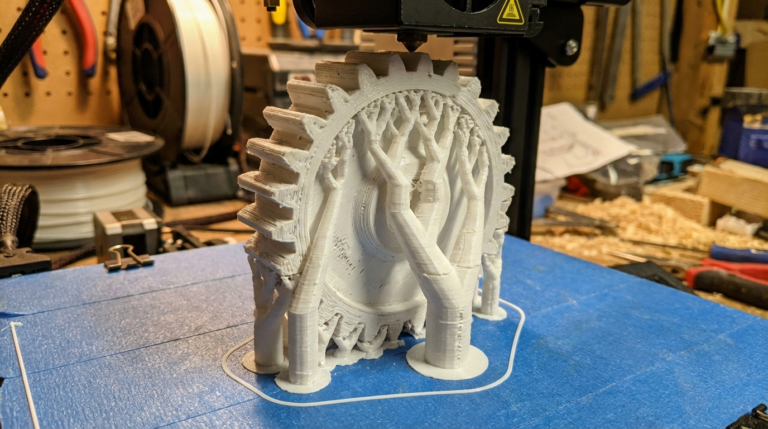
Sometimes rough top surfaces indicate a mechanical problem rather than a settings issue:
- Worn nozzle: A nozzle worn to a larger diameter extrudes inconsistently. Replace nozzles every 500-1000 print hours for brass, or switch to hardened steel.
- Extruder tension: Too loose = slipping filament = inconsistent flow. Too tight = grinding filament = same result. Adjust the tension arm until the extruder grips firmly without deforming the filament.
- Partial clog: Debris in the nozzle restricts flow intermittently. Perform a cold pull to clean it out.
- PTFE tube gap: On Bowden printers, a gap between the PTFE tube and nozzle inside the hotend allows filament to pool and ooze inconsistently. Ensure the tube is cut square and seated flush against the nozzle.
The Quick-Fix Checklist
Before you start changing settings at random, work through this checklist in order. Each step builds on the previous one:
- Check top layer count. Is it at least 5 for 0.2mm layer height? If not, increase it.
- Check infill density. Is it at least 15%? Bump it up if not.
- Slow down top layers. Set top speed to 25mm/s.
- Enable ironing (optional but effective for flat surfaces).
- Increase fan speed to 100% for PLA, 50% for PETG on top layers.
- Calibrate flow rate if you haven’t already.
- Check filament moisture. Dry it if there’s any doubt.
- Fine-tune temperature. Try the lower end of your range.
Most rough top surface issues resolve at step 1 or 2. If you get through the whole list and still have problems, you’re likely looking at a hardware issue — check the nozzle, extruder, and PTFE tube.
Real-World Examples
Scenario 1: “My top surface shows a grid pattern.” You can see the infill underneath the top layers. Fix: increase top layers to 6 and infill to 20%. The grid pattern completely disappears.
Scenario 2: “Top is smooth in some areas but rough in others.” This is usually a cooling or speed issue. The smooth areas are where the nozzle moved slowly (outer perimeters) and the rough areas are where it sped up (infill-like motion on top). Fix: reduce top layer speed uniformly to 25mm/s.
Scenario 3: “Top surface has tiny pits and craters.” Classic wet filament symptom. The pits are where steam bubbles burst through the surface. Fix: dry the filament for 4-6 hours at the appropriate temperature.
Scenario 4: “Top surface looks good but has a wavy texture.” This is usually over-extrusion on the top layer. Too much plastic creates ridges that the nozzle pushes around. Fix: reduce top surface flow to 95% or reduce overall flow rate by 2-3%.
The Bottom Line
Rough top surfaces are frustrating because they’re the most visible part of any print. But they’re also one of the most diagnosable problems in 3D printing. In 90% of cases, the fix is simply more top layers, denser infill, and slower top speed. Add ironing for truly flat surfaces, and you’ll get results that look like they came from an injection mold.
The key insight is that top surfaces are the hardest thing your printer does — depositing plastic over partially hollow space and making it look solid and smooth. Giving the printer more material (layers), more support (infill), and more time (slower speed) solves almost every top surface issue without touching a single piece of hardware.