Best 3D Printer Enclosures: DIY Build and Buying Guide
If you’ve ever tried printing ABS without an enclosure, you already know the pain — warping corners, cracking layers, and that lovely chemical smell wafting through your workspace. An enclosure solves all three problems by maintaining a stable, warm environment around your printer. But building or buying the right enclosure isn’t as simple as tossing a cardboard box over your Ender 3.
In this guide, I’ll cover everything you need to know about 3D printer enclosures: why you need one, what to look for, the best pre-built options, and how to build your own for under $50.
Why Do You Need an Enclosure?
An enclosure isn’t just a “nice to have” — for certain materials, it’s practically mandatory. Here’s what an enclosure does for your prints:
- Eliminates warping: By keeping the ambient temperature around 35–45°C, an enclosure prevents the rapid cooling that causes corners to curl up
- Prevents layer cracking: Temperature differentials between layers cause delamination. A consistent enclosure temp keeps layers bonded
- Contains fumes: ABS, ASA, and Nylon all emit VOCs during printing. An enclosure with a carbon filter keeps your air clean
- Reduces noise: A well-built enclosure can cut printer noise by 10–15 dB
- Protects prints from drafts: Even PLA benefits from protection against air conditioning or open windows
- Keeps dust and pets out: Cat hair in your first layer is a real problem for some of us
Which Materials Need an Enclosure?
| Material | Enclosure Needed? | Ideal Chamber Temp |
|---|---|---|
| PLA | Optional (helps with drafts) | 25–30°C |
| PETG | Recommended | 30–40°C |
| ABS | Required | 40–50°C |
| ASA | Required | 40–50°C |
| Nylon | Strongly recommended | 40–55°C |
| Polycarbonate | Required | 50–70°C |
| TPU | Optional | 25–35°C |
Important note for PLA: You can actually over-heat PLA in an enclosure. PLA has a low glass transition temperature (~60°C), so if your enclosure gets too hot, PLA prints will soften and deform. If you’re printing PLA in an enclosure, crack the door open or add ventilation.
Best Pre-Built Enclosures
1. Creality Enclosure (Budget Pick)
A simple tent-style enclosure made of fire-retardant fabric with a clear window panel. Fits most printers up to 480 x 600 x 720mm. It won’t win any beauty contests, but it gets the job done for under $60. Easy to fold and store when not in use.
2. Sovol Enclosure
Similar concept to the Creality but with better build quality and a more rigid frame. Features a front zipper for access and a top opening for filament feeding. Around $70–80.
3. SUNLU Filament Dryer Box S4 + Enclosure Combo
SUNLU makes a combination dryer and enclosure system that feeds dry filament directly into the enclosure. Clever solution if moisture is a constant battle in your workspace.
4. Prusa Original Enclosure (Premium Pick)
Designed specifically for Prusa printers, this is a purpose-built IKEA Lack-based enclosure kit with proper ventilation, cable management, and an optional HEPA + carbon filter. Around $200 but beautifully engineered.
5. Bambu Lab AMS Enclosure
If you’re in the Bambu ecosystem, their official enclosure integrates perfectly with the X1 Carbon and P1S. Temperature-controlled, great sealing, but locked to their ecosystem.
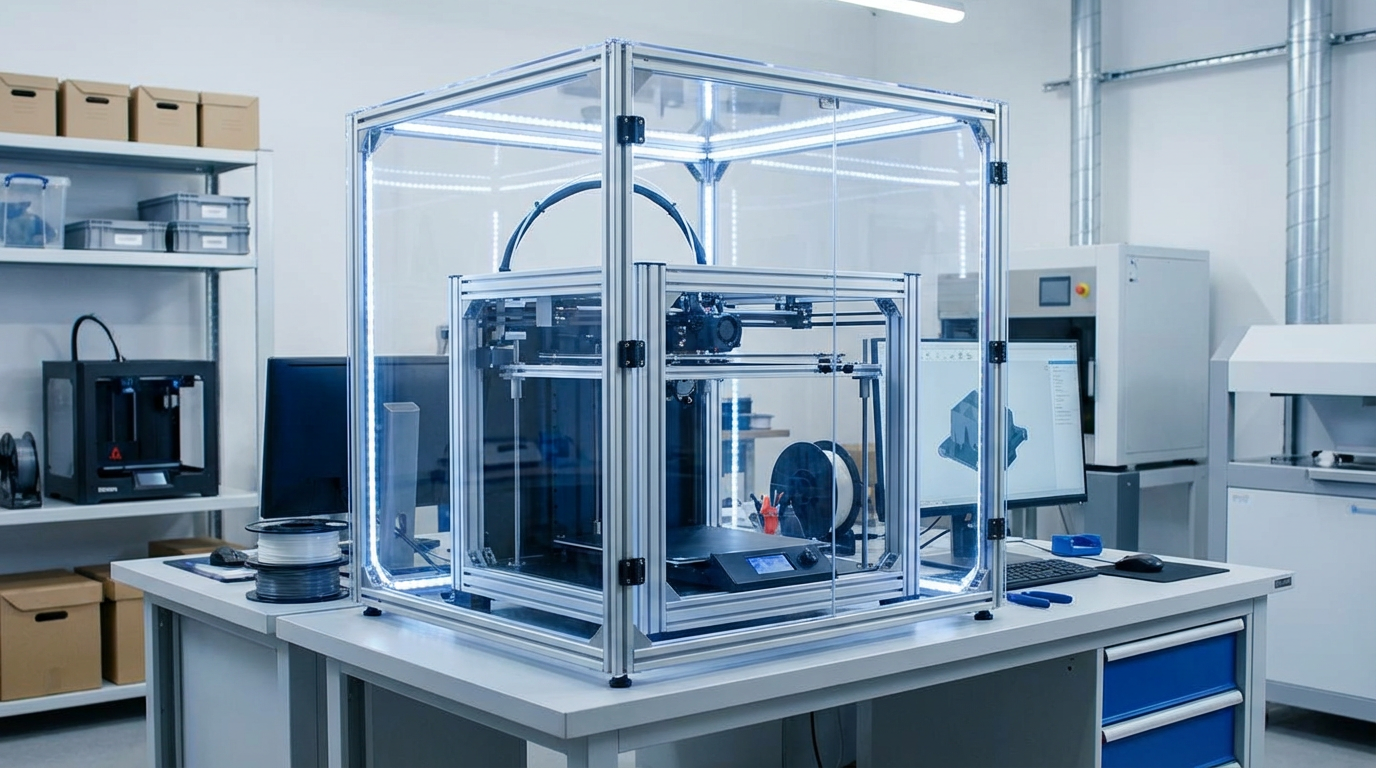
DIY Enclosure: The IKEA LACK Method
The most popular DIY enclosure in the 3D printing community uses two IKEA LACK tables ($12.99 each). This has been the go-to design for years, and for good reason — it’s cheap, it works, and it looks decent.
Materials needed:
- 2× IKEA LACK tables ($26 total)
- Acrylic or polycarbonate sheets for sides and door (3mm thick, ~$15–25)
- Hinges and magnetic catches for the door ($5)
- LED strip for interior lighting (optional, $8)
- Printed brackets and corners (print these yourself)
Total cost: $40–65
Build steps:
- Stack two LACK tables — one is the base, one is the top. Remove the legs from the top table and attach them to the bottom table’s top surface to create the frame
- Cut acrylic panels to fit the back and two sides
- Cut a front panel with hinges to serve as a door
- Add magnetic catches so the door stays closed
- Print corner brackets to hold everything together (plenty of free designs on Printables and Thingiverse)
- Add LED lighting inside for visibility
- Cut a small hole in the back panel for cables and filament path
Advanced Enclosure Features
Temperature Control
For engineering materials like ABS and PC, you may want active temperature control. Options include:
- PTC ceramic heater: Small, safe, efficient. A 100W PTC heater with a thermostat can maintain 50°C+ chamber temps
- Incandescent light bulb: Old-school but effective. A 60W bulb generates plenty of heat. Use a dimmer for temperature control
- Heated bed excess: Many printers radiate enough heat from the bed alone to maintain 35–40°C in a sealed enclosure
Air Filtration
If you’re printing ABS or ASA, add a filtration system:
- A small 80mm fan with a HEPA filter removes particulate matter
- Add activated carbon after the HEPA filter to capture VOCs
- The NEVERMORE filter system (originally designed for Voron printers) is excellent and well-documented
Camera and Monitoring
Adding a camera inside the enclosure lets you monitor prints remotely. A basic USB webcam with OctoPrint, or a WiFi camera like the Wyze Cam, works great. Mount it in a corner where it has a clear view of the build plate.
Common Enclosure Mistakes
- Enclosing electronics: Your printer’s mainboard and stepper drivers generate heat. If these are inside the enclosure, they can overheat. Either move the electronics outside or add a dedicated cooling fan for them
- No ventilation option: Even for high-temp materials, you sometimes need to vent the enclosure. Always include a way to open it or add a fan
- Filament spool inside: Heat and humidity inside the enclosure can actually damage filament on the spool. Feed from outside through a small hole, or use a sealed filament dryer
- Forgetting about the power supply: PSUs have thermal limits. If yours is inside the enclosure, monitor its temperature. Many people relocate the PSU to the outside
Do You Really Need One?
If you only print PLA and PETG in a room without drafts, honestly, you probably don’t need an enclosure. Save your money for better filament or a direct drive upgrade.
But if any of these apply to you, an enclosure is worth every penny:
- You want to print ABS, ASA, Nylon, or PC
- Your printer is in a garage, basement, or drafty room
- You care about fume safety
- You have pets or kids who might touch a hot printer
- You need consistent results for production or business
Start with the IKEA LACK build if you’re on a budget, or grab a Creality tent enclosure for instant results. Either way, your prints will thank you — especially when winter hits and your shop temperature drops.