Silk PLA Filament: Print Settings, Tips, and Best Brands
What Makes Silk PLA Different From Regular PLA?
Walk into any 3D printing forum and you’ll see the same question pop up every week: “Why do my silk PLA prints look terrible?” The answer usually comes down to one thing — people treat silk PLA like regular PLA, and it absolutely is not the same material.
Silk PLA gets its distinctive shimmering, metallic look from additives blended into the base PLA polymer. These additives change how light reflects off the printed surface, creating that gorgeous pearlescent sheen. But they also change how the filament behaves during printing. The additives reduce inter-layer adhesion, alter flow characteristics, and make the material more sensitive to temperature changes.
Understanding these differences is the key to getting stunning silk PLA prints instead of stringy, blobby messes. Let’s break down exactly what settings you need to adjust and why.
Temperature Settings for Silk PLA
Temperature is where most people go wrong with silk PLA. Regular PLA prints happily at 200-210°C, but silk PLA generally needs to run 5-15°C hotter than your standard PLA temperature.
Start at 215°C and work up from there. Many silk filaments perform best between 215-230°C. Why so hot? The metallic additives increase the viscosity of the melted filament. Without enough heat, the material doesn’t flow smoothly, leading to under-extrusion, poor layer adhesion, and inconsistent surface finish — exactly the opposite of what you want from a material chosen for its looks.
The best approach is to print a temperature tower specifically with your silk PLA. Don’t rely on results from regular PLA tests. Look for the temperature that gives you the smoothest, shiniest surface with minimal stringing. A little stringing at the right temperature beats a matte, rough surface at a lower one — you can always clean up strings, but you can’t fix dull silk PLA after the fact.
For the bed temperature, 60-65°C works well for most silk PLA brands on PEI or glass beds. Some users report better results at 55°C to reduce elephant foot, but don’t go below 50°C or adhesion becomes unreliable.
Print Speed: Slower Than You Think
Silk PLA rewards patience. The shimmer effect shows best on smooth, consistent extrusion lines, and that means slowing down compared to regular PLA.
My recommended speeds for silk PLA:
- Outer walls: 30-40 mm/s (this is critical for surface quality)
- Inner walls: 50-70 mm/s
- Infill: 80-100 mm/s
- Top surface: 25-35 mm/s
- First layer: 20-25 mm/s
Yes, those outer wall speeds are slow compared to what you might run with regular PLA. But silk PLA at 30mm/s produces that mirror-smooth finish that makes people ask “wait, that’s 3D printed?” Push it to 60mm/s and you’ll get visible vibration marks and inconsistent shimmer. The whole point of silk PLA is the surface — don’t sabotage it for a few minutes of saved print time.
Retraction Settings
Silk PLA is notorious for stringing. Those same additives that create the shimmer also make the melted filament stringier and more prone to oozing. Getting retraction right is essential.
For direct drive extruders:
- Retraction distance: 1.0-1.5mm (slightly more than standard PLA)
- Retraction speed: 25-35 mm/s
- Wipe distance: 2mm
For Bowden tube setups:
- Retraction distance: 5-7mm
- Retraction speed: 30-40 mm/s
- Wipe distance: 3mm
Enable “wipe while retracting” if your slicer supports it (OrcaSlicer and PrusaSlicer both do). This makes the nozzle travel along the perimeter while retracting, which helps break the string at the wall surface rather than leaving a blob.
If you’re still getting strings after dialing in retraction, try enabling “retract on layer change” and reducing travel speed to 120-150mm/s. Sometimes silk PLA strings aren’t caused by oozing — they’re caused by the nozzle moving so fast that it drags filament off the previous layer.
Cooling: The Balancing Act
Here’s where silk PLA gets tricky. Regular PLA loves maximum cooling — blast the fan at 100% and you’re golden. Silk PLA is more nuanced.
Too much cooling makes the shimmer effect less pronounced because the surface solidifies before it can smooth out. Too little cooling causes drooping, curling, and poor overhangs. The sweet spot for most silk PLA:
- Fan speed: 70-85% (not 100%)
- First 3 layers: Fan off or at 30%
- Bridges: 100% fan
- Overhangs: 90% fan
Reducing fan speed slightly lets each layer stay warm enough to smooth out just a bit more before solidifying, which enhances the silk effect. This is one of those small tweaks that makes a visible difference — side by side, 80% fan silk PLA looks noticeably shinier than the same filament at 100% fan.
Layer Height and Line Width
Silk PLA’s shimmer comes from how light bounces off each layer line. This means layer height has a direct impact on the visual effect:
0.16-0.2mm layer height produces the best shimmer on vertical walls. Each layer is wide enough to catch light but not so thick that you see obvious steps. Going below 0.12mm actually reduces the silk effect — the layer lines are too fine to produce the characteristic sheen.
For line width, stick with 0.4-0.45mm on a 0.4mm nozzle. Wider lines (0.5mm+) can cause inconsistent extrusion that looks splotchy on silk filament. Narrower lines work but take longer without meaningful quality improvement.
Design Tips for Silk PLA
Not every model looks good in silk PLA. The material shines (literally) on specific types of geometry:
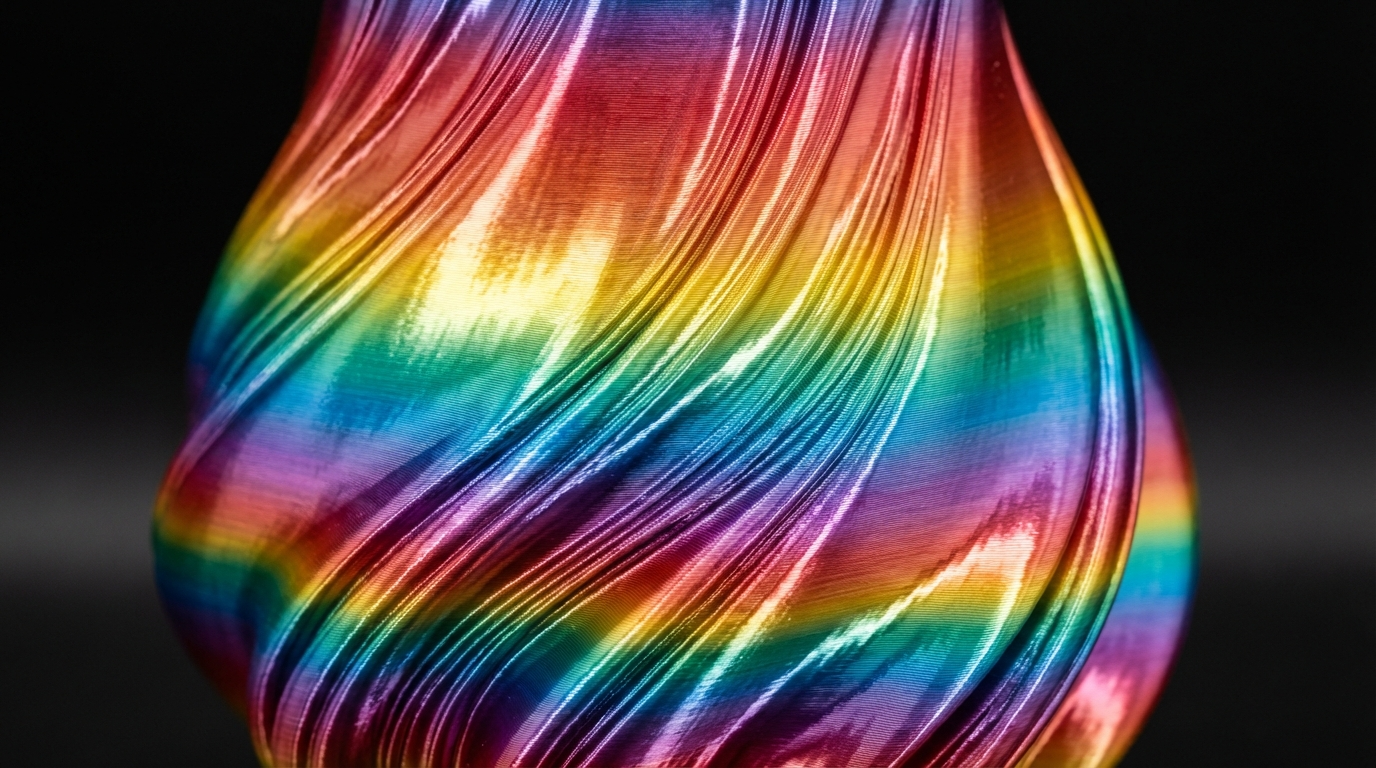
Curved surfaces: Vases, organic shapes, and smooth curves show off the shimmer beautifully. The light catches different angles as it moves across the surface, creating a gradient effect that flat surfaces can’t match.
Minimal overhangs: Silk PLA doesn’t handle steep overhangs as well as regular PLA because of the reduced cooling. Design your models with overhangs under 45° when possible, or orient them to minimize overhang areas.
Large, smooth faces: The shimmer effect is most dramatic on large, uninterrupted surfaces. Models with lots of small details or sharp edges break up the light reflection and reduce the visual impact.
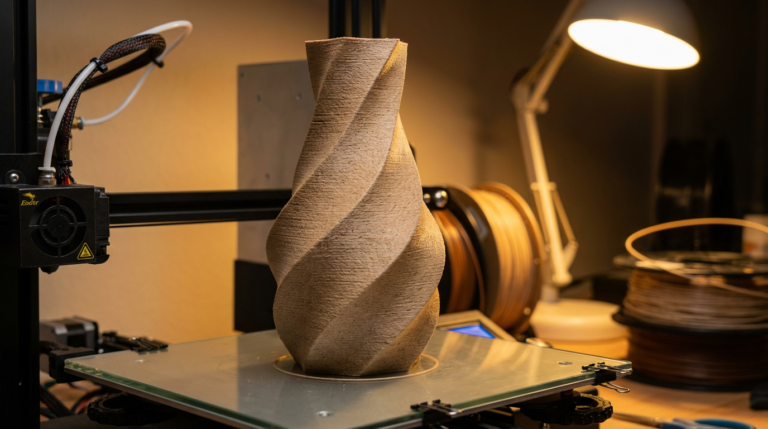
Vase mode prints are where silk PLA absolutely shines. A single-wall vase printed in spiral mode showcases the shimmer effect with zero seam lines and consistent surface quality. If you haven’t tried printing a vase in silk PLA yet, do it. It’s the killer demo for this material.
Post-Processing Silk PLA
One advantage of silk PLA: it often needs minimal post-processing. The surface finish straight off the printer is usually the best finish you’ll get. Sanding silk PLA removes the shimmer effect, so avoid it unless you’re specifically going for a matte look.
For minor stringing cleanup, a heat gun on its lowest setting held 15-20cm away for a few seconds will melt the strings without affecting the surface. A lighter works too, but be careful — silk PLA can discolor from heat faster than regular PLA.
If you want to enhance the shimmer further, a light coat of clear gloss spray (Rust-Oleum Crystal Clear or similar) deepens the metallic effect and adds UV protection. One thin coat is plenty — multiple coats can create an uneven glossy film that looks worse than the raw print.
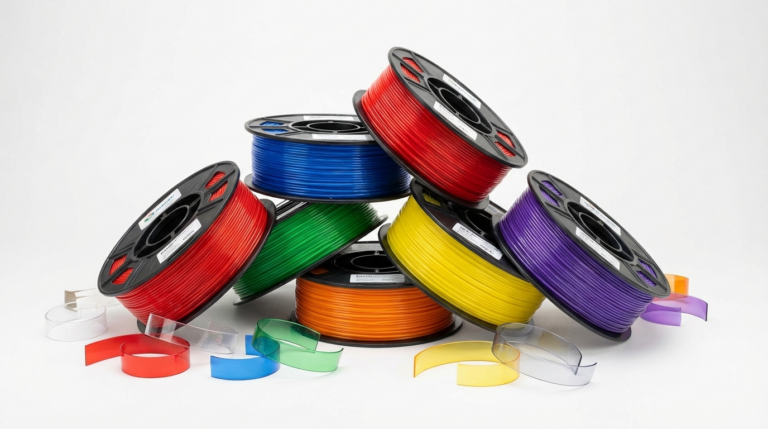
Best Silk PLA Brands to Try
Not all silk PLAs are created equal. After testing dozens of spools, here are my top picks:
- TTYT3D Silk PLA — The original that started the silk trend. Consistent quality, wide color range, reasonable price. Great starter choice.
- Eryone Dual Color Silk — Two-color silk that shifts between shades depending on viewing angle. Stunning on vases and organic prints.
- Polymaker PolyLite Silk PLA — Premium option with excellent consistency and slightly better layer adhesion than budget silk PLAs. Worth the extra cost if surface quality is your priority.
- Sunlu Silk PLA — Budget-friendly with surprisingly good shimmer. Can be stringier than premium options, but the price makes it great for experiments.
- eSUN Silk PLA — Good middle ground between price and quality. The gold and copper colors are particularly impressive.
Troubleshooting Common Silk PLA Issues
Dull, matte surface: Temperature too low. Increase by 5°C increments until the shimmer returns. Also check fan speed — try reducing to 75%.
Excessive stringing: Increase retraction distance by 0.5mm and reduce travel speed. Enable wipe on retract.
Poor layer adhesion (layers splitting): Temperature too low or cooling too high. Increase nozzle temp and reduce fan speed. This is the most common structural failure with silk PLA.
Blobs on surface: Reduce flow rate by 2-3%. Silk PLA often needs slightly less flow than regular PLA due to the additives changing the viscosity.
Warping: Silk PLA warps slightly more than regular PLA. Use a brim on larger prints and keep bed temperature at 60°C. An enclosure helps for prints taller than 100mm.
Final Thoughts
Silk PLA is one of those materials that looks incredible when printed correctly and awful when settings are wrong. The key is understanding that it needs higher temperatures, slower speeds, moderate cooling, and careful retraction compared to standard PLA. Dial in those four parameters and you’ll produce prints that genuinely impress people. Just remember: this material is all about the surface finish. Any setting choice that improves surface smoothness is the right one, even if it costs you some print speed.