How to Replace a Bowden Tube on Your 3D Printer (Complete Guide)
If your 3D printer is experiencing inconsistent extrusion, unexpected clogs, or PTFE particles in your prints, it might be time to replace the bowden tube. This critical component guides filament from the extruder motor to the hotend, and over time it degrades — especially if you print at higher temperatures. In this guide, I’ll walk you through when and how to replace your bowden tube, the tools you need, and the best upgrades available.
What Is a Bowden Tube and Why Does It Matter?
A bowden tube is the PTFE (polytetrafluoroethylene) tube that connects your extruder to the hotend on bowden-style 3D printers. Unlike direct drive systems where the motor sits right on top of the hotend, bowden setups use this tube to push filament over a longer distance. This reduces weight on the print head, allowing faster movements and less ghosting — but it introduces a potential failure point.
The tube serves two purposes: it provides a low-friction path for filament to travel through, and in many hotends (especially all-metal ones excluded), the PTFE tube extends into the heatbreak to create a seal against the nozzle. When this tube degrades, you’ll start seeing extrusion problems that no amount of retraction tuning can fix.
Signs Your Bowden Tube Needs Replacement
Before you tear apart your printer, make sure the tube is actually the problem. Here are the telltale signs:
- Inconsistent extrusion — thin spots, gaps, or varying line widths that weren’t there before
- Increased stringing — retraction settings that used to work perfectly no longer help
- Frequent clogs — especially if they happen at the same spot repeatedly
- Visible damage — discoloration (the tube turns brown or yellow near the hotend), kinks, or flat spots
- Grinding filament — the extruder gear chews into filament because of increased resistance in the tube
- Popping or clicking sounds — pressure builds up behind a partially blocked or deformed tube
If your printer is more than 6 months old and you print regularly, the bowden tube has likely seen better days. High-temperature printing with PETG or ABS accelerates degradation significantly — stock PTFE tubes start breaking down above 240°C.
Tools and Materials You’ll Need
Gather these before you start:
- Replacement bowden tube — Capricorn XS (blue) is the gold standard upgrade for 1.75mm filament
- Tube cutter or sharp razor blade — a clean, square cut is essential
- PC4-M6 and PC4-M10 pneumatic fittings (also called couplers) — replace these too while you’re at it
- Small wrench set — for removing the pneumatic fittings
- Needle or thin wire — for cleaning out the hotend while it’s apart
- Caliper — to measure the tube length accurately
Step-by-Step Bowden Tube Replacement
Step 1: Remove the Old Tube
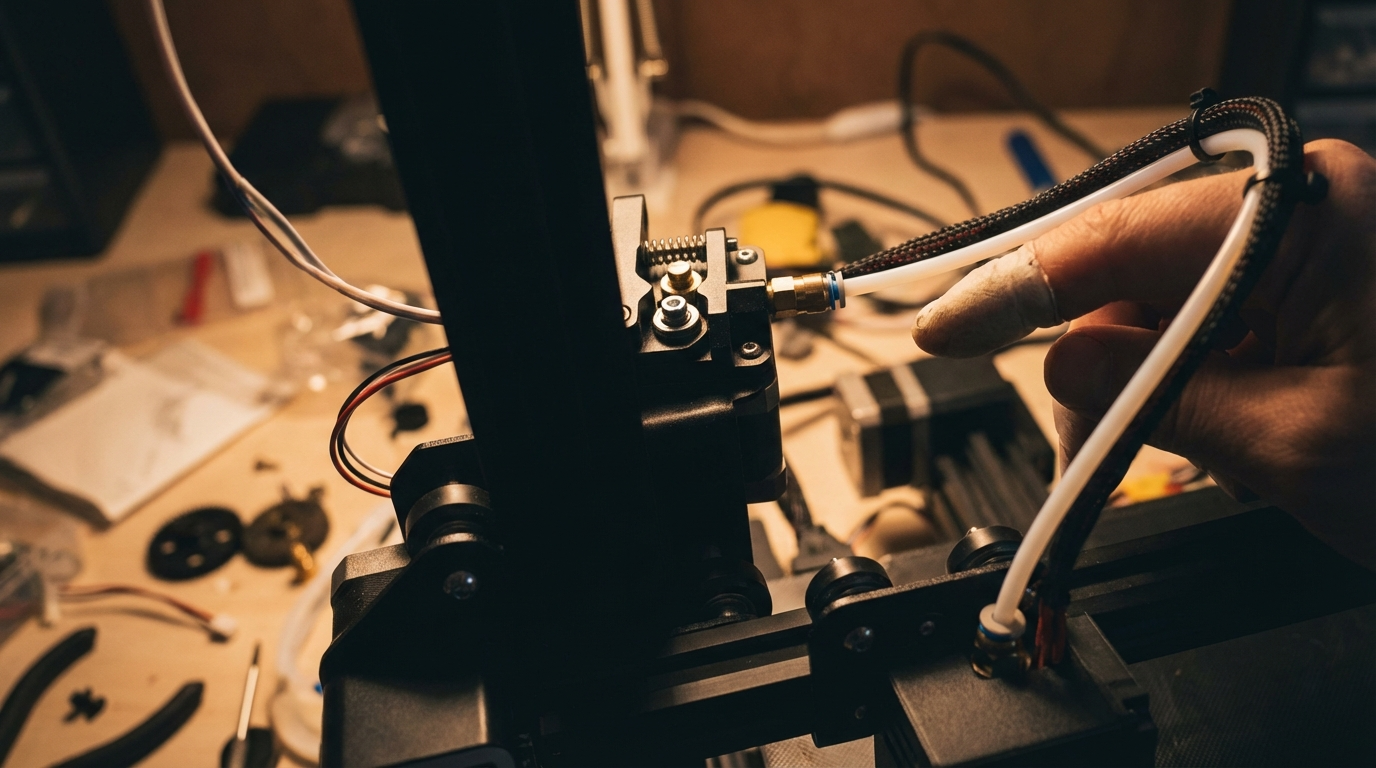
Heat your hotend to printing temperature (around 200°C for PLA) to soften any filament inside. Retract the filament fully, then turn off the heater. Push down on the pneumatic fitting collar at the hotend side and pull the tube out. Repeat at the extruder side. If the fitting is worn and won’t grip, you’ll see why replacing fittings matters.
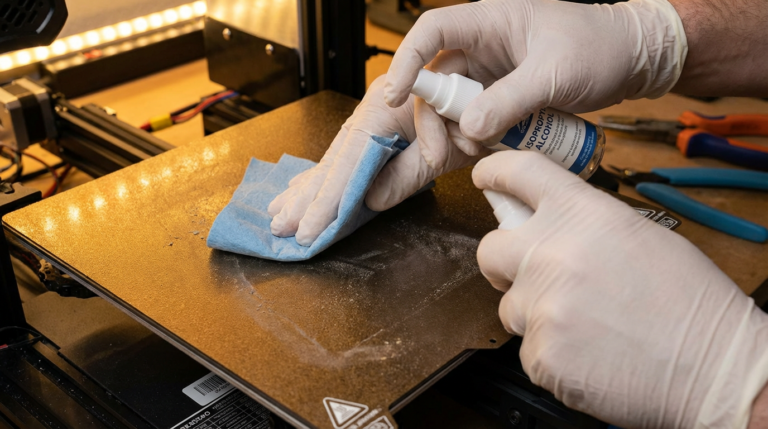
Step 2: Inspect and Clean
Look inside the old tube. You’ll likely see discoloration at the hotend end — that’s heat damage. Check the hotend throat for any debris or PTFE fragments. Use a needle or cleaning filament to clear any blockage. This is also a great time to do a cold pull if you suspect residue buildup.
Step 3: Cut the New Tube
Measure the old tube and cut the new one to the same length. The cut must be perfectly square — an angled cut creates a gap at the nozzle junction where molten filament pools and causes clogs. If you’re using Capricorn tubing, they often include a small cutting guide. A sharp razor blade on a flat surface works well too. After cutting, make sure there are no burrs inside the tube.
Step 4: Install New Fittings
Unscrew the old pneumatic fittings and thread in the new ones. Don’t overtighten — these are brass threading into aluminum in most cases. Finger-tight plus a quarter turn with a wrench is usually sufficient.
Step 5: Install the New Tube
Push the tube into the hotend side first. For printers where the PTFE interfaces with the nozzle (like the Ender 3 stock hotend), push it all the way down until it seats against the nozzle. You should feel it stop. Then release the collar and give it a gentle tug to make sure it’s locked. Repeat at the extruder side.
Step 6: Verify the Installation
Heat the hotend back up. Load filament manually by pushing it through — it should glide smoothly without resistance until it hits the melt zone. Extrude 50-100mm and watch for consistent flow. If it’s uneven, the tube might not be seated properly against the nozzle.
Capricorn vs Stock PTFE: Is the Upgrade Worth It?
Short answer: yes. Capricorn XS tubing has a tighter inner diameter (1.9mm vs the standard 2.0mm), which means less filament play inside the tube. This translates to:
- More responsive retractions
- Less stringing
- Better dimensional accuracy
- Higher temperature tolerance (up to 260°C vs 240°C for generic PTFE)
At around $10-15 for a meter of tubing plus fittings, it’s one of the best price-to-performance upgrades you can make on a budget bowden printer. The tighter tolerance does mean you need high-quality filament with consistent diameter — cheap filament with ±0.1mm tolerance might have feeding issues.
Common Mistakes to Avoid
Even a simple tube swap can go wrong. Watch out for these:
- Gap between tube and nozzle — this is the #1 cause of clogs after a bowden swap. The tube must seat flush against the nozzle. Some people use the “Luke’s hotend fix” (a small piece of tubing inside the heatbreak) to ensure a perfect seal.
- Tube too short — if the tube doesn’t reach comfortably, it’ll pull out during prints when the head moves to far corners. Add 10-15mm of slack.
- Tube too long — excessive tube creates a large loop that increases friction and reduces retraction effectiveness. Route it with a gentle curve, no sharp bends.
- Reusing old fittings — the teeth inside pneumatic couplers wear down. Old fittings are the #1 reason tubes slip out mid-print. Always replace them.
- Not recalibrating retraction — a new tube (especially Capricorn with tighter ID) may need different retraction settings. Start with 4-5mm at 40mm/s for bowden and test from there.
How Often Should You Replace It?
There’s no fixed schedule, but here are general guidelines:
- Stock PTFE tube — every 3-6 months with regular use, sooner if printing above 230°C often
- Capricorn XS — every 6-12 months, depending on printing temperatures
- All-metal hotend users — the tube only guides filament through the cold zone, so degradation is much slower. Replace when you notice feeding issues.
Keep a spare tube and fittings on hand. When your printer starts acting up mid-project, the last thing you want is to wait for shipping.
Final Thoughts
Replacing a bowden tube is one of those maintenance tasks that every FDM printer owner needs to learn. It takes about 15 minutes, costs under $15, and can solve a surprising number of print quality issues. If you’ve been chasing stringing, clogs, or inconsistent extrusion with software settings alone, the hardware might be the real culprit. Swap that tube, replace the fittings, and you’ll likely feel like you’ve got a brand new printer.