Dual Extruder 3D Printing: Complete Setup and Tips Guide
What Is Dual Extruder 3D Printing?
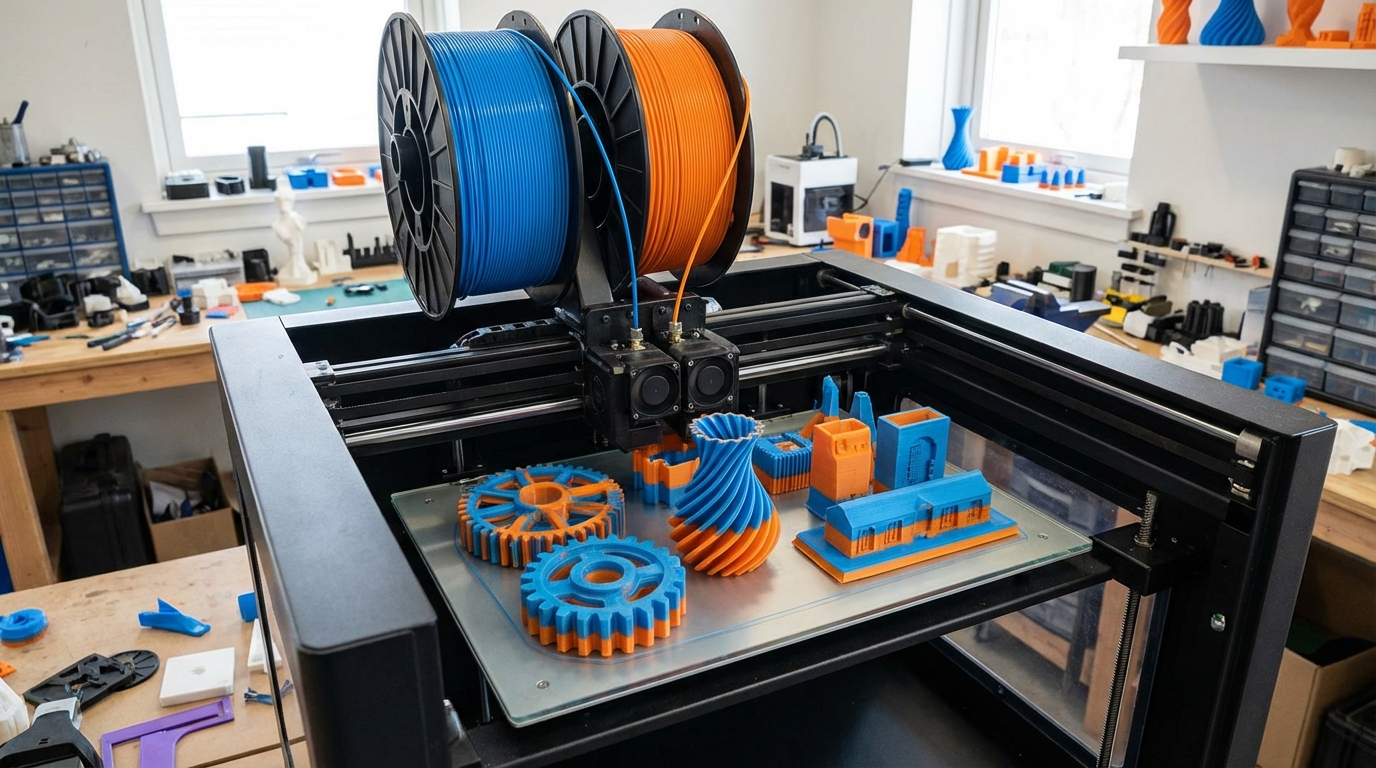
If you’ve been printing for a while, you’ve probably hit the wall: single-material prints can only take you so far. Enter dual extruder 3D printing — the ability to use two different filaments in a single print job. Whether you’re after multi-color models, soluble supports, or combining rigid and flexible materials, a dual extruder setup opens up a world of possibilities that single-nozzle machines simply can’t match.
But here’s the catch — dual extrusion isn’t just “twice the nozzles, twice the fun.” It comes with its own set of challenges, calibration headaches, and slicer settings that can make or break your prints. In this guide, I’ll walk you through everything you need to know to get your dual extruder setup dialed in and producing clean, reliable two-material prints.
Types of Dual Extrusion Systems
Not all dual extruder setups are created equal. Understanding the differences will help you pick the right approach for your needs and budget.
Independent Dual Extruders (IDEX)
IDEX machines have two completely separate print heads that move independently on the X-axis. This is the gold standard for dual extrusion. Each extruder can park itself off to the side when not in use, which dramatically reduces oozing and stringing from the inactive nozzle. Machines like the Flashforge Creator Pro and the BCN3D Sigma use this design. The downside? They’re more expensive and mechanically complex.
Shared Carriage Dual Nozzles
This is the more common budget-friendly approach. Two hotends sit side by side on the same carriage. The inactive nozzle stays at print height, which means it can drag across your print and leave marks or pick up material. You’ll need to use ooze shields or prime towers to manage this. The Creality CR-X and many older dual-extruder machines use this design.
Single-Nozzle Multi-Material (MMU/AMS)
Systems like Prusa’s MMU3 or Bambu Lab’s AMS feed multiple filaments through a single hotend. This eliminates the offset calibration headache entirely, but introduces purge waste — every material switch requires pushing out the old filament before the new one can print. These systems work great for multi-color PLA prints but can struggle with material combinations that have different temperature requirements.
Tool-Changing Systems
The newest approach uses a tool-changing mechanism where the printer physically swaps entire hotend assemblies. The E3D ToolChanger and Prusa XL use this design. It combines the benefits of IDEX (no inactive nozzle interference) with the ability to use radically different materials. It’s also the most expensive option.
Setting Up Your Dual Extruder: The Critical Steps
Before you even think about slicing a dual-material print, you need to get your hardware dialed in. Skip any of these steps and you’ll waste hours troubleshooting later.
Step 1: Nozzle Offset Calibration
This is the single most important calibration for dual extrusion. Your slicer needs to know the exact X and Y offset between your two nozzles. Even a 0.1mm error will show up as misaligned layers in your prints.
Print a calibration pattern — most slicers include one, or you can find them on Thingiverse. The pattern prints alternating lines from each extruder, and you measure which alignment marks line up best. Enter the offset values in your slicer’s printer settings. Some printers store these in firmware instead.
Step 2: Z-Height Matching
Both nozzles need to be at exactly the same height. If one is even slightly lower, it’ll scrape across layers printed by the other nozzle. On shared-carriage designs, this usually means physically adjusting one nozzle with a set screw until both touch the bed at the same point. IDEX and tool-changing systems handle this in firmware.
Step 3: Retraction and Prime Settings
Dual extrusion demands aggressive retraction on tool changes. When one extruder becomes inactive, you need to pull the filament back far enough to prevent oozing — typically 2-4mm for direct drive or 6-10mm for Bowden setups. When the extruder becomes active again, it needs to prime (push filament forward) the same amount plus a little extra to account for any material that leaked out during the wait.
Slicer Settings That Matter
Prime Tower vs. Ooze Shield
A prime tower is a small pillar printed alongside your model. Every time the active extruder switches, both nozzles wipe on the tower first. This purges any contaminated material and primes the nozzle before it touches your actual print. The downside is wasted material and print time.
An ooze shield is a thin wall printed around your model. It catches any drips or strings from the inactive nozzle. It uses less material than a prime tower but isn’t as effective at purging contamination between switches.
My recommendation: use a prime tower for any print where color bleed matters. Use an ooze shield for functional prints where appearance is secondary.
Filament-Specific Temperature Management
If you’re combining materials with different print temperatures (say, PLA at 200°C and PETG at 240°C), you have two options. You can keep both hotends at their respective temperatures throughout the print — this is faster but increases the risk of heat creep and oozing from the hotter nozzle. Or you can have the slicer lower the inactive nozzle’s temperature by 10-20°C during standby — this reduces oozing but adds time for temperature changes.
Interface Layers for Soluble Supports
One of the biggest advantages of dual extrusion is soluble support material. PVA dissolves in water, HIPS dissolves in limonene, and they leave a perfectly smooth surface where supports used to be. Set your slicer to print 2-3 interface layers of support material between the support structure and your model. The support structure itself can be your primary material to save on expensive soluble filament.
Troubleshooting Common Dual Extrusion Problems
Color Bleed Between Materials
If you see traces of one color contaminating the other, your prime tower isn’t doing enough work. Increase the purge volume in your slicer settings. Going from 100mm³ to 150mm³ usually fixes light contamination. For stubborn cases, some slicers let you add extra wipe movements on the prime tower.
Nozzle Dragging and Surface Marks
On shared-carriage printers, the inactive nozzle sits at the same height as the active one. It will drag across your print, leaving marks or even knocking it off the bed. Solutions include: installing a mechanical nozzle lifter (some printers have this as an upgrade), increasing Z-hop in your slicer settings, or adding a silicone sock to the inactive nozzle to minimize sticking.
Poor Adhesion Between Materials
Not all materials bond well together. PLA-to-PLA with different colors works great. PLA-to-PETG? Not so much — they’ll delaminate at the interface. If you need to combine dissimilar materials, design mechanical interlocking features (dovetails, pins) rather than relying on layer adhesion alone.
Excessive Stringing During Tool Changes
If you see strings trailing from the inactive nozzle across your print, increase retraction distance for tool changes specifically (this is separate from regular retraction settings in most slicers). Also check that your ooze shield or prime tower is positioned so the nozzle travels over it during switches.
Best Practices for Reliable Dual Extrusion
- Start simple: Print a two-color calibration cube before attempting complex models. Fix alignment issues on something quick and cheap.
- Match materials when possible: Two colors of the same material type (PLA + PLA) is always easier than mixing types (PLA + TPU).
- Keep your prime tower: Yes, it wastes material. No, you shouldn’t skip it. The alternative is contaminated prints.
- Clean nozzles between prints: Residual material in an idle nozzle causes problems on the next print. Do a quick purge of each extruder before starting.
- Monitor the first few layers: Dual extrusion failures tend to show up early. Watch the first 5-10 layers to catch alignment or adhesion issues before wasting hours of print time.
- Use a silicone sock: On both hotends. It reduces heat radiation, prevents filament from sticking to the outside of the nozzle, and makes cleanup easier.
When Dual Extrusion Is Worth It (And When It’s Not)
Dual extrusion shines for soluble supports on complex geometries, multi-color prints for display models, and combining rigid + flexible materials in functional parts. It’s overkill for single-material prints that just need different infill patterns, or for prints where you could just paint or dye the finished model.
The reality is that dual extrusion adds complexity, print time, and failure modes. If you’re printing functional parts in a single material, a reliable single-extruder machine will serve you better. But if you’re pushing the boundaries of what’s possible with FDM, dual extrusion is a game-changer worth mastering.
Take the time to calibrate properly, understand your slicer settings, and run test prints before committing to a 20-hour dual-material job. Your patience will pay off in prints that simply aren’t possible any other way.