3D Print Support Interface Settings: The Complete Optimization Guide
What Are Support Interface Settings?
If you’ve ever torn supports off a 3D print only to find a rough, scarred surface underneath, you’re not alone. Default support settings in most slicers are a compromise — they stick well enough to hold up overhangs but leave ugly marks when removed. The secret to clean support removal and smooth overhanging surfaces lies in a feature many users overlook: support interface layers.
Support interface (also called support roof and floor) adds a thin, dense layer between your supports and the actual model. Think of it as a protective barrier — a carefully tuned gap between the scaffolding and the part it holds up. When configured correctly, support interface gives you the best of both worlds: supports that hold overhangs perfectly during printing and separate cleanly afterward.
How Support Interface Works
Standard supports connect directly to your model with the same pattern and density as the rest of the support structure. This creates a strong bond that’s hard to remove cleanly.
Support interface adds dedicated layers at two key transition points:
- Support Roof (Top Interface): Dense layers on top of the support, directly below the overhang surface. This creates a smooth, continuous surface for the model’s first overhang layer to print on
- Support Floor (Bottom Interface): Dense layers at the bottom of the support, directly above the model surface where the support begins. This prevents the support from bonding too tightly to the top of the model below it
The interface layers use a denser pattern (typically 80-100% density) than the main support body (typically 5-15% density), providing a flat surface for overhangs to bridge across while maintaining a controlled separation from the model.
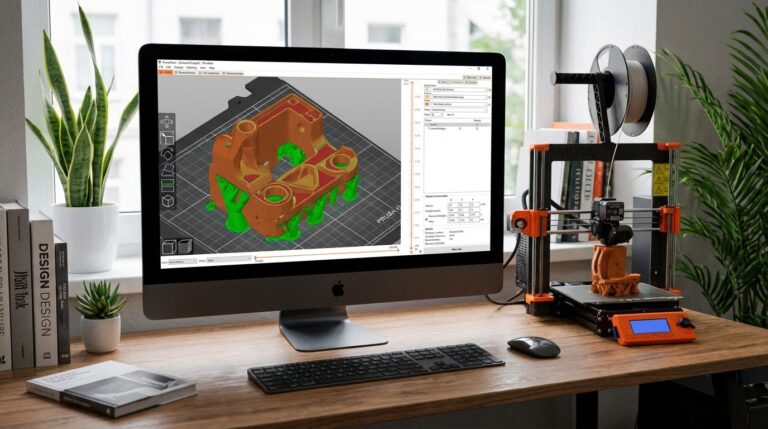
Support Interface Settings in Cura
Cura has comprehensive support interface controls. Here’s how to access and configure them:
Enable Support Interface
Go to Support → Enable Support Interface and check the box. This reveals additional settings:
Key Settings
- Support Interface Thickness: How many mm of interface layers to add. Default is usually 0.8mm (about 4 layers at 0.2mm layer height). I recommend 1.0-1.2mm for best results — at least 5-6 interface layers
- Support Interface Density: How dense the interface pattern is. Default is 33%, which is too sparse. Set this to 80-100% for a smooth overhang surface
- Support Interface Pattern: The pattern used for interface layers. Lines or Zigzag produce the smoothest overhang surfaces. Grid works but can be harder to remove
- Support Interface Resolution: Controls how precisely the interface follows the model boundary. Lower values (0.2-0.4mm) give more accurate interface boundaries but take longer to slice
Separate Roof and Floor Settings
In Cura’s advanced settings, you can configure roof and floor independently:
- Support Roof Thickness: The thick interface on top (under overhangs). This is the most important — set to 1.0-1.2mm
- Support Roof Density: Set to 90-100% for glass-smooth overhangs
- Support Roof Pattern: Lines oriented perpendicular to the model’s first layer direction
- Support Floor Thickness: Interface on the bottom (above model surface). 0.6-0.8mm is usually sufficient
- Support Floor Density: 50-80% is fine — the floor doesn’t need to be as dense as the roof
Support Interface Settings in PrusaSlicer and OrcaSlicer
PrusaSlicer (and its fork OrcaSlicer) handle support interface slightly differently:
Key Settings
- Support → Interface Layers (Top/Bottom): Number of interface layers. Set Top: 3-5, Bottom: 2-3
- Interface Pattern: Choose Rectilinear for smooth surfaces or Concentric for organic shapes
- Interface Spacing: Distance between interface lines. 0.2mm (nearly solid) gives the best overhang quality
- Interface Loop Pattern: Enable for curved/organic models — creates concentric interface loops that conform to the model shape
Contact Z Distance
This is the vertical gap between the interface layer and the model. It’s the single most critical setting for support removability:
- 0 layer heights (0mm): Interface touches the model directly. Best overhang quality, but supports are nearly impossible to remove. Only use with soluble supports (PVA)
- 0.5 layer heights: Very small gap. Great overhang quality, moderate difficulty removing. Good for PETG
- 1 layer height (0.2mm at 0.2mm layers): The default sweet spot. Good overhang quality, supports pop off with moderate force
- 1.5-2 layer heights: Easier removal but rougher overhangs. Better for PLA which tends to bond tightly to supports
Optimizing Interface Settings by Material
Different materials bond to supports with different strengths, so your interface settings should change accordingly:
PLA
PLA tends to bond strongly to supports. Use a larger Z gap and lower interface density:
- Contact Z Distance: 0.2-0.3mm
- Interface Density: 70-80%
- Interface Pattern: Lines
- Tip: Lower the support interface temperature by 5°C to reduce bonding
PETG
PETG is notorious for welding to supports. Support interface is almost mandatory for this material:
- Contact Z Distance: 0.25-0.35mm (larger than PLA)
- Interface Density: 60-70%
- Interface Pattern: Lines
- Tip: Print supports at 10-15°C cooler than the model. Consider using a different support material if your printer supports two extruders
ABS
ABS supports remove relatively easily due to the material’s brittleness:
- Contact Z Distance: 0.15-0.2mm
- Interface Density: 80-90%
- Interface Pattern: Lines
- Tip: ABS is a good candidate for higher density interface since supports snap off cleanly
TPU/Flexible
Flexible materials are extremely difficult to separate from supports. Use generous gaps:
- Contact Z Distance: 0.3-0.4mm
- Interface Density: 50-60%
- Interface Pattern: Lines
- Tip: Use the minimum viable support density (8-10%) and consider tree supports which have less contact area
Support Interface vs. Tree Supports
Tree supports have become increasingly popular thanks to slicers like Cura and OrcaSlicer. So do you still need support interface with tree supports?
Short answer: Yes, but the settings differ.
Tree supports already minimize contact area by touching the model at thin branch tips rather than broad flat surfaces. But adding interface layers to tree support tips further improves overhang quality. Use:
- Thinner interface: 0.4-0.6mm (2-3 layers) is enough since contact areas are smaller
- Higher density: 90-100% — the small contact patches benefit from complete coverage
- Tighter Z gap: Tree supports are easier to remove regardless, so you can reduce the gap for better surface quality
Advanced Techniques
Interface-Only Supports
Some slicers support a mode where the entire support structure is printed at interface density and pattern, with no sparse infill body. This is called “Support Interface Only” or “Dense Supports.” The result is very clean overhang surfaces but uses more material and takes longer to print.
Use this for small supports where the extra material cost is negligible and surface quality is critical.
Variable Interface Density
In OrcaSlicer, you can set up variable support settings using the paint-on support feature. Apply denser interface in critical cosmetic areas and sparser interface in hidden internal surfaces.
Support Blocker Zones
Instead of supporting everything, use support blockers to prevent supports in areas where they’d be hard to remove or leave unacceptable marks. Combine this with interface layers where supports do exist for the best overall result.
Troubleshooting Common Interface Issues
- Interface fusing to model: Increase Z distance by 0.05mm increments until supports pop off cleanly
- Rough overhang surface despite interface: Increase interface density toward 100% and add more interface layers
- Supports falling apart before print finishes: Interface density might be too high relative to the support body, causing delamination. Increase support body density to 12-15%
- Difficult to remove interface pieces: Switch to Lines pattern (easier to peel) and increase Z gap
- Interface layer not appearing in preview: Some slicers require minimum support height before interface activates. Check that your supports are tall enough to accommodate both body and interface layers
Recommended Starting Profiles
Here’s a quick-start profile that works well for most materials and situations:
- Support Interface: Enabled
- Roof Thickness: 1.0mm
- Floor Thickness: 0.6mm
- Interface Density: 80%
- Interface Pattern: Lines
- Z Distance: 1 layer height (match your layer height setting)
- Support Body Density: 10-15%
- Support Body Pattern: Zigzag (easy removal)
Start here and adjust based on your specific material and model geometry.
Final Thoughts
Support interface settings are one of those slicer features that make a disproportionate difference in print quality once you learn to use them. The default support settings in most slicers are conservative — they prioritize reliability over surface quality. By enabling interface layers and fine-tuning the density, pattern, and Z distance for your material, you can achieve overhang surfaces that rival supported injection-molded parts.
Take 10 minutes to set up a support interface profile for your primary material, save it as a preset, and never go back to bare supports again.