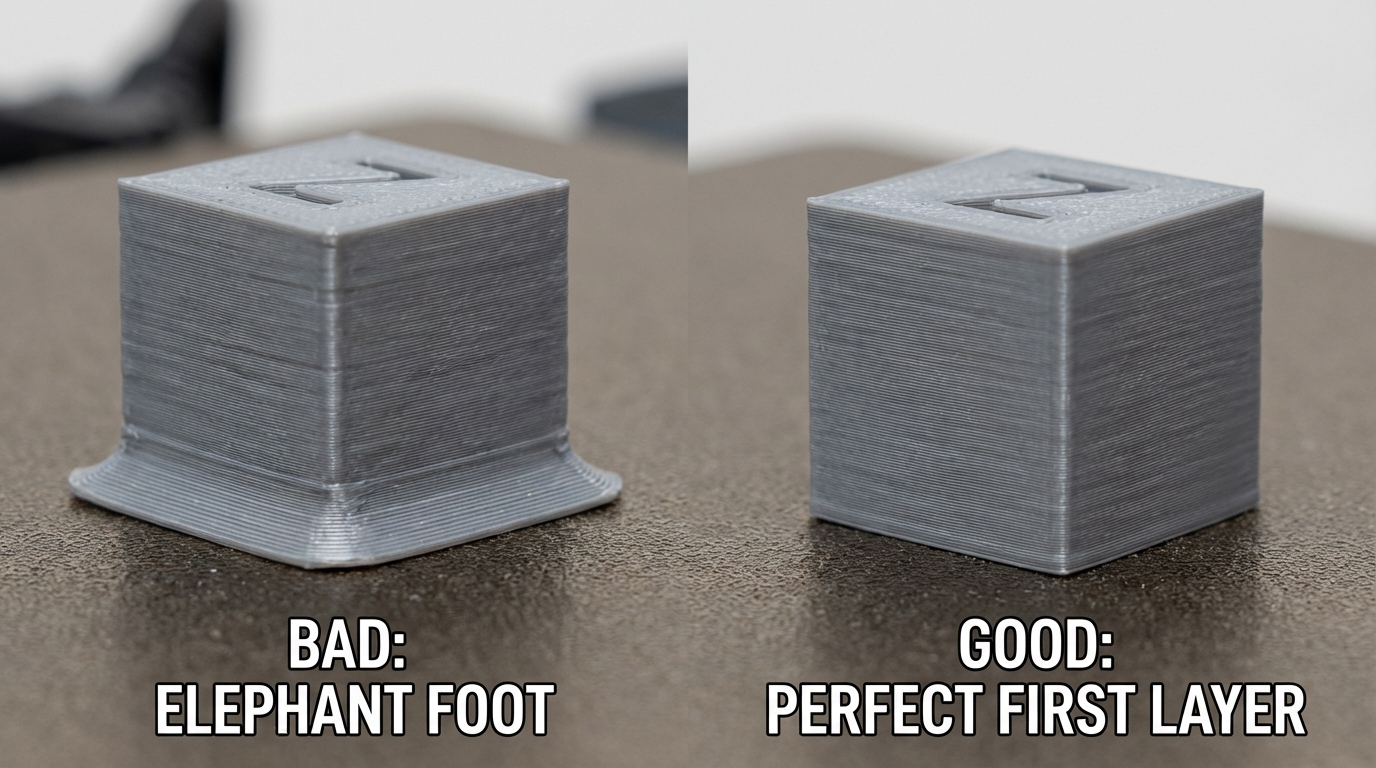
How to Fix Elephant Foot on 3D Prints Without Losing Bed Adhesion
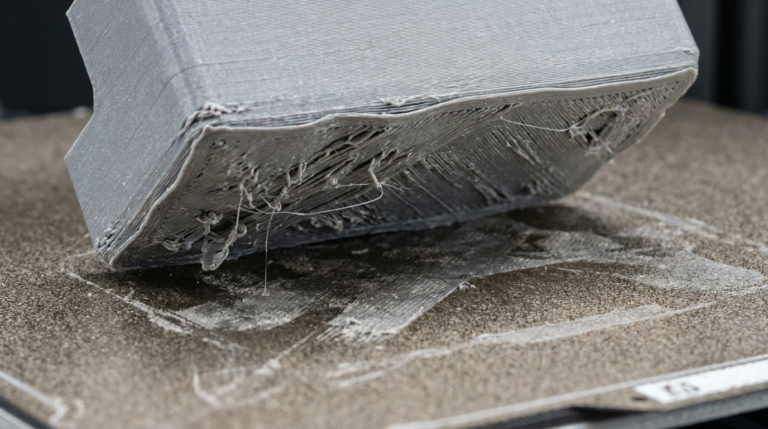
Elephant foot is that annoying bulge at the very bottom of your 3D print where the first few layers flare outward, creating a wider base than the rest of the object. It’s called “elephant foot” because, well, it makes your prints look like they’re standing on elephant feet — thicker at the bottom, then tapering to normal dimensions above. For functional parts that need to fit together or slide into enclosures, elephant foot turns precision designs into parts that don’t fit.
The frustrating thing about elephant foot is that it’s usually caused by settings that are otherwise helping your print succeed. The same conditions that give you great bed adhesion also cause that first-layer bulge. Fixing it means finding the sweet spot between adhesion and dimensional accuracy — and that’s exactly what we’re going to do.
Why Elephant Foot Happens
Elephant foot is fundamentally a squish problem. The first layer gets compressed more than it should, and that excess material has to go somewhere — so it spreads outward. Several factors contribute:
Z-Offset Too Low
This is the single most common cause. When your nozzle is too close to the bed, the first layer gets squished flat. The excess plastic has nowhere to go but sideways, creating that characteristic bulge. Even a difference of 0.02-0.05mm in Z-offset can be the difference between a perfect first layer and elephant foot.
Bed Temperature Too High
A bed that’s too hot keeps the bottom layers in a semi-molten state for too long. The weight of the layers above slowly compresses the soft bottom, causing it to spread. This is especially common with PLA on a bed set above 65°C or PETG above 85°C.
First Layer Settings Too Aggressive
Many slicer profiles use a wider line width, lower speed, and higher flow rate for the first layer to ensure good adhesion. These settings are fine for adhesion, but they all contribute to excess material at the base. A first layer line width of 150% combined with 120% flow is essentially guaranteeing elephant foot on detailed parts.
Cooling Fan Off for First Layers
Most profiles disable the part cooling fan for the first few layers to help adhesion. But without cooling, those bottom layers stay soft longer and deform under the weight of subsequent layers. This is a trade-off you’ll need to manage rather than eliminate entirely.
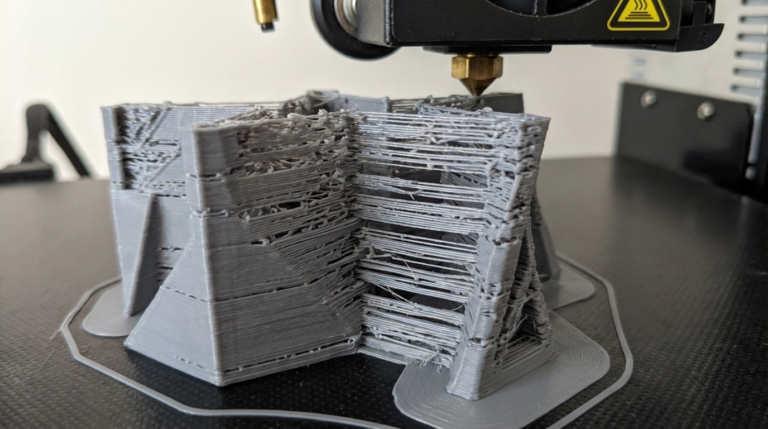
Fixing Elephant Foot: The Systematic Approach
Here’s my step-by-step process for eliminating elephant foot while maintaining reliable bed adhesion. Work through these in order — each one builds on the previous fix.
Step 1: Calibrate Your Z-Offset Precisely
This alone fixes elephant foot for most people. The goal is to have the nozzle just barely squishing the first layer — enough for adhesion, not so much that material spreads.
The paper test gets you close, but for elephant foot issues you need to go further:
- Print a single-layer calibration square (50×50mm, 1 layer only)
- Measure the thickness with calipers — it should be within 10% of your first layer height setting
- If it’s significantly thinner, your nozzle is too close. Raise Z-offset by 0.02mm and retest
- Keep adjusting in 0.02mm increments until the measured thickness matches your slicer setting
On printers with a probe (BLTouch, CR Touch), adjust the Z-offset in your firmware. On manual-leveling printers, re-level with slightly less squish on the leveling knobs.
Step 2: Lower Your Bed Temperature
Try reducing bed temperature by 5°C increments until you find the lowest temperature that still gives reliable adhesion. For common materials:
- PLA: Try 55°C instead of 60-65°C. On PEI beds, PLA sticks fine at 50°C.
- PETG: Try 75-80°C instead of 85-90°C.
- ABS: Bed temp matters less here — elephant foot with ABS is more about Z-offset and enclosure temperature.
Step 3: Adjust First Layer Flow and Width
Reduce your first layer flow rate to 95-100% (from the typical 100-120%). Similarly, set first layer line width closer to your normal line width — 105-110% instead of 150%. You’ll lose some adhesion margin, but the dimensional accuracy improvement is significant.
If you’re worried about adhesion after reducing flow, compensate with better bed surface preparation (clean IPA wipe) rather than pushing more material.
Step 4: Use Elephant Foot Compensation in Your Slicer
Most modern slicers have a dedicated elephant foot compensation setting. This is the nuclear option — it works by slightly shrinking the outline of the first few layers inward, anticipating the outward spread.
- Cura: “Initial Layer Horizontal Expansion” — set to -0.1 to -0.2mm
- PrusaSlicer/OrcaSlicer: “Elephant foot compensation” — try 0.1-0.3mm
- Bambu Studio: Same as PrusaSlicer — “Elephant foot compensation” under Advanced settings
Start conservative (0.1mm) and increase in 0.05mm steps until the bottom matches the dimensions of the rest of the print. Don’t overdo it — too much compensation creates a first layer that’s narrower than the rest, which looks just as bad and weakens adhesion.
Step 5: Enable Cooling Sooner
Instead of keeping the fan off for the first 3-4 layers, try enabling it at a low speed (30-40%) starting from layer 2. This firms up the bottom layers sooner, reducing the window where weight-induced spreading can occur. The first layer itself should still print with the fan off for adhesion.
The Chamfer Trick: A Design-Level Solution
If you’re designing your own parts and elephant foot is a persistent issue, add a small chamfer (0.3-0.5mm at 45°) to the bottom edge of your model. The chamfer absorbs the elephant foot bulge, and the final result looks dimensionally correct. This is a common technique in production 3D printing where mechanical fit matters.
In Fusion 360, TinkerCAD, or any CAD software, just add a chamfer to bottom edges. It adds seconds to your design workflow and eliminates elephant foot as a concern entirely.
Material-Specific Elephant Foot Tips
PLA
PLA is the most forgiving material for elephant foot fixes because it doesn’t need high bed temps for adhesion. Drop bed temp to 50-55°C on PEI, use 95% first layer flow, and you’ll see immediate improvement. PLA also responds well to elephant foot compensation settings in the slicer.
PETG
PETG is trickier because it genuinely needs higher bed temps and tends to stick too well to certain surfaces. Use elephant foot compensation of 0.15-0.25mm and consider a light coating of glue stick (paradoxically, this acts as a release agent with PETG while maintaining adhesion). Reduce first layer speed to 15-20mm/s for more controlled placement.
ABS/ASA
With ABS and ASA, elephant foot is often caused by the enclosure temperature rather than bed temperature. If your enclosure runs very hot, the bottom layers stay soft for a long time. Consider cracking the enclosure door slightly for the first 10-15 layers, then closing it for the remainder of the print. Use 0.2-0.3mm elephant foot compensation.
TPU
Flexible materials like TPU are especially prone to elephant foot because they deform easily under compression. Use minimal first layer squish (Z-offset at the higher end), low first layer speed (10-15mm/s), and elephant foot compensation of 0.2-0.3mm. TPU also benefits from printing on a cooler bed — try 40-45°C.
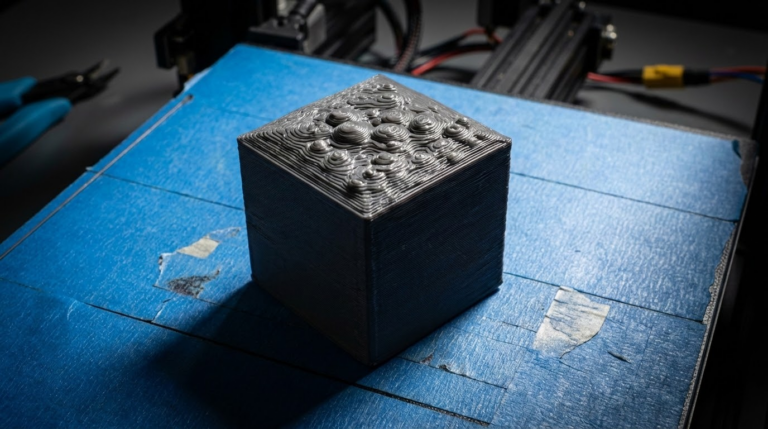
Testing and Validation
The fastest way to dial in elephant foot settings is to print a test cube (20×20×10mm) and measure the bottom dimensions versus the middle dimensions. They should match within 0.1mm. If the bottom is wider by more than 0.1mm, you still have elephant foot to address.
For functional parts, print a test fit before committing to a full batch. A simple box-and-lid test tells you immediately whether your bottom dimensions are accurate enough for assembly work.
When to Accept Some Elephant Foot
Here’s a reality check: a tiny amount of elephant foot (under 0.1mm) is normal and often unavoidable without compromising first layer adhesion. For decorative prints, tabletop miniatures, or parts where the bottom isn’t visible, don’t chase perfection. Save the precision calibration for functional parts, mechanical assemblies, and pieces that need to fit together.
The goal isn’t zero elephant foot — it’s elephant foot that’s small enough not to matter for your specific application. Get that Z-offset right, reduce your bed temp a touch, and use the slicer compensation when needed. Your parts will thank you.