Best Bambu Lab P1S Settings for PLA, PETG, ABS and TPU
Why the Bambu Lab P1S Needs Proper Slicer Settings
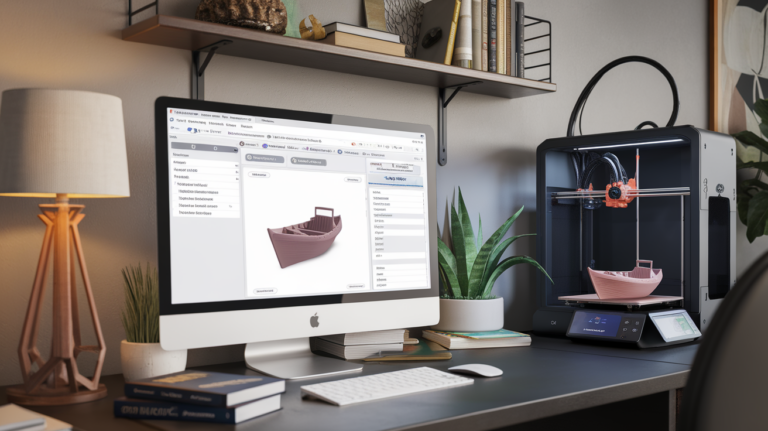
The Bambu Lab P1S is one of the most capable enclosed 3D printers under $700. Out of the box, it prints remarkably well with Bambu Studio’s default profiles. But if you’re using Cura, PrusaSlicer, or OrcaSlicer — or if you want to push your P1S beyond “good enough” — you need to understand what settings actually matter.
I’ve been running a P1S for several months now, printing everything from functional brackets to detailed miniatures. Here’s what I’ve learned about dialing in the settings for different materials and use cases.
Essential Settings for PLA on the P1S
PLA is where most people start, and the P1S handles it exceptionally well. The enclosed chamber actually runs a bit warm for PLA, so there’s a nuance here that many guides miss.
Recommended PLA profile:
- Nozzle temperature: 200-210°C (start at 205°C)
- Bed temperature: 55-60°C (lower than typical because the enclosure retains heat)
- Print speed: 250-300mm/s for inner walls, 150mm/s for outer walls
- Acceleration: 5000mm/s² (the P1S handles this easily)
- Retraction: 0.8mm at 30mm/s (direct drive needs very short retraction)
- Cooling fan: 80-100% after first layer
- Layer height: 0.2mm standard, 0.12mm for detail work
Important P1S-specific tip: If you’re printing PLA in the fully enclosed P1S, consider cracking the front door open or removing the top cover. PLA doesn’t need — and can actually suffer from — too much ambient heat. Heat creep is the enemy with PLA in enclosed printers.
PETG Settings That Actually Work
PETG is where the P1S’s enclosed chamber really shines. The consistent temperature environment reduces warping and improves layer adhesion significantly compared to open-frame printers.
Recommended PETG profile:
- Nozzle temperature: 230-240°C (PETG needs more heat than PLA)
- Bed temperature: 70-80°C
- Print speed: 200mm/s inner walls, 100mm/s outer walls
- Acceleration: 3000-4000mm/s²
- Retraction: 0.6-0.8mm at 25mm/s (PETG is stringy — tune carefully)
- Cooling fan: 30-50% (too much cooling causes poor layer adhesion)
- Z-hop: 0.4mm (helps prevent nozzle from hitting and dragging on the print)
- First layer speed: 50mm/s
The single biggest tip for PETG on the P1S: use a textured PEI sheet, not the smooth one. PETG bonds aggressively to smooth PEI and can rip chunks off your build plate. The textured sheet gives excellent adhesion during printing but releases cleanly when cooled.
ABS and ASA: Using the Enclosure Properly
ABS and ASA are the main reasons people buy enclosed printers, and the P1S delivers. The enclosed chamber maintains ambient temperatures around 40-50°C, which dramatically reduces warping compared to printing ABS on an open Ender 3.
Recommended ABS/ASA profile:
- Nozzle temperature: 240-250°C
- Bed temperature: 100-110°C
- Chamber temperature: Let it naturally warm up — don’t force it open
- Print speed: 200mm/s standard
- Acceleration: 4000mm/s²
- Retraction: 0.5-0.8mm at 30mm/s
- Cooling fan: 0-20% (minimal cooling for ABS)
- Brim: 5-8mm for parts with small footprints
Critical step: Pre-heat the chamber by running the bed at 110°C for 10-15 minutes before starting an ABS print. This raises the ambient temperature inside the enclosure and prevents the “first few layers warp” problem that many P1S users encounter.
TPU Flexible Filament Settings
The P1S’s direct drive extruder handles TPU surprisingly well, but you need to slow way down compared to rigid filaments.
Recommended TPU profile (95A shore hardness):
- Nozzle temperature: 220-230°C
- Bed temperature: 50°C
- Print speed: 30-50mm/s (yes, this slow)
- Retraction: 0.3-0.5mm at 20mm/s (or disable retraction entirely)
- Cooling fan: 50-80%
- Flow rate: 105-110% (TPU compresses in the extruder)
- Acceleration: 1000mm/s² maximum
The biggest mistake with TPU on the P1S is trying to print too fast. The Bambu Lab stock profiles sometimes suggest 80-100mm/s for TPU, but in practice, 30-50mm/s produces much more reliable results with fewer jams and less stringing.
Speed vs. Quality: Finding Your Sweet Spot
The P1S can theoretically print at 500mm/s, but should you? Here’s a realistic breakdown of speed vs. quality:
- Draft quality (fast prototyping): 300mm/s, 0.28mm layer height — rough but functional
- Standard quality: 200-250mm/s, 0.2mm layer height — good for most uses
- High quality: 100-150mm/s, 0.12mm layer height — smooth surfaces, longer prints
- Maximum quality: 60-80mm/s, 0.08mm layer height — miniatures and display pieces
For most users, the “standard quality” range hits the sweet spot. The P1S’s input shaper (vibration compensation) means you can print at 200mm/s and still get quality that would require 60mm/s on a non-compensated printer.
Calibration Steps for Optimal Results
The P1S has built-in calibration routines that handle most of the heavy lifting, but there are additional steps worth taking:
- Auto-calibration: Run the built-in flow, vibration compensation, and bed leveling routines for each new filament roll
- Manual flow calibration: Print a single-wall box and measure with calipers — adjust flow multiplier if walls aren’t the expected thickness
- Pressure advance: The P1S auto-tunes this, but you can fine-tune it for each filament using the PA calibration pattern
- First layer calibration: Use the “micro-adjust” Z offset during the first print with new filament until squish looks right
Pro tip: Save calibrated profiles per filament brand and color. A matte black PLA from Bambu Lab will need different settings than a glossy red PLA from Hatchbox.
Common P1S Issues and Fixes
Problem: Stringing with PETG
Fix: Reduce retraction to 0.4mm, increase retraction speed to 30mm/s, lower temperature by 5°C. Enable “wipe on retract” in your slicer.
Problem: First layer adhesion failure
Fix: Clean the build plate with 90% IPA. Re-run auto bed leveling. Increase first layer flow to 105%. Reduce first layer speed to 50mm/s.
Problem: ABS warping despite enclosure
Fix: Pre-heat chamber for 15 minutes. Add a 8mm brim. Increase bed temperature to 110°C. Check for draft leaks around the enclosure door.
Problem: Inconsistent extrusion at high speeds
Fix: Check for partial clogs — do a cold pull. Verify the PTFE tube inside the hotend isn’t degraded. Consider upgrading to a hardened steel nozzle if printing abrasive filaments.
My Personal Go-To Settings
After months of testing, here are the exact settings I use for 90% of my P1S prints:
- PLA: 205°C nozzle, 55°C bed, 250mm/s, 0.2mm layers, door open
- PETG: 235°C nozzle, 75°C bed, 150mm/s, 0.2mm layers, door closed
- ABS: 245°C nozzle, 105°C bed, 200mm/s, 0.2mm layers, fully enclosed
These aren’t “optimal” in a theoretical sense — they’re the settings I’ve landed on that produce consistently good results with minimal failed prints. Reliability beats theoretical perfection every time.
Final Thoughts
The Bambu Lab P1S is an incredibly capable machine that rewards proper setup. While the default Bambu Studio profiles are a great starting point, taking the time to calibrate per-filament and understand the relationship between speed, temperature, and cooling will take your prints from “good” to “wow.”
Start with the settings in this guide, then iterate based on your specific filament and use case. Keep a log of what works — future you will thank present you when you switch filaments and can pull up proven settings instead of guessing.