Best Cura Settings for Ender 3: A Beginner-Friendly Guide
The Cura Settings That Actually Matter for Ender 3
When I first got my Ender 3, I opened Cura and immediately felt overwhelmed. There are literally hundreds of settings, and every YouTube video seemed to recommend something different. I burned through an entire roll of PLA just testing random profiles before I figured out which settings actually make a difference for beginners.
After three years of printing on various Ender 3 models (the original, V2, and S1), here are the Cura settings I wish someone had given me on day one.
Start With the Right Cura Profile
Before you touch any settings, make sure you’ve selected the correct printer profile in Cura. Go to Settings → Printer → Add a Printer, and pick your exact Ender 3 model. Cura ships with profiles for the Ender 3, Ender 3 Pro, Ender 3 V2, and Ender 3 S1.
The default profile is actually decent for basic prints. But “decent” and “good” are different things, and a few tweaks will dramatically improve your results.
Layer Height: Start at 0.2mm
For a 0.4mm nozzle (which is what the Ender 3 comes with), 0.2mm layer height is the sweet spot for most prints. It gives you a good balance between print quality and speed.
- 0.12mm: For detailed models, miniatures, and anything where surface finish matters
- 0.2mm: Your daily driver — good for 90% of prints
- 0.28mm: When speed matters more than looks (functional parts, prototypes)
I honestly print at 0.2mm about 80% of the time. The quality is good enough for display pieces, and the print times are reasonable. Going to 0.12mm nearly doubles your print time, so save that for when it actually matters.
Print Speed: Slower Than You Think
The Ender 3’s stock firmware and hardware can technically handle 80-100 mm/s, but the print quality takes a serious hit at those speeds. Here’s what I actually run:
- Print speed: 50 mm/s (this is your main speed setting)
- Wall speed: 25-30 mm/s (slower walls = smoother surfaces)
- Top/bottom speed: 25 mm/s
- Infill speed: 60-80 mm/s (nobody sees infill, so go fast)
- Travel speed: 150 mm/s
- First layer speed: 20 mm/s (slow first layer = better adhesion)
I know it’s tempting to crank the speed up, but trust me on this. At 50 mm/s, you’ll get clean prints with minimal artifacts. At 80 mm/s, you’ll get ringing, ghosting, and layers that don’t quite line up. The Ender 3 just doesn’t have the frame rigidity for high-speed printing.
Temperature Settings
Temperature is one of those things where the “right” answer depends on your specific filament. But these ranges work well as starting points:
PLA (Most Common for Beginners)
- Nozzle temperature: 200-210°C (I start at 205°C for most brands)
- Bed temperature: 55-60°C
PETG
- Nozzle temperature: 230-245°C (I use 235°C for most PETG)
- Bed temperature: 75-80°C
One thing that took me forever to figure out — different PLA brands can need wildly different temperatures. Hatchbox PLA prints beautifully at 200°C, but eSUN PLA+ needs 215°C to get proper layer adhesion. Always print a temperature tower with new filament. It takes 45 minutes and saves you hours of troubleshooting.
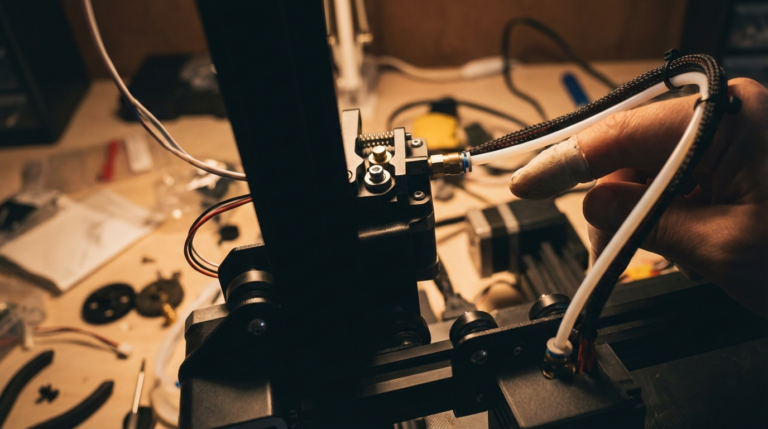
Retraction Settings
Retraction is what prevents stringing — those thin wisps of plastic between separate parts of your print. The Ender 3 uses a Bowden tube setup, which means you need more retraction than a direct drive printer.
- Retraction distance: 6mm (this is the most important number)
- Retraction speed: 25 mm/s
- Retraction minimum travel: 1.5mm
- Maximum retraction count: 10
If you’re getting stringing with these settings, bump the distance to 6.5mm before changing anything else. Going above 7mm on a Bowden setup can cause clogs, so be careful.
Wall and Infill Settings
Walls are the outer shell of your print, and they matter more than most people realize. Here’s my setup:
- Wall line count: 3 (gives you about 1.2mm of solid wall)
- Top layers: 4
- Bottom layers: 4
- Infill density: 20% for decorative, 40% for functional parts
- Infill pattern: Cubic (good balance of strength and speed)
I used to run 2 walls to save time, but the difference in strength and surface quality is noticeable. Three walls is the sweet spot — four walls doesn’t add much unless you’re printing something structural.
For infill pattern, I’ve tried them all. Cubic gives you decent strength in all directions without being as slow as gyroid. If you need maximum strength, go gyroid at 30-40%. For display pieces, lines at 15% works fine and prints fast.
Cooling Fan Settings
The stock Ender 3 cooling fan is… not great. It only blows from one side, which means overhangs on the left side of your print look worse than on the right. But you can still get good results with the right fan settings:
- Fan speed: 100% for PLA (after initial layers)
- Initial fan speed: 0%
- Regular fan speed at layer: 5
For PETG, I drop the fan to 50%. PETG doesn’t like being cooled as aggressively as PLA, and too much fan causes layer adhesion problems.
If you’re serious about improving your Ender 3’s print quality, upgrading to a dual-fan duct like the Satsana or Hero Me is one of the best modifications you can make. But that’s a story for another day.
Support Settings for Beginners
Supports are necessary for overhangs steeper than about 45 degrees, but bad support settings will leave ugly scars on your print. Here’s what works well on the Ender 3:
- Support structure: Tree (when possible — they’re easier to remove)
- Support overhang angle: 55° (not the default 45° — the Ender 3 handles moderate overhangs fine)
- Support density: 10-15%
- Support Z distance: 0.2mm (one layer height)
- Support interface: Enabled, 2 layers, 100% density
That support interface setting is a game-changer. It creates a dense layer between the support and your model, which makes the bottom of overhangs much smoother. Without it, you get a rough, stringy mess.
First Layer Settings
Your first layer determines whether the whole print succeeds or fails. I give it special treatment:
- Initial layer height: 0.28mm (thicker than subsequent layers)
- Initial layer line width: 120%
- Initial layer speed: 20 mm/s
- Initial layer fan speed: 0%
- Build plate adhesion type: Skirt (for most prints) or Brim (for large/tall prints)
- Skirt line count: 3
That thicker initial layer gives you more room for slight bed leveling imperfections. And the wider line width means more plastic getting squished into the bed surface, which improves adhesion.
My Complete Cura Profile for Ender 3 (PLA)
Here’s the exact profile I use for everyday PLA printing on my Ender 3 V2. Copy these settings and you’ll have a solid starting point:
- Layer height: 0.2mm
- Initial layer height: 0.28mm
- Line width: 0.4mm
- Wall line count: 3
- Top/bottom layers: 4 each
- Infill: 20%, cubic pattern
- Print speed: 50 mm/s
- Wall speed: 25 mm/s
- Travel speed: 150 mm/s
- Initial layer speed: 20 mm/s
- Nozzle temp: 205°C
- Bed temp: 60°C
- Retraction distance: 6mm
- Retraction speed: 25 mm/s
- Fan speed: 100%
- Initial fan speed: 0%
- Fan at layer: 5
- Support overhang angle: 55°
- Adhesion: Skirt, 3 lines
Common Mistakes Beginners Make in Cura
Using the “draft” quality preset: It sets the layer height to 0.3mm, which honestly looks rough on the Ender 3. The time savings over 0.2mm isn’t worth the quality drop for most prints.
Not enabling “Print Thin Walls”: Without this, Cura skips walls thinner than your line width. Turn it on — it’s under Shell settings.
Leaving combing on “All”: Switch combing mode to “Within Infill” or “Not in Skin.” This prevents the nozzle from traveling across the top surface of your print, which reduces those annoying z-seam artifacts.
Forgetting about Z-seam alignment: Set this to “Sharpest Corner” to hide the seam where it’s least visible. If your model doesn’t have sharp corners, “User Specified” with a back-facing position works well.
Not using Cura’s preview: Always check the layer preview before printing. It only takes a minute, and it’ll catch problems like missing walls, bad supports, or weird infill patterns before you waste filament.
When to Deviate From These Settings
These settings are your baseline — the “safe” starting point that works for most prints. But sometimes you’ll need to change things:
- Printing miniatures: Drop to 0.12mm layer height, slow everything down to 30-35 mm/s
- Functional parts under load: Bump walls to 4-5, infill to 40-60%
- Large flat parts: Add a brim, slow first layer to 15 mm/s
- Tall thin prints: Enable “Minimum Layer Time” at 10 seconds to prevent heat deformation
- Flexible filament (TPU): Completely different settings — that’s a whole separate article
But for your first dozen prints on the Ender 3, just use the profile I listed above. Get comfortable with the printer, learn what good prints look and feel like, and then start experimenting. Changing one setting at a time is the only way to understand what each one actually does.