Best Print Speed for 3D Printer Quality: The Complete Guide
Why Print Speed Matters More Than You Think
Every 3D printing enthusiast eventually faces the same dilemma: do you crank up the speed and finish prints faster, or slow things down for better quality? The truth is, finding the best print speed for your 3D printer isn’t about picking one magic number — it’s about understanding how speed interacts with every other setting in your slicer.
I’ve spent years dialing in speed profiles for dozens of different printers, from budget Ender 3s to high-end CoreXY machines. What I’ve learned is that most people leave serious quality on the table by either printing too fast or too slow. Let’s break down exactly how to find your printer’s sweet spot.
Understanding Print Speed Basics
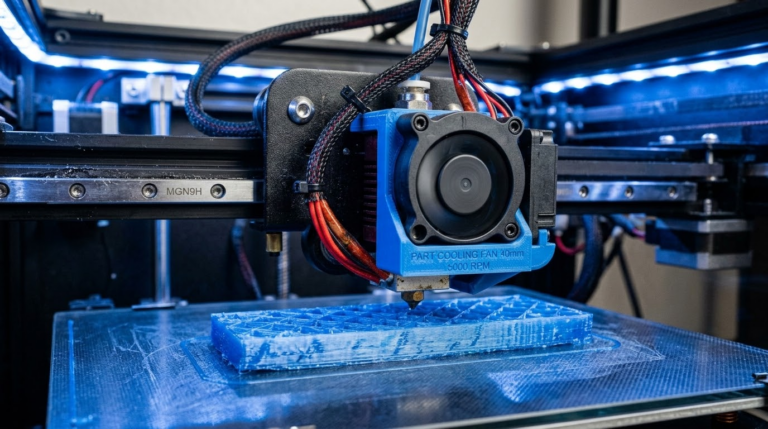
Print speed in your slicer (measured in mm/s) controls how fast the print head moves while extruding plastic. But here’s what many beginners miss: your slicer actually has multiple speed settings, each affecting a different part of the print.
Wall speed (also called perimeter speed) directly affects the visible surface quality of your prints. This is typically set lower than infill speed because walls are what you actually see. For most printers, a wall speed between 30-50 mm/s delivers clean, consistent results.
Infill speed can be pushed much higher since nobody sees the inside of your print. Most printers handle 60-100 mm/s for infill without issues. Some high-speed machines like the Bambu Lab P1S can go even faster.
Travel speed is how fast the print head moves when it’s not extruding. This should always be higher than your print speed — typically 120-200 mm/s. Faster travel means less time for oozing between moves, which reduces stringing.
First layer speed should always be slower — usually 20-30 mm/s regardless of your other settings. A slow first layer gives the plastic time to properly bond to the build surface.
How Speed Affects Print Quality
When you push speed too high, several things start going wrong simultaneously. Understanding these failure modes helps you diagnose problems and find the right balance.
Ringing and Ghosting
This is the most common speed-related artifact. You’ll see wavy ripples or echo patterns on flat surfaces, especially near sharp corners. It happens because the print head’s momentum causes vibrations when it changes direction quickly. The faster you print, the worse ringing gets.
To test for ringing, print a simple cube at your current speed. Look at the faces near the corners — if you see faint ripple patterns radiating outward, you’re printing too fast for your printer’s frame rigidity.
Under-Extrusion at High Speeds
Your hotend can only melt filament so fast. When you exceed this volumetric flow limit, the extruder can’t push enough plastic through the nozzle, leading to gaps, weak layers, and rough surface texture. A standard 0.4mm nozzle with a V6-style hotend maxes out around 10-12 mm³/s. High-flow hotends like the Revo or Rapido can handle 20-30+ mm³/s.
To calculate your volumetric flow rate: multiply layer height × line width × speed. For example, 0.2mm layer × 0.4mm width × 60 mm/s = 4.8 mm³/s — well within safe limits for any hotend.
Layer Adhesion Problems
Speed affects how well each layer bonds to the one below it. When the nozzle moves fast, each line of plastic has less time in contact with the previous layer while still hot. This can lead to weaker parts that delaminate under stress. If you’re printing functional parts, keep wall speeds moderate (40-50 mm/s) to maintain structural integrity.
Optimal Speed Settings by Printer Type
Different printer architectures handle speed very differently. Here’s what works for each:
Bed Slingers (Ender 3, Prusa MK3S+)
These printers move the entire bed on the Y-axis, which means a heavy glass or steel plate is accelerating back and forth. This limits practical speeds to about 50-60 mm/s for walls and 80 mm/s for infill. Push beyond this and you’ll see ringing on Y-axis surfaces. Acceleration matters more than top speed here — keep it around 500-1000 mm/s² for quality prints.
CoreXY (Voron, Bambu Lab, RatRig)
CoreXY machines keep the bed stationary (or move it only in Z) while the lightweight toolhead handles X and Y. This allows dramatically higher speeds — 100-200 mm/s for walls and 200-300+ mm/s for infill. The key limiter becomes volumetric flow rather than frame vibration.
Delta Printers
Deltas excel at high-speed printing due to their lightweight effector platform. Speeds of 100-150 mm/s are typical, with some users pushing 200+ mm/s. However, they can struggle with accuracy at the edges of the build plate, so reduce speed for prints near the perimeter.
Finding Your Printer’s Speed Limit: A Practical Method
Here’s my step-by-step process for dialing in optimal speed. It takes about an hour and a few test prints, but the results are worth it.
Step 1: Establish a quality baseline. Print a 20mm calibration cube at 40 mm/s with 1000 mm/s² acceleration. Photograph all sides. This is your reference for “good quality.”
Step 2: Speed ladder test. Print the same cube at 50, 60, 70, 80, and 100 mm/s. Compare each to your baseline. The first speed where you notice visible quality degradation (ringing, rough surfaces, layer gaps) is your upper limit.
Step 3: Back off 10%. Take that upper limit and reduce it by 10%. This gives you a margin of safety for complex geometries and longer prints where small issues compound.
Step 4: Set speed differentials. Use your optimized speed for walls. Set infill 50-80% higher. Set top/bottom layers 10-20% slower. Set first layer at 20-25 mm/s.
Step 5: Tune acceleration. If you’re still seeing ringing at your target speed, reduce acceleration by 200 mm/s² increments until it disappears. Acceleration often matters more than top speed for quality.
Speed Settings That Actually Work
After years of testing across many printers, here are my recommended starting points:
For visual/display models: Walls 35-45 mm/s, infill 60-80 mm/s, travel 150 mm/s. Prioritize surface finish over speed.
For functional parts: Walls 40-50 mm/s, infill 60-80 mm/s, travel 150 mm/s. Moderate speed for best layer adhesion.
For rapid prototyping: Walls 60-80 mm/s, infill 100-150 mm/s, travel 200 mm/s. Accept minor quality loss for faster iteration.
For miniatures and fine detail: Walls 25-35 mm/s, infill 40-60 mm/s, travel 120 mm/s. Slow and steady for crisp details.
Advanced Speed Optimization Tips
Enable jerk/junction deviation tuning. In Marlin firmware, the jerk setting controls how fast the printer takes corners without decelerating. Lower jerk (8-10 mm/s) reduces ringing. In Klipper, junction deviation serves a similar purpose — start at 0.05 and adjust from there.
Use variable speed based on feature size. Most modern slicers let you slow down for small perimeters and overhangs. In Cura, enable “Small Feature Speed” and set it to 50% for details under 5mm. PrusaSlicer has “Speed for small perimeters” that works similarly.
Consider input shaping. If you run Klipper firmware, input shaping is a game-changer. It compensates for resonance frequencies in your frame, allowing you to print 50-100% faster without ringing. Run the calibration test and apply the suggested values — the improvement is dramatic.
Adjust speed for different filaments. PETG and TPU generally need slower speeds than PLA. ABS can handle high speeds but needs stable chamber temperatures. Nylon should be printed slowly (30-40 mm/s) for reliable results.
Common Speed Myths Debunked
“Faster printing always means weaker parts.” Not necessarily true. Research has shown that within reasonable speed ranges, layer adhesion remains fairly consistent. It’s only at extreme speeds where the filament can’t properly bond that strength drops significantly.
“You need an expensive printer to print fast.” While CoreXY machines handle speed better, a well-tuned Ender 3 with firmware tweaks can print quality parts at 60+ mm/s. The limiting factor is usually the hotend flow rate, not the frame.
“Print speed is the biggest factor in print time.” For many prints, travel moves, heating, and retraction time add up to 30-50% of total print time. Optimizing these can be just as effective as increasing print speed.
Wrapping Up
The best print speed for your 3D printer depends on your specific hardware, the filament you’re using, and what you’re printing. Start with the recommended settings for your printer type, run the speed ladder test, and adjust from there. Remember that acceleration and jerk settings often matter more than raw top speed for final print quality.
Don’t chase speed numbers you see online — those are often set by experienced users with tuned machines and high-flow hotends. Focus on finding the speed where your printer produces results you’re happy with, then optimize from there. A well-tuned printer at 50 mm/s will produce better results than a poorly-tuned one at 150 mm/s every single time.