How to 3D Print Lithophanes: Settings, Tips, and Lamp Build Guide
What Is a Lithophane?
A lithophane is a thin 3D-printed panel that reveals a detailed image when backlit. Thick areas block light and appear dark; thin areas let light through and appear bright. The result is a photograph rendered in plastic — invisible when viewed from the front, stunning when illuminated from behind.
Lithophanes have been around since the 1820s, originally carved from porcelain. FDM 3D printers brought them back as one of the most impressive things you can print at home. A well-made lithophane looks like magic to anyone who hasn’t seen one before.
This guide covers every step: converting your image, picking the right settings, printing it properly, and building it into a lamp, nightlight, or window display.
Choosing the Right Image
Not every photo makes a good lithophane. The technique works best with:
- High contrast images — portraits with clear light/dark separation look incredible.
- Simple compositions — one subject against a clean background reads better than busy scenes.
- Good resolution — at least 1000px on the longest edge. Higher resolution gives finer detail.
- Black and white photos — color information is lost anyway, so B&W lets you judge the result before printing.
Avoid images with large flat areas of similar brightness. These create sections of uniform thickness that look bland when lit. Faces, pets, landscapes with dramatic lighting, and architectural shots with strong shadows all work well.
Converting Your Image to a Lithophane Model
Several free tools convert images to printable STL files:
- ItsLitho — the most popular option. Browser-based, free, with tons of shape options (flat, curved, lamp shade, box, globe).
- 3DP Rocks — simpler interface, good for flat lithophanes.
- Cura’s lithophane plugin — built into the slicer if you prefer an all-in-one workflow.
For your first lithophane, start with a flat panel on ItsLitho. Upload your image and configure these settings:
| Setting | Recommended Value | Why |
|---|---|---|
| Maximum thickness | 3.0 mm | Thick enough for dark areas to fully block light |
| Minimum thickness | 0.8 mm | Thin enough for bright areas to glow |
| Width | 100–150 mm | Good balance of detail and print time |
| Border | 3 mm | Adds rigidity to prevent warping |
| Positive/Negative | Positive image | Standard for most lithophanes |
Download the STL and open it in your slicer.
Critical Slicer Settings for Lithophanes
Lithophanes demand specific settings that differ from normal printing. Get these wrong and you’ll get a blurry, grainy mess instead of a sharp image.
Layer Height: 0.12 mm or Lower
This is non-negotiable. Each layer translates to a row of pixels in your image. At 0.2 mm layers, you lose half the vertical resolution. At 0.12 mm, you get noticeably sharper images. If your printer can handle 0.08 mm, even better — but the print time doubles.
100% Infill — No Exceptions
Lithophanes work by varying wall thickness. Any infill pattern other than 100% creates internal voids that scatter light and destroy the image. Set infill to 100% with a lines or concentric pattern.
Print Speed: 30–40 mm/s Maximum
Slow printing ensures consistent extrusion across the varying thicknesses of a lithophane. Fast speed changes cause pressure fluctuations in the nozzle that show up as banding in your final image. This isn’t the time for speed records.
Single Wall, No Top/Bottom Layers
Set wall count to 1 and top/bottom layers to 0. The infill does all the work. Extra walls add material that blurs the image by reducing the contrast between thick and thin sections.
Print Orientation: Vertical, Always
This is the most common mistake beginners make. Never print a lithophane flat on the bed. Laying it flat means the layer lines run parallel to the image, which creates visible horizontal banding.
Instead, stand the lithophane upright on its edge. This way, each layer is a vertical slice through the image, and the resolution across the image depends on your nozzle width (usually 0.4 mm) rather than your layer height. The result is dramatically sharper.
Yes, a vertical lithophane needs support or a brim to stay stable. Use a wide brim (10+ mm) and slow down the first layer. Some makers add a small flat base to the STL in the lithophane generator to avoid this issue entirely.
Best Filament for Lithophanes
Not all filaments transmit light equally:
- White PLA — the gold standard. Most white PLAs have excellent light transmission and produce clean, high-contrast lithophanes.
- Natural/translucent PLA — works well but can look slightly yellowish when lit.
- eSun Warm White PLA — a community favorite. Slightly off-white tone gives a warm, vintage look.
- Eryone/Hatchbox white PLA — both produce good results at budget prices.
Avoid: Colored filaments (block too much light), PETG (too translucent — not enough contrast between thick and thin areas), and matte filaments (scatter light instead of transmitting it cleanly).
Building a Lithophane Lamp
A flat lithophane is nice. A lithophane lamp is a showpiece. Here’s how to build one:
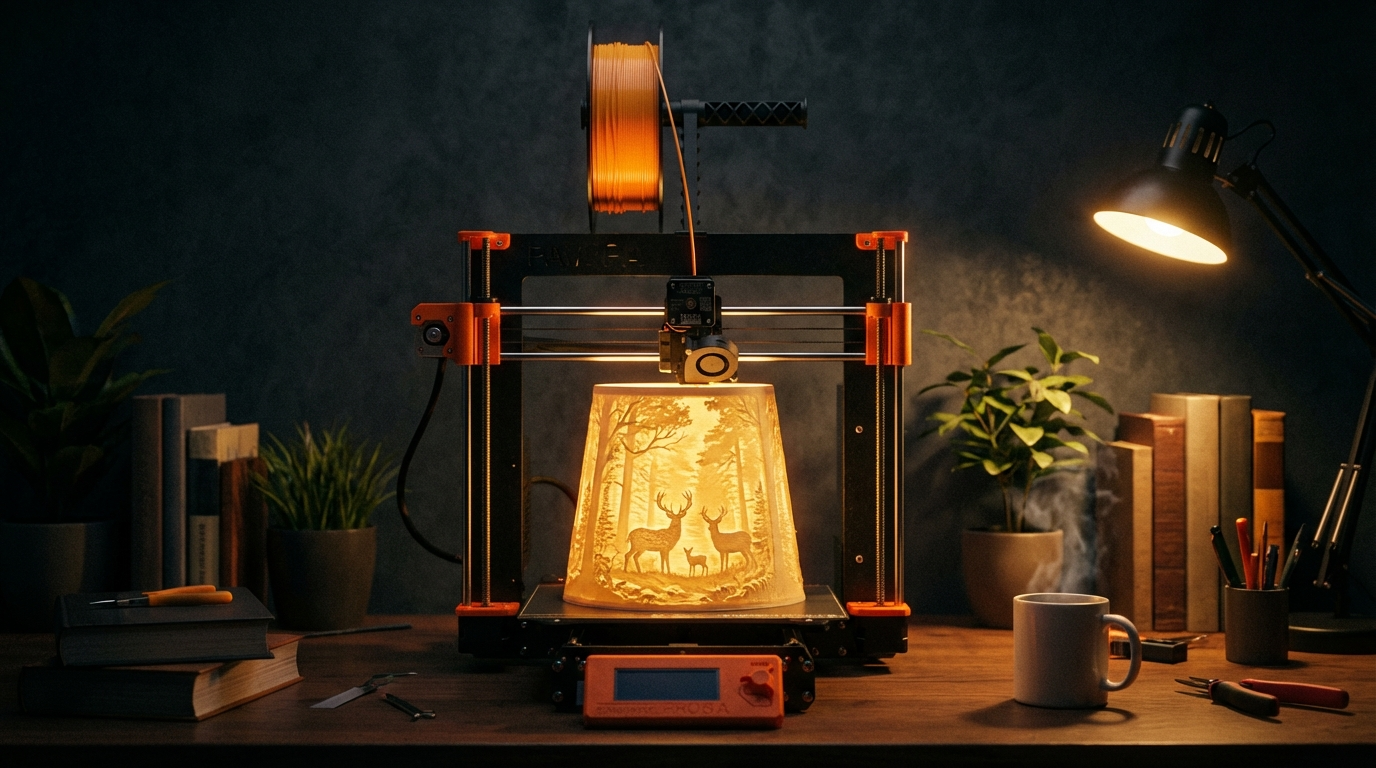
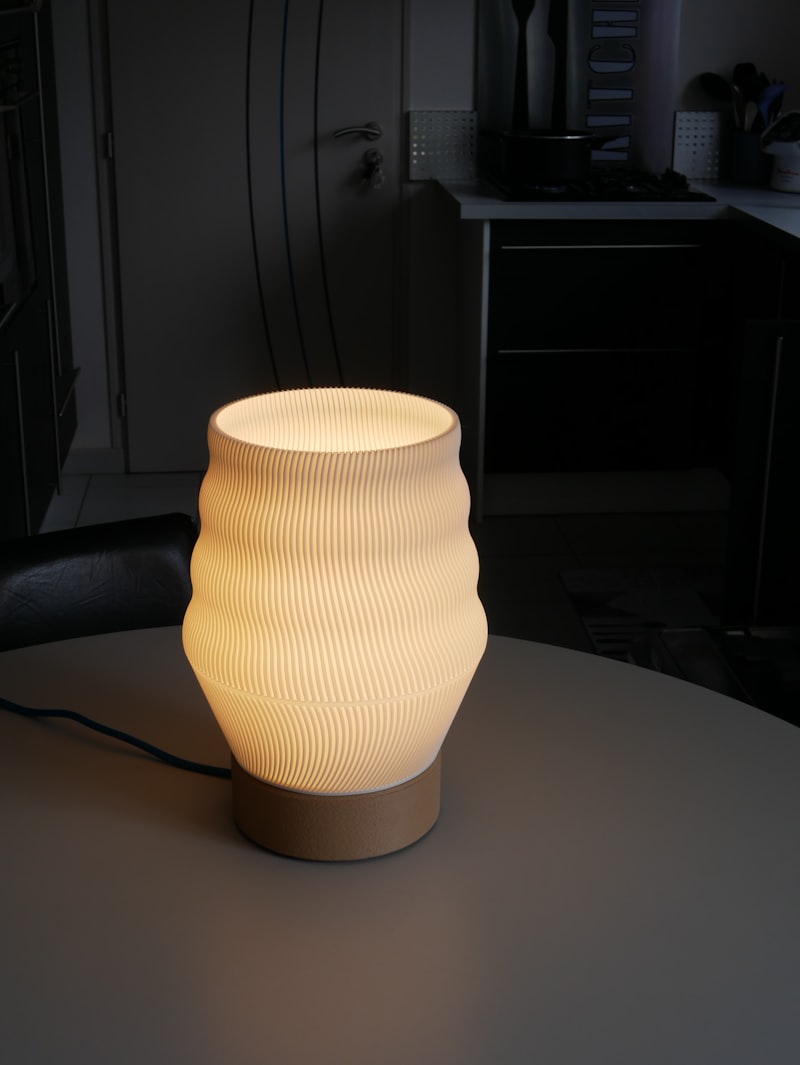
Cylindrical Lamp
Use ItsLitho’s “curved” or “cylinder” mode to wrap your image around a tube shape. Print it vertically. Then:
- Buy a cheap LED puck light or USB-powered LED strip from Amazon ($5–$10).
- Print a simple base with a hollow center to hold the light.
- Place the lithophane cylinder over the base.
- Optional: print a top cap to diffuse upward light spill.
Use warm white LEDs (2700–3000K) for the most flattering look. Cool white LEDs work but can make the lithophane look clinical.
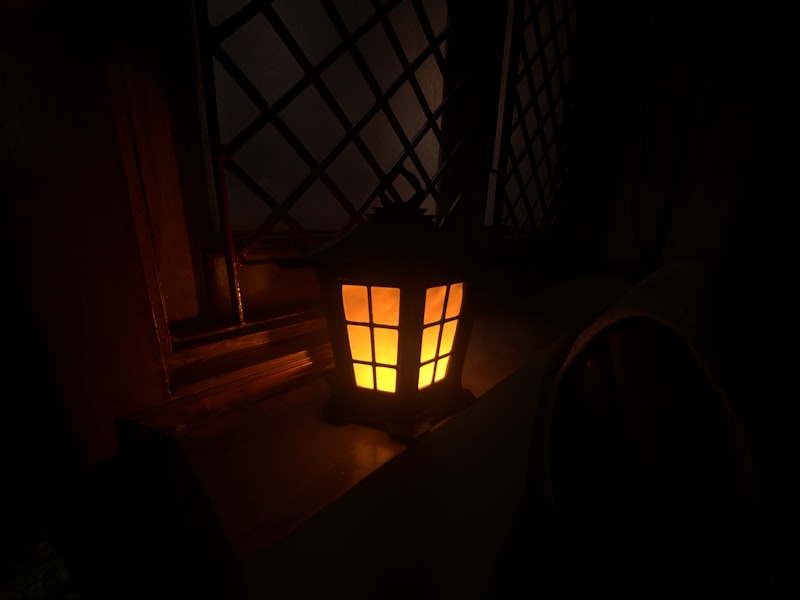
Box Lamp / Nightlight
Generate four flat lithophanes (one per image) and a solid base/top. Glue or snap them together into a box shape with a light source inside. This makes an incredible personalized gift — four family photos on a rotating nightlight.
Window Mount
The simplest option: print a flat lithophane with a built-in frame and suction cup mount. Stick it on a sunny window. Natural light produces the most beautiful lithophane effect — and it changes throughout the day as the sun moves.
Troubleshooting Common Lithophane Problems
Image looks blurry or washed out: Check that you printed vertically, not flat. Also verify your infill is 100% — any gaps scatter light and reduce contrast.
Horizontal banding visible: Reduce print speed to 25–30 mm/s. Enable pressure advance if you’re on Klipper, or linear advance on Marlin. These features compensate for the pressure changes that cause banding.
Dark spots or uneven lighting: Your light source is too close to one side. Use a diffused LED or move the light further from the lithophane for even illumination.
Lithophane warped after printing: White PLA is prone to warping on large flat prints. Use a heated bed at 60°C, a wide brim, and let the print cool slowly (don’t remove it immediately).
Too dark overall / image barely visible: Your maximum thickness is too high. Try reducing it from 3.0 mm to 2.5 mm. Or your filament isn’t translucent enough — switch brands.
Advanced Tips for Perfect Lithophanes
Once you’ve nailed the basics, these tweaks push quality even further:
- Pre-process your image: Increase contrast by 20–30% in any photo editor before converting to STL. Lithophanes compress the dynamic range, so starting with extra contrast compensates.
- Use a 0.2 mm nozzle: A smaller nozzle gives finer horizontal detail. Print time increases significantly, but the difference on detailed portraits is remarkable.
- Dry your filament: Even slightly damp PLA creates micro-bubbles that scatter light and reduce sharpness. Dry at 45°C for 4–6 hours before printing.
- Experiment with thickness range: For images with lots of midtones, try 0.6 mm minimum / 3.5 mm maximum to spread the tonal range wider.
- LED color temperature matters: Warm white (2700K) for portraits and cozy scenes. Neutral white (4000K) for landscapes and architectural shots.
Final Thoughts
Lithophanes are one of those rare 3D printing projects that genuinely impress non-hobbyists. The technical challenge is moderate — mostly about getting the slicer settings right — but the results look like something you’d buy from a specialty shop, not print at home for pennies.
Start with a small flat panel of a high-contrast portrait. Once you see it glow when you hold it up to a window, you’ll understand why lithophane printing has its own dedicated community. Then start planning that custom lamp.