How to Calibrate Flow Rate on Your 3D Printer (Step-by-Step Guide)
What Is Flow Rate Calibration?
Flow rate calibration is one of those things most 3D printing beginners skip entirely — and then wonder why their prints look awful. I get it. You unbox your printer, level the bed, maybe run a test cube, and call it a day. But if your extruder is pushing out 5% too much or too little plastic, every single print suffers. Walls that should be smooth end up bumpy. Dimensional accuracy goes out the window. And worst of all, you might blame the slicer, the filament, or the printer itself when the fix takes about fifteen minutes.
Flow rate (sometimes called extrusion multiplier) controls how much filament your printer pushes through the nozzle relative to what the slicer expects. A flow rate of 100% means the printer extrudes exactly the amount the G-code requests. In practice, no printer is perfectly calibrated out of the box. Manufacturing tolerances in the extruder gears, slight variations in filament diameter, and even the hotend design all introduce small errors that compound over an entire print.
Why Proper Flow Rate Matters
Think of flow rate as the foundation beneath your other calibrations. You can spend hours dialing in retraction settings, temperature towers, and speed profiles — but if your flow rate is off by even a few percent, those calibrations are built on shaky ground.
Over-extrusion symptoms: Bulging walls, rough surfaces, excess material squeezing between perimeters, elephant foot on the first layer, and blobs at corners. Your prints might also be slightly larger than designed dimensions.
Under-extrusion symptoms: Gaps between perimeters and infill, visible lines on top surfaces, weak layer adhesion, and parts that snap easily. Dimensions tend to come in slightly under target.
The tricky part? Both problems can look similar to other issues. Over-extrusion mimics a too-low Z-offset. Under-extrusion looks like a partial clog. That’s why methodical calibration is essential — it removes flow rate from your troubleshooting variables.
Step 1: Calibrate Your E-Steps First
Before touching flow rate, make sure your extruder steps-per-millimeter (E-steps) are correct. These two calibrations are related but different. E-steps ensure your extruder motor physically pushes the right length of filament. Flow rate fine-tunes the volume of plastic deposited.
To calibrate E-steps:
- Heat your hotend to printing temperature (remove the bowden tube from the hotend if possible, or at least remove the nozzle to eliminate back-pressure).
- Mark your filament 120mm above the extruder entrance.
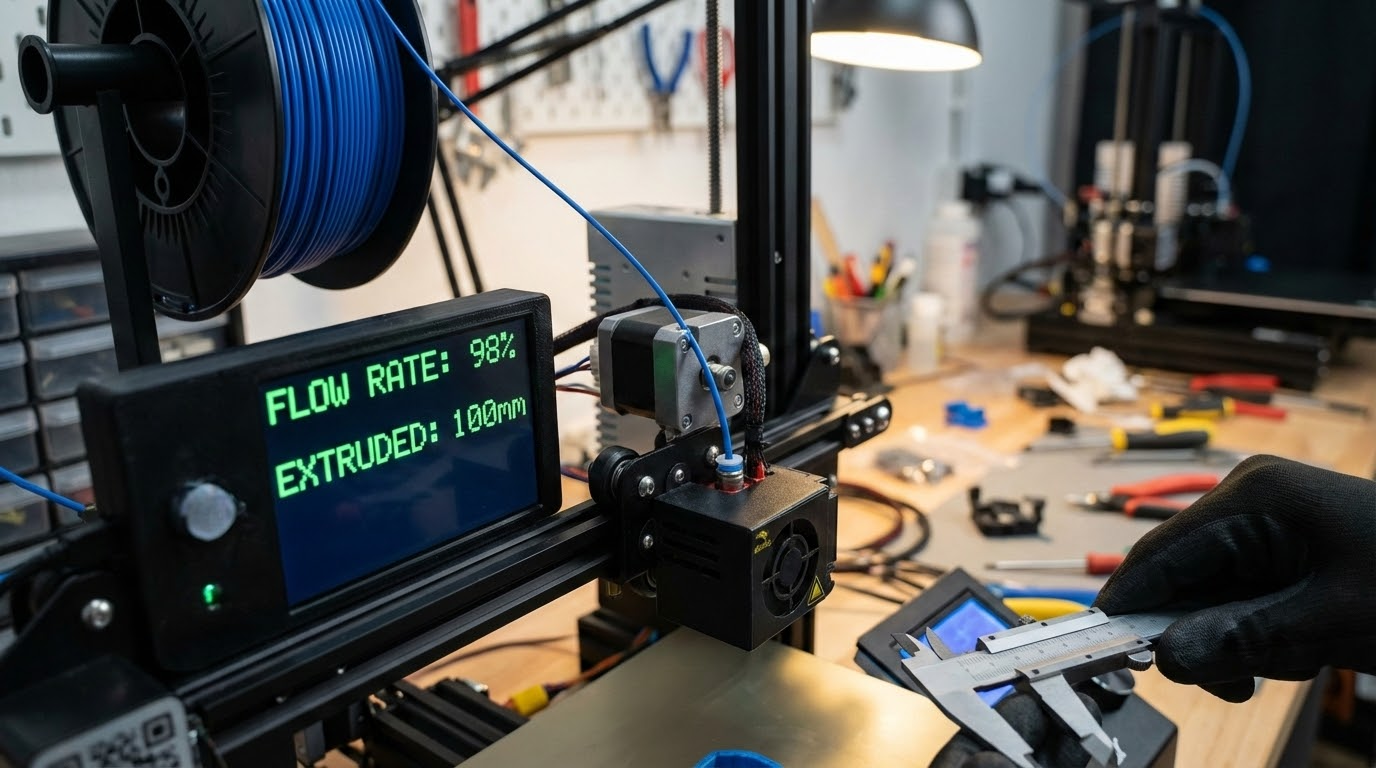
- Command the printer to extrude 100mm:
G1 E100 F100 - Measure the remaining distance from your mark to the extruder entrance.
- Calculate: if 20mm remains, you extruded exactly 100mm — perfect. If 25mm remains, you only extruded 95mm.
- New E-steps = (current E-steps × 100) / actual mm extruded.
- Save with
M92 Exx.xxfollowed byM500.
Once E-steps are dialed in, you know the mechanical side is accurate. Now flow rate handles the volumetric fine-tuning.
Step 2: Print a Flow Rate Test Cube
The classic approach uses a single-wall cube — a hollow box printed with exactly one perimeter and zero infill. This lets you measure wall thickness directly against the expected extrusion width.
Here’s how to set it up in your slicer:
- Model: 20×20×20mm cube
- Wall count: 1 (single perimeter)
- Top layers: 0
- Bottom layers: 1 (just enough for adhesion)
- Infill: 0%
- Extrusion width: 0.4mm (or whatever your nozzle size is)
- Flow rate: 100% (baseline)
- Speed: slow — 30mm/s or less for accuracy
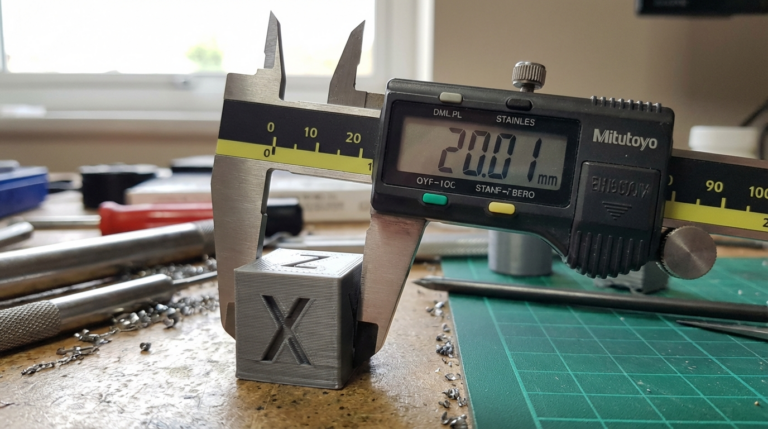
Print the cube, let it cool completely, then measure the wall thickness at several points using digital calipers. Avoid the corners — measure flat sections of each wall, at least 3-4 spots per side.
Step 3: Calculate the Correct Flow Rate
The math is simple:
New flow rate = (expected width / measured width) × current flow rate
For example, if your extrusion width is set to 0.4mm and you measure walls averaging 0.44mm:
New flow rate = (0.4 / 0.44) × 100% = 90.9%
Round to the nearest whole number — in this case, 91%. Set this in your slicer and print another test cube to verify. The walls should now measure very close to 0.4mm.
If you’re within ±0.02mm, you’re in great shape. Anything beyond that deserves another round of adjustment. Most printers land somewhere between 88% and 98% flow rate for PLA with a standard brass nozzle.
Flow Rate Varies by Filament
This is something that catches people off guard: your perfect flow rate for PLA probably won’t work for PETG. And ABS will need its own setting too.
Each material melts differently, has different viscosity at printing temperatures, and compresses differently in the extruder. PETG in particular tends to need lower flow rates (92-96%) because it’s stringier and more prone to over-extrusion artifacts. ABS typically runs close to PLA. TPU is a whole different animal — flexible filaments compress in the extruder path, making flow calibration trickier on Bowden setups.
Pro tip: Create separate slicer profiles for each filament brand and type. Once you calibrate flow rate for Hatchbox PLA, save that profile. When you switch to eSUN PLA+, run the test again — even same-material filaments from different manufacturers can differ by 2-3%.
Advanced: Volumetric Flow Rate Limits
Beyond the extrusion multiplier, there’s a hard physical limit to how much plastic your hotend can melt per second. This is your maximum volumetric flow rate, measured in mm³/s.
A standard E3D V6-style hotend with a 0.4mm nozzle tops out around 11-15 mm³/s for PLA. High-flow hotends like the Revo or Rapido can push 25-40+ mm³/s. If your slicer requests more than your hotend can deliver — which happens at high speeds with wide extrusion widths — the extruder skips steps or grinds filament, and you get under-extrusion.
To calculate your flow demand: layer height × extrusion width × print speed. For example: 0.2mm × 0.4mm × 150mm/s = 12 mm³/s. That’s already pushing a standard hotend. Bump the speed to 200mm/s and you’re at 16 mm³/s — likely beyond its capability.
Knowing your hotend’s limit helps you set realistic speed expectations. No amount of flow rate tuning compensates for asking a hotend to do more than physics allows.
Common Mistakes During Flow Calibration
After helping dozens of people troubleshoot flow issues, I’ve seen the same mistakes repeatedly:
- Measuring with the wrong tool. A ruler doesn’t cut it. You need digital calipers — they’re $10-15 and indispensable for 3D printing.
- Measuring hot prints. Plastic shrinks as it cools. Always let the test cube reach room temperature before measuring.
- Ignoring filament diameter variation. Cheap filament can vary ±0.05mm in diameter. That’s a 2.5% volume variation on 1.75mm filament. If your measurements are inconsistent, the filament might be the problem.
- Adjusting flow rate to fix other issues. If you have a partial clog or E-step miscalibration, changing flow rate is a band-aid, not a fix. Address root causes first.
- Using different settings for the test and actual prints. Calibrate at the temperature, speed, and layer height you’ll actually use. Flow behavior changes with temperature and speed.
Slicer-Specific Settings
Cura: The setting is called “Flow” under the Material section. You can also set per-structure flow rates: wall flow, infill flow, top/bottom flow, and support flow. Start with the global flow setting and fine-tune individual components later if needed.
PrusaSlicer / OrcaSlicer: Look for “Extrusion multiplier” under Filament Settings. It works the same way — 1.0 = 100%. These slicers also support per-filament profiles that save your calibrated values.
Simplify3D: “Extrusion Multiplier” under the Extruder tab. Same concept, same math.
When to Recalibrate
Flow rate isn’t a set-and-forget value. Recalibrate when you:
- Switch filament brands or types
- Replace the nozzle (even same-size nozzles vary slightly)
- Change the hotend or extruder
- Notice print quality degradation over time (nozzle wear)
- Switch between nozzle sizes (0.4mm vs 0.6mm vs 0.8mm)
A worn brass nozzle develops a slightly larger bore over time, especially if you print abrasive filaments like carbon fiber or glow-in-the-dark PLA. This effectively increases flow, making previously calibrated values too high. Switching to hardened steel or ruby-tipped nozzles eliminates this problem but introduces its own flow characteristics due to different thermal properties.
Putting It All Together
Flow rate calibration is a fifteen-minute process that pays dividends on every single print. Here’s the quick reference:
- Verify E-steps are correct first.
- Print a single-wall test cube at 100% flow.
- Measure walls with digital calipers (multiple points, room temperature).
- Calculate: new flow = (target width / measured width) × 100.
- Print another cube to verify.
- Save to a filament-specific slicer profile.
That’s it. No magic, no guesswork — just measurement and math. Your prints will thank you with cleaner walls, better dimensional accuracy, and fewer head-scratching failures. If you haven’t calibrated your flow rate yet, today’s the day. Grab those calipers and run a test cube. You’ll wonder why you didn’t do it sooner.