How to Change Filament Color Mid Print: 4 Methods for Multicolor 3D Prints
Why You’d Want to Change Filament Color Mid-Print
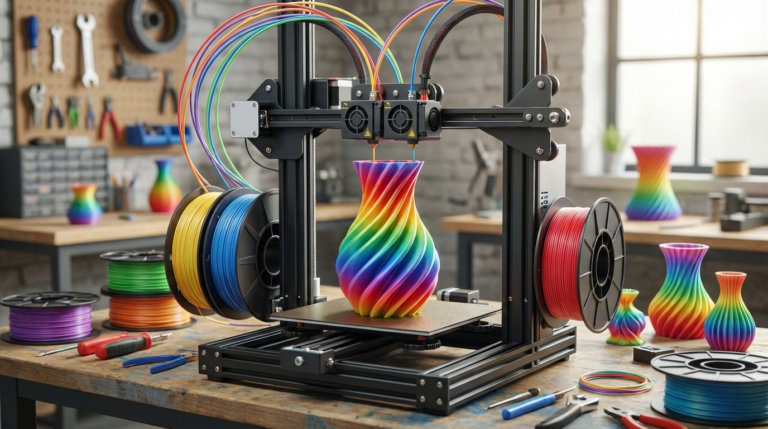
Multicolor prints look amazing, but not everyone has a Bambu Lab AMS or a Prusa MMU sitting on their desk. The good news is that you don’t need any special hardware to print in multiple colors. With some simple slicer tricks and a willingness to babysit your printer for a few minutes, you can produce stunning multicolor prints on any single-extruder 3D printer.
The most common use cases? Signs with contrasting text and background, layered artwork or lithophanes with color accents, figurines with different colored sections, and functional parts where color indicates different zones (like a temperature knob with red and blue halves).
Method 1: Manual Filament Swap at Layer Change
This is the simplest method and works on literally every FDM printer. You pause the print at a specific layer, swap the filament, and resume.
Setting It Up in Your Slicer
In Cura:
- Slice your model normally
- Open the preview, find the layer where you want the color change
- Go to Extensions → Post Processing → Modify G-Code
- Add “Filament Change” script
- Set the layer number for the color change
- This inserts an M600 command that pauses the printer and moves the nozzle out of the way
In PrusaSlicer / OrcaSlicer:
- Slice your model
- In the layer slider on the right side of the preview, find your target layer
- Click the “+” icon next to the layer slider
- Select “Add color change”
- The slicer automatically inserts the M600 command
The Swap Process
When the printer reaches the color change layer, it will:
- Pause and beep (if your printer has a buzzer)
- Move the nozzle to a park position (usually front-left)
- Wait for you to swap filament
Here’s how to do the swap cleanly:
- Heat and retract the current filament. Most firmware handles this automatically during M600. If not, retract manually until the filament pulls free from the extruder.
- Cut the new filament at a sharp angle. This makes it easier to feed into the extruder.
- Feed the new filament until it reaches the hotend. Push it through until you see the new color extruding cleanly.
- Purge the old color. Keep pushing filament until no trace of the old color remains. This typically takes 50-100mm of purging, depending on how different the colors are (dark to light requires more purging than light to dark).
- Resume the print. Press the button on your printer or confirm via OctoPrint.
Tips for Clean Color Transitions
- Use a purge tower or purge block. Some slicers can generate a small tower that the printer purges into after each color change. This keeps the transition waste off your actual part.
- Clean the nozzle exterior. Wipe the outside of the nozzle with a brass brush before resuming. Residual old-color plastic on the outside can leave marks on the first few layers of the new color.
- Account for temperature differences. If switching between materials (e.g., black PLA at 210°C to white PLA at 200°C), adjust the temperature before resuming.
Method 2: Painting G-Code (Color by Region on Same Layer)
What if you want different colors on the same layer — like text on a nameplate? Manual filament swap only works for full-layer color changes. For same-layer multicolor, you need a different approach.
PrusaSlicer Multi-Material Painting
PrusaSlicer (and OrcaSlicer) have a built-in “Multi-Material Painting” tool that lets you paint different colors onto different parts of your model, even within the same layer. Here’s the workflow for single-extruder printers:
- Set up your printer profile with 2+ “extruders” even though you only have one
- Import your model and open the MMU painting tool
- Paint the regions you want in different colors
- The slicer generates color change commands (M600) at the appropriate points
- A purge tower is generated automatically to handle transitions
This is more advanced but produces results that look like they came from a multi-extruder printer.
Method 3: Filament Splicing
Filament splicing means joining two different colored filaments end-to-end before the print starts. The printer runs through the spliced filament continuously, and color changes happen automatically when the splice point reaches the nozzle.
Manual Splicing
You can splice filament manually by:
- Cutting both filaments at clean 90-degree angles
- Heating a short section of PTFE tube with a heat gun
- Inserting both filament ends into the PTFE tube until they meet
- The heat softens both ends and they fuse together
- Let it cool, then trim any bulge with a craft knife
The splice needs to be the same diameter as the original filament (1.75mm ± 0.05mm) or it can jam in the extruder. This takes practice.
Automated Splicing (Palette / Mosaic)
The Mosaic Palette is a device that sits between your filament spools and the extruder. It automatically splices up to 8 different filaments based on instructions from the slicer. It’s essentially a multi-material upgrade for any single-extruder printer.
- Pros: Fully automated, supports up to 8 colors, works with any printer
- Cons: Costs $500-600, generates significant purge waste, adds complexity
Method 4: Embedded Color Changes (Signs, Logos, Text)
For flat items like signs, name plates, and logos, there’s a clever technique that requires only one color change and produces sharp, professional results.
The Inlay Method
- Design your sign in two pieces: a base plate and the text/logo as separate bodies
- Make the text 0.4-0.8mm thick (2-4 layers at 0.2mm layer height)
- Recess the text into the base plate so it sits flush or slightly proud
- Print the base plate in your background color
- Swap filament when you reach the text layers
- The text prints in the new color directly into/onto the base
This method produces incredibly clean results because the color boundary aligns with a layer change — there’s no mixing or transition zone.
Troubleshooting Multi-Color Prints
Color Bleed at Transitions
The most common issue with mid-print color changes is color contamination — traces of the old color showing up in the first few layers of the new color. Solutions:
- Purge more. The default purge amount is often not enough, especially going from dark to light colors. Black to white might need 150mm+ of purging.
- Use a purge tower. This confines the messy transition to a sacrificial structure that you discard after printing.
- Print a purge line. Before resuming the actual print, have the printer lay down a purge line along the edge of the bed.
Layer Shift After Resume
Sometimes the print shifts slightly on the X or Y axis after a pause/resume. This is usually caused by:
- Bumping the printhead while swapping filament. Be gentle — don’t push on the hotend or gantry.
- Stepper motors losing position. Some printers disable steppers during pause to save power. In Marlin, set
NOZZLE_PARK_FEATUREand keep motors enabled during pause. - Belt skip. If you accidentally push the carriage during the swap, it can skip belt teeth. Always move the carriage by jogging through the firmware, never by hand.
Adhesion Between Colors
If the new color doesn’t bond well to the previous layers, the issue is usually temperature-related:
- The bed and previous layers cooled during the swap. The longer the printer is paused, the more the existing layers cool, reducing interlayer adhesion.
- Solution: Work quickly during the swap (under 2 minutes), and consider increasing bed temperature by 5°C for the first few layers after resuming.
Advanced: Automatic Multi-Color Without Special Hardware
Some printers (like the Bambu Lab A1 series with AMS Lite) now offer affordable automatic color changing. But if you don’t want to buy new hardware, here are some creative alternatives:
- Gradient effect: Swap filament every 5-10 layers, gradually transitioning through similar colors (light blue → blue → dark blue). This creates a gradient effect that looks like it came from a specialty filament.
- Stripe patterns: Alternate between two colors every few layers for a striped effect. Works great for decorative vases and containers.
- Random color pops: Use up partial spools by splicing short sections of random colors into a main filament. The result is a random confetti-like color pattern that’s unique to each print.
Materials That Play Well Together
Not all filament combinations work for multi-color printing. The materials need to be compatible — they should print at similar temperatures and bond to each other between layers.
- PLA + PLA: Perfect. Any PLA colors work together.
- PETG + PETG: Works well. Same temperatures.
- PLA + PETG: Doesn’t bond well between layers. Avoid.
- ABS + ABS: Works fine, but you still need an enclosure.
- PLA + Silk PLA: Works, but silk variants may need 5-10°C higher temperature.
Final Thoughts
You don’t need a multi-thousand-dollar printer with an automatic material system to produce stunning multicolor prints. A $200 printer with the manual filament swap method can create results that look just as good — it just requires a few minutes of your time at each color change. Start with simple two-color designs (text on a plate, stacked color bands) and work your way up to more complex multi-region prints as you get comfortable with the process. The M600 filament change command and your slicer’s built-in color change tools make the whole thing surprisingly straightforward once you’ve done it a couple of times.