How to Fix 3D Print Scars and Marks on Surface: Complete Guide
If you’ve been 3D printing for any length of time, you’ve probably noticed those annoying scars, marks, and blemishes that show up on your print surfaces. These imperfections — often called travel marks, seam lines, or surface scarring — can turn an otherwise perfect print into something that looks rough and unfinished. The good news? Most surface defects have straightforward causes and fixes.
In this guide, I’ll walk you through every type of surface scar you might encounter on your 3D prints, explain exactly what causes each one, and give you tested solutions that actually work. Whether you’re dealing with z-seam lines, nozzle drag marks, or mysterious scratches that seem to appear from nowhere, you’ll find your answer here.
Understanding Surface Scars on 3D Prints
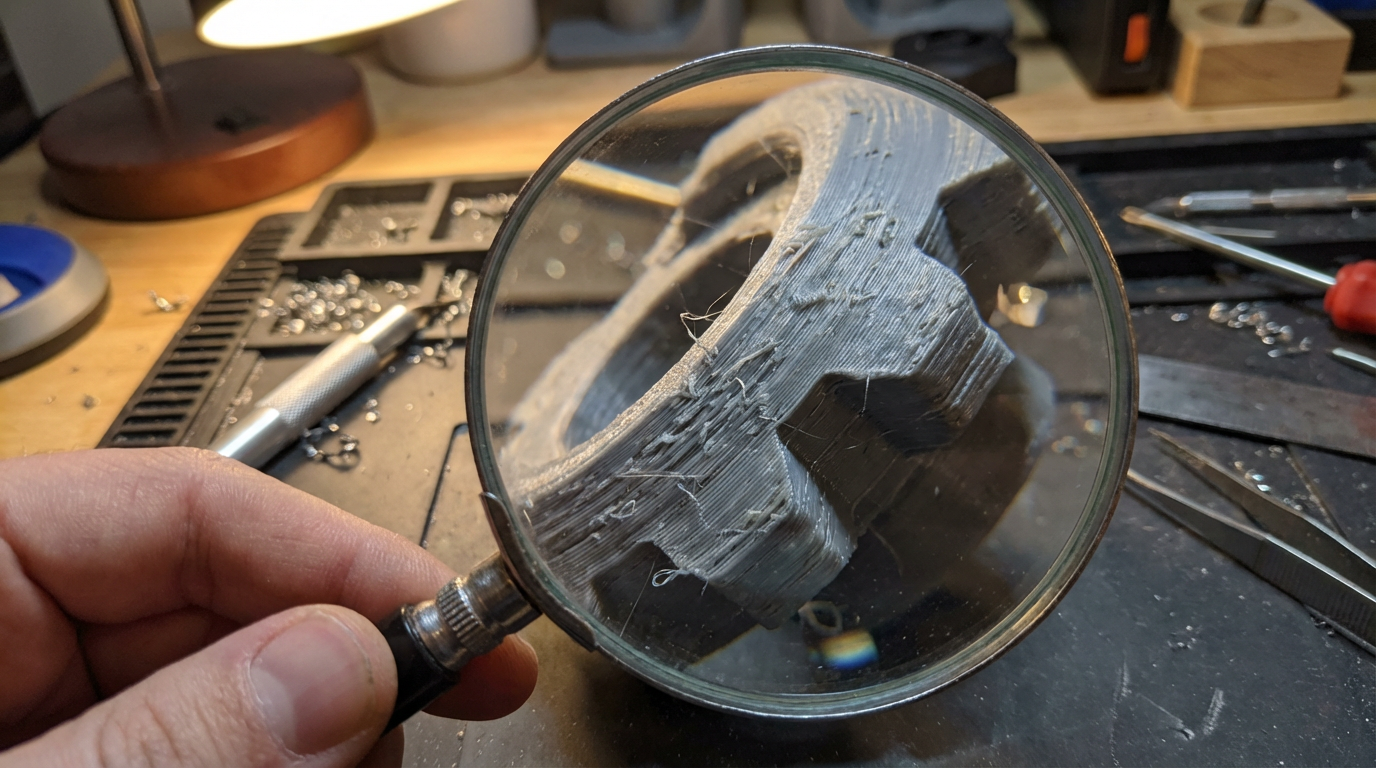
Surface scars on 3D prints are any visible marks, lines, or blemishes that shouldn’t be there. They differ from issues like stringing or layer shifting because they appear directly on the surface of the print walls, often as raised bumps, scratches, or indentations.
The most common types include:
- Z-seam lines — vertical lines where each layer starts and stops
- Travel marks — scratches left by the nozzle moving across the surface
- Blob marks — small bumps caused by excess material at layer transitions
- Drag marks — lines created when the nozzle physically touches the print surface
- Retraction scars — small divots or bumps at retraction points
Z-Seam Lines: The Most Common Surface Scar
Every layer of a 3D print has to start somewhere, and that starting point creates a visible seam. This is called the z-seam, and it’s technically unavoidable — but you can make it nearly invisible with the right settings.
How to Fix Z-Seam Lines
In Cura:
- Set “Z Seam Alignment” to “Sharpest Corner” for models with corners — this hides the seam in natural geometry
- For round objects, use “Random” to scatter the seam points across the surface instead of creating one visible line
- Enable “Coasting” (0.06-0.1mm³) to reduce pressure at the end of each layer
In PrusaSlicer / OrcaSlicer:
- Set seam position to “Nearest” or “Aligned” depending on your model geometry
- Use “Seam painting” to manually place seams in inconspicuous locations
- Adjust “Wipe while retracting” settings to clean the nozzle at layer changes
Travel Marks and Nozzle Scratches
Travel marks happen when your nozzle moves across the top surface of your print while traveling between print areas. If the nozzle is too close to the surface or there’s excess filament oozing, it leaves visible scratches or drag lines.
Solutions for Travel Marks
- Enable Z-hop — This lifts the nozzle slightly during travel moves, preventing it from touching the surface. Set it to 0.2-0.4mm for most printers.
- Enable retraction during travel — Prevents oozing filament from being dragged across the surface.
- Reduce travel speed — Sometimes slowing travel moves from 150mm/s to 100mm/s reduces the force of any contact.
- Enable “Avoid printed parts when traveling” — Available in most slicers, this routes travel moves around finished areas.
Blob and Zit Marks on Walls
Blobs (also called zits or pimples) are small raised bumps on the surface of your print. They’re caused by pressure buildup in the nozzle when the extruder starts or stops, leaving a tiny blob of excess material.
How to Eliminate Blobs
The key is managing pressure in the hotend:
- Tune retraction settings — For direct drive: 0.5-2mm distance, 25-45mm/s speed. For Bowden: 3-7mm distance, 40-60mm/s speed.
- Enable coasting — Stops extrusion slightly before the end of a perimeter, using residual pressure to finish the line.
- Adjust extra restart distance — Set to a small negative value (-0.02 to -0.05mm) to slightly under-extrude at restart points.
- Linear/Pressure Advance — If your firmware supports it (Klipper or Marlin), this automatically compensates for pressure changes.
Retraction Scarring
Retraction scars appear as small pits or bumps at points where the filament was retracted and then restarted. This is closely related to blob marks but specifically tied to retraction events.
Fixing Retraction Scars
The balance is delicate — too much retraction causes gaps, too little causes blobs:
- Print a retraction tower — Use a retraction test tower to find the sweet spot for your specific filament and hotend combination.
- Fine-tune restart distance — Start with 0mm extra restart distance and adjust in 0.01mm increments.
- Check your nozzle temperature — Higher temperatures make oozing worse. Try reducing by 5°C if you’re seeing retraction artifacts.
- Wipe settings — Enable nozzle wipe to clean the nozzle tip before starting a new perimeter.
Overheating and Surface Artifacts on Small Parts
When printing small parts or thin features, the previous layer may not have enough time to cool before the next one is deposited. This causes the surface to look melted, droopy, or scarred with rough texture.
Solutions for Heat-Related Surface Damage
- Set minimum layer time — Most slicers let you set a minimum time per layer (8-15 seconds is typical). The printer will slow down to allow cooling.
- Print multiple objects simultaneously — This gives each part more cooling time between layers.
- Increase fan speed — For PLA, running the part cooling fan at 100% for small features is perfectly fine.
- Add a cooling tower — Place a small tower next to your main print to force the nozzle to travel away, giving your part time to cool.
Nozzle Drag on Top Surfaces
Top surface quality is often where scars are most visible. If your top surface looks scratched or has lines running across it, the nozzle is likely dragging through the just-deposited material.
Improving Top Surface Quality
- Enable ironing — Available in Cura and PrusaSlicer, ironing passes the hot nozzle over the top surface with minimal extrusion, creating a smooth finish.
- Increase top layers — Use at least 5-6 top solid layers (or 1.2mm top thickness) to prevent infill from showing through.
- Monotonic top surface — Enable monotonic infill pattern for top layers (available in most modern slicers) for consistent line direction.
- Reduce flow rate for top layers — Try 90-95% flow for the top skin to prevent over-extrusion.
Post-Processing: Removing Surface Scars After Printing
Sometimes the best approach is a combination of prevention and cure. After optimizing your settings, you can further improve surface quality through post-processing:
- Sanding — Start with 200-grit and work up to 600-grit for a smooth finish. Wet sanding works especially well for PLA.
- Filler primer — Spray-on filler primer fills small surface imperfections and creates a paintable surface.
- Acetone vapor smoothing — For ABS and ASA prints, brief exposure to acetone vapor melts the surface smooth.
- Heat gun treatment — A quick pass with a heat gun can smooth minor surface scars on PLA, but be extremely careful not to deform your print.
Prevention Checklist
Before starting your next print, run through this quick checklist to minimize surface scars:
- Z-seam set to “Sharpest Corner” or manually placed
- Z-hop enabled (0.2-0.4mm)
- Retraction calibrated with a test tower
- Coasting enabled (0.04-0.08mm³)
- Combing mode set to “Within infill” or “Not in skin”
- Part cooling fan at appropriate speed for your material
- Minimum layer time set to 8-15 seconds
- Linear/Pressure Advance tuned (if supported)
- Nozzle temperature verified with a temp tower
- Ironing enabled for flat top surfaces
Final Thoughts
Surface scars on 3D prints are frustrating, but they’re almost always fixable. The key is identifying which type of scar you’re dealing with and then applying the targeted fix. Start with the most impactful changes — z-seam alignment, z-hop, and retraction calibration — and work your way through the finer adjustments.
Remember that every printer, filament, and model is different. What works perfectly on one setup might need slight adjustments on another. Keep notes on your settings, and don’t be afraid to print test objects specifically for dialing in surface quality. A well-calibrated printer can produce prints with surfaces so smooth they look injection-molded — and that’s worth the time investment.