How to Fix 3D Print Warping on One Side Only: 6 Causes and Solutions
Why Would a 3D Print Only Warp on One Side?
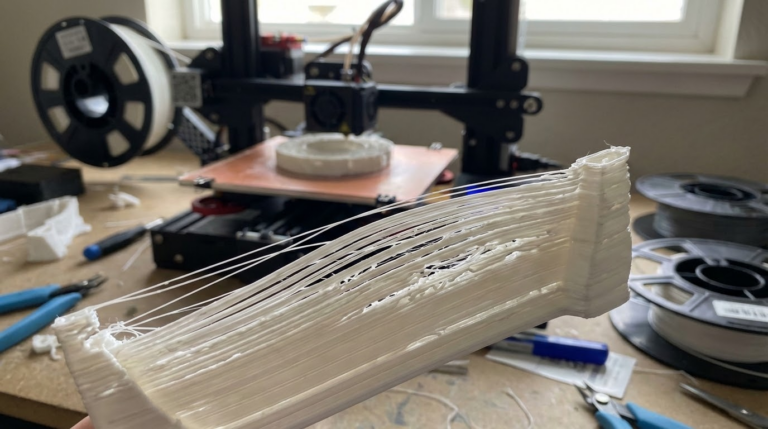
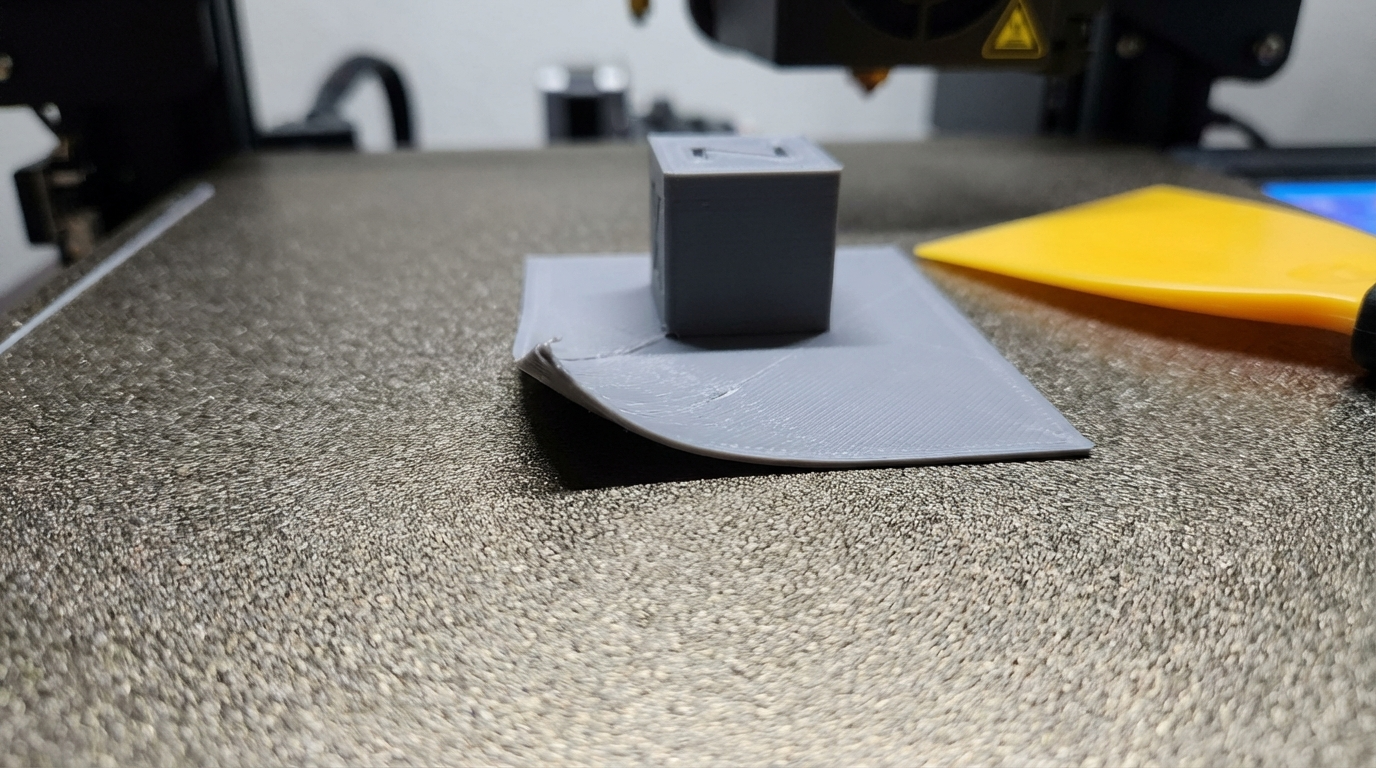
Warping in 3D printing usually affects all corners equally. The bottom of the print shrinks as it cools, the edges pull up, and you get the classic curled-corner look on all sides. But what happens when only one side warps? The left side stays perfectly flat while the right side lifts, or the front is fine but the back curls up like old wallpaper.
Asymmetric warping is more common than most people realize, and it’s maddening because the usual fixes — higher bed temperature, brims, enclosures — often don’t help because they address the wrong cause. When warping affects only one side, the problem isn’t temperature or adhesion in general. It’s a local condition that’s different on one side of the bed compared to the other.
Here are the actual causes and how to fix each one.
Cause #1: Uneven Bed Temperature
This is the most common reason for one-sided warping, and it’s built into the design of most heated beds. The heating element in a typical 3D printer bed is a flat resistive heater (either a PCB heater or silicone heater pad) attached to an aluminum plate. In theory, this distributes heat evenly. In practice, almost every heated bed has temperature variation across its surface.
Why It Happens
The heater element is densest near the center and the thermistor (temperature sensor) is mounted at one specific point — usually center or slightly off-center. The firmware regulates temperature based on that one sensor reading. So the center might be exactly 60°C, but the edges could be 50-55°C, and the corners might be 45-52°C. If the heater traces are slightly more concentrated on one side, or if the thermistor is mounted off-center, one edge of the bed can be significantly cooler than the other.
How to Diagnose
Use an infrared thermometer (the $20 point-and-shoot kind) or a thermal camera (FLIR, or even some newer smartphones). Set your bed to your normal printing temperature and wait 10 minutes for it to stabilize. Then check the temperature at each corner and the center. A variation of more than 5°C between sides is enough to cause asymmetric warping.
How to Fix
- Insulate the underside of the bed: Apply a sheet of cork or silicone insulation underneath the heated bed. This reduces heat loss from the bottom, making the temperature more uniform and helping the edges warm up faster. Cost: $5-10.
- Add a thermal pad: If one side is consistently cooler, a thin silicone thermal pad between the heater and the aluminum plate in that area can improve heat transfer. This is a more advanced fix.
- Increase bed temperature by 5-10°C: This ensures even the coolest edge is above the minimum adhesion temperature. It’s a brute-force approach, but it works.
- Reposition your print: If the left side of the bed is cooler, move your print to the center-right so the warping-prone edge is on the warmer side.
Cause #2: Air Draft on One Side
Open-frame printers are exposed to ambient air movement. A window to the left of the printer, an HVAC vent blowing toward the right side, a fan in the room, or even walking past the printer frequently — all of these create air currents that cool one side of the print faster than the other.
How to Diagnose
Hold a piece of tissue paper near each side of the bed while it’s at printing temperature. If the tissue moves noticeably more on one side, you have an air draft. Also pay attention to where the warping consistently occurs — if it’s always the side facing a window or door, draft is the likely cause.
How to Fix
- Enclose the printer: A full enclosure eliminates drafts entirely. Even a partial enclosure (cardboard box with the front open) helps significantly.
- Move the printer: Position it away from windows, vents, and high-traffic areas. Corners of rooms tend to have the least air movement.
- Add a draft shield: In your slicer (Cura has a built-in “Draft Shield” option), you can print a thin wall around the entire object. This wall blocks air movement near the print. It wastes some filament, but it’s effective.
Cause #3: Uneven Bed Leveling
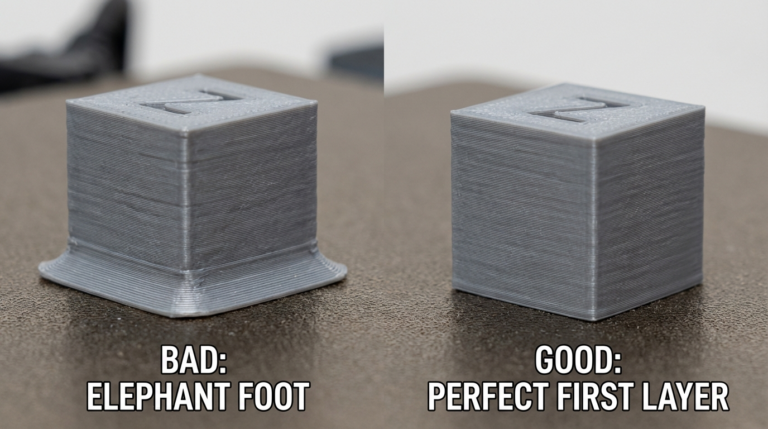
If the bed is tilted — even slightly — one side of your first layer is squished more than the other. The well-squished side has great adhesion and stays flat. The poorly-adhered side has less grip on the build plate and is more likely to warp as the print cools and contracts.
How to Diagnose
Print a first-layer test across the entire bed. If one side shows thinner, more transparent lines while the other side shows thicker, more opaque lines, the bed is tilted. Auto bed leveling (ABL) should compensate for this, but if your ABL mesh is outdated, the probe is dirty, or the calibration is off, the compensation might not be accurate.
How to Fix
- Re-level the bed: Manually level using the paper method, paying extra attention to the corners that warp.
- Re-run ABL calibration: If you have a BLTouch/CR Touch, run a fresh mesh calibration. Clean the probe tip first — a dirty probe gives incorrect readings.
- Check for a warped bed: Place a metal ruler edge-down across the bed surface in multiple directions. If you can see light passing under the ruler, the bed itself is warped. Glass beds can be placed on top of a warped aluminum bed to provide a flat reference surface.
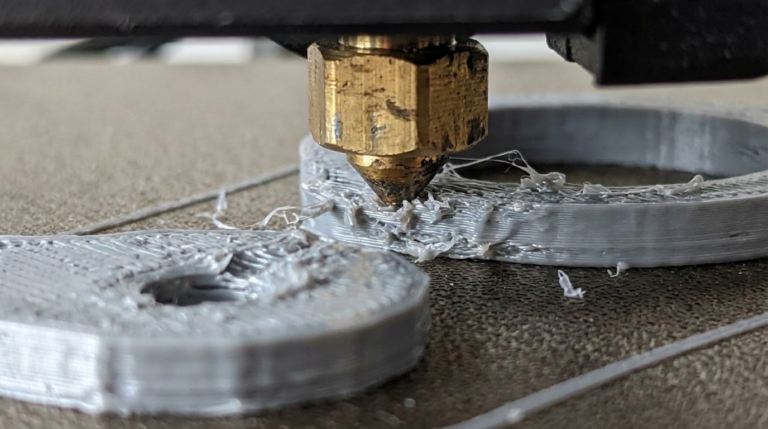
Cause #4: Uneven Bed Surface or Contamination
If one area of your build surface is contaminated with finger oils, old adhesive residue, or has a worn-out section, that area will have less adhesion. Less adhesion on one side means that side is more vulnerable to the pulling forces of cooling plastic.
How to Fix
Clean the entire bed thoroughly with isopropyl alcohol. If that doesn’t help, wash the entire surface with warm water and dish soap, dry completely, then wipe with IPA. Check for physical damage — scratches or gouges in PEI sheets can create adhesion dead zones.
Cause #5: Part Geometry
Sometimes the print itself is the problem. If one side of the model has a large flat area touching the bed while the other side has a thinner profile or a different shape, the thermal stresses during cooling will be different on each side. Large flat sections shrink more and pull harder. Thin sections or rounded edges distribute stress more evenly.
How to Fix
- Rotate the model: Orient the largest flat surface along the axis with the best bed adhesion (usually the center of the bed where temperature is most uniform).
- Add a brim on one side: Most slicers let you adjust brim width. A wider brim on the warping side gives more adhesion where you need it. In PrusaSlicer, you can paint-on brim areas.
- Use mouse ears: Small discs added to specific corners in your CAD model. They act as localized brims that you trim off after printing.
Cause #6: Bed Heating Delays
When you start a print, the bed heater kicks on and starts warming up. Most printers wait until the thermistor reads the target temperature before starting, but the thermistor only reads one point. The rest of the bed — especially the edges and corners — might still be 5-10°C below target when printing begins. If one side of the bed heats slower (farther from the heater element center, less insulated, or near a cold surface), it won’t be at the right temperature when the first layer goes down.
How to Fix
Add a 2-5 minute pre-heat dwell time in your start G-code. After the bed reaches target temperature, add G4 P120000 (wait 2 minutes) or G4 P300000 (wait 5 minutes) before the print starts. This gives the entire bed time to reach a uniform temperature, not just the thermistor location.
Quick Diagnostic Workflow
When you see one-sided warping, work through this checklist in order:
- Check for drafts: Tissue paper test near all sides of the bed. Block any air movement.
- Check bed temperature uniformity: IR thermometer on all four corners and center. If variation is >5°C, insulate the bed or increase temperature.
- Check bed level: Print a full-bed first layer test. Adjust leveling or re-run ABL.
- Clean the bed: Full IPA wipe, then test again.
- Add dwell time: Let the bed soak at temperature for 2-5 minutes before printing.
- Add localized adhesion: Brim or mouse ears on the warping side only.
In most cases, the fix is one of the first three items. Asymmetric warping is almost always caused by an asymmetric condition — uneven heat, uneven air, or uneven leveling. Find which side is different and fix that specific side, and the warping disappears.
When Nothing Works
If you’ve addressed all six causes and one side still warps, consider these last-resort options:
- Switch build surfaces: Try glass (perfectly flat) or a fresh PEI sheet.
- Use a raft: A raft absorbs warping stress before it reaches the actual print. The raft might warp slightly, but the print on top of it stays flat.
- Change filament: Some filament brands warp more than others due to inconsistent formulation. Try a different brand or a low-warp variant (PLA+ tends to warp less than standard PLA, for example).
- Print at a different time: Ambient conditions change throughout the day. If your printer is in a garage, nighttime printing might have more stable temperatures than daytime when the sun heats one wall.
One-sided warping is solvable. It just requires thinking about what’s different on that side versus the side that’s fine, and then making that one condition equal across the entire bed.