How to Fix 3D Printer Vibration, Wobble, and Ringing: Complete Guide
Vibration is one of the most underestimated enemies of 3D print quality. When your printer wobbles, shakes, or resonates, it shows up in your prints as ringing, ghosting, layer inconsistencies, and surface artifacts that no amount of slicer tweaking can fix. The good news is that vibration problems have mechanical solutions, and most of them are either free or very affordable.
In this guide, I’ll cover every source of 3D printer vibration and wobble, from loose bolts to resonance frequencies, and give you practical fixes that actually eliminate the problem rather than just masking the symptoms.
How Vibration Ruins Your Prints
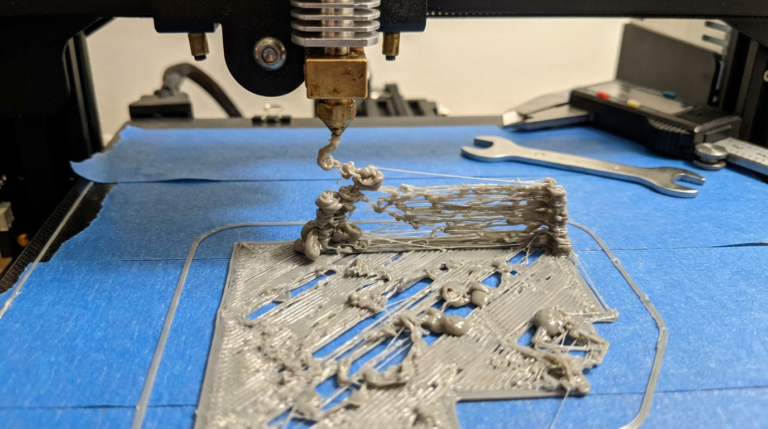
Before diving into fixes, it helps to understand what vibration actually does to your prints. When the print head changes direction quickly — like when printing a sharp corner — the momentum causes the frame and motion system to vibrate. These vibrations create several visible defects:
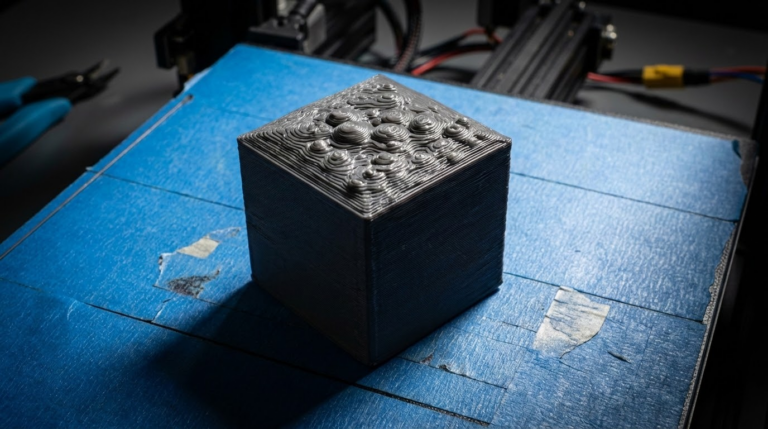
- Ringing (ghosting): Repeating echo patterns on flat surfaces after sharp corners or features. This is the most common vibration artifact.
- Layer inconsistency: Uneven wall thickness caused by the nozzle position oscillating during printing.
- Surface ripples: Wavy patterns on vertical walls, especially visible on large flat areas.
- Dimensional inaccuracy: Parts come out slightly different sizes because the nozzle overshoots its target position.
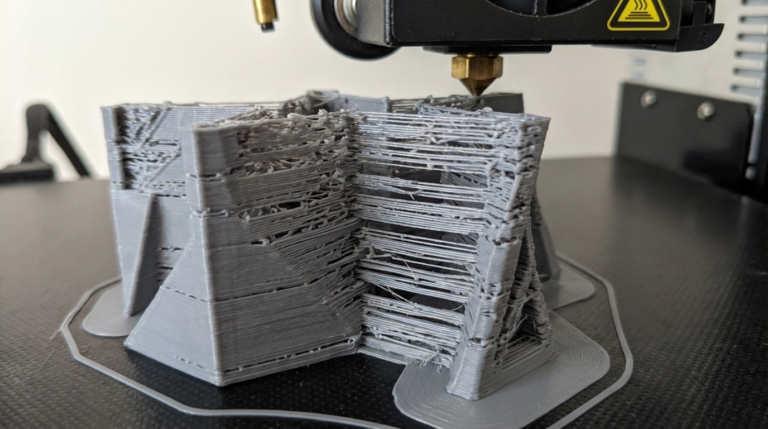
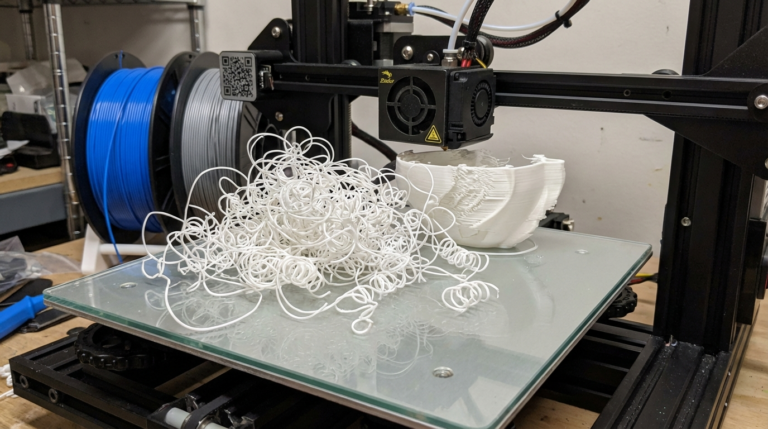
- Print failures: In extreme cases, vibration causes layer shifts, lost steps, or complete print detachment.
Identifying the Source of Vibration
Not all vibration comes from the same place. Before you start fixing things, identify where the vibration originates.
The Frame
Put your hand on the frame while the printer is running at full speed. If the entire frame shakes, you have a rigidity problem. Common on:
- Budget i3-style printers with acrylic or thin aluminum frames
- Printers assembled without proper bolt tightening
- Printers placed on wobbly desks or shelves
The Motion System
Watch the belts, pulleys, and linear rails during fast movements. Vibration from the motion system shows up as:
- Belt oscillation (you can see the belt vibrating)
- Play in the linear bearings or wheels
- Loose pulley grub screws causing inconsistent positioning
The Print Surface
Some printers have beds that wobble independently of the frame. This is especially common on cantilever-style beds (Prusa-style). Press on the far edge of the bed — if it moves more than a fraction of a millimeter, you have a bed rigidity issue.
External Sources
Sometimes the vibration isn’t from the printer at all. Subwoofers, washing machines, foot traffic, or placing the printer on a flexible surface can all transmit vibrations through the frame.
Mechanical Fixes: Tightening and Tuning
1. Tighten Every Bolt
This sounds obvious, but it’s the number one fix for vibration problems. Over time — sometimes even during shipping — bolts work themselves loose. Systematically go through every bolt on your printer:
- Frame corner brackets
- Motor mounts
- Bed mounting screws
- Hotend and extruder mounting bolts
- V-slot wheel eccentric nuts
- Pulley grub screws (especially these — they come loose constantly)
2. Adjust V-Slot Wheels
If your printer uses V-slot wheels (Ender 3, CR-10, Artillery, etc.), proper adjustment is critical. Each axis has an eccentric nut on one of the wheels:
- Move the axis to the middle of its travel
- Try to wiggle the gantry/bed — there should be zero play
- Turn the eccentric nut in small increments until the play is gone
- The axis should still move smoothly — too tight causes flat spots on the wheels
3. Belt Tension
Both too-loose and too-tight belts cause vibration problems:
- Too loose: The belt bounces, causing ringing and backlash
- Too tight: Puts excessive load on bearings and motors, causing resonance
- Just right: When plucked, the belt should produce a low-pitched “thrum,” not a high-pitched “ping”
Some advanced users tune belt tension by frequency. Using a phone app that measures sound frequency, aim for 80-120 Hz when the belt is plucked. Both X and Y belts should be matched as closely as possible.
Vibration Dampening Solutions
Stepper Motor Dampers
Stepper motors are a significant source of vibration, especially on printers with A4988 drivers (common on older boards). Motor dampers are rubber-metal sandwich mounts that go between the motor and the frame.
- Cost: $5-15 for a set of 3-4
- Effectiveness: Significant noise reduction, moderate vibration reduction
- Compatibility: Most NEMA 17 motors on i3-style printers
- Downside: Adds ~3mm of motor offset that may need to be accounted for
Note: If your printer uses TMC2209 or TMC2208 stepper drivers with StealthChop enabled, motor dampers provide less benefit because these drivers already minimize motor vibration through their quiet operating mode.
Sorbothane Feet
Sorbothane is a viscoelastic polymer that absorbs vibrations remarkably well. Placing sorbothane pads under your printer’s feet dramatically reduces the vibration transmitted to and from the surface it sits on.
- Thickness: 10-12mm pads work best for most printers
- Durometer: 30-50 durometer for printers in the 5-15kg range
- Placement: One pad under each foot, or a full sheet cut to size
- Cost: $15-30 for a set

Concrete Paver Base
One of the most effective and cheapest vibration solutions is placing your printer on a heavy concrete paver slab. The mass of the concrete absorbs vibrations through inertia — it simply doesn’t want to move.
- Get a concrete paver from a hardware store ($3-8)
- Place sorbothane pads between the paver and your desk
- Put the printer on top of the paver (with or without additional sorbothane between)
- The combination of mass dampening (concrete) and viscoelastic dampening (sorbothane) is remarkably effective
Software Solutions: Input Shaping
Input shaping is a firmware-level feature that actively compensates for vibration by predicting and counteracting resonance. It’s the single most impactful upgrade for print quality at high speeds.
Klipper Input Shaper
If your printer runs Klipper firmware, input shaping is built in and highly configurable:
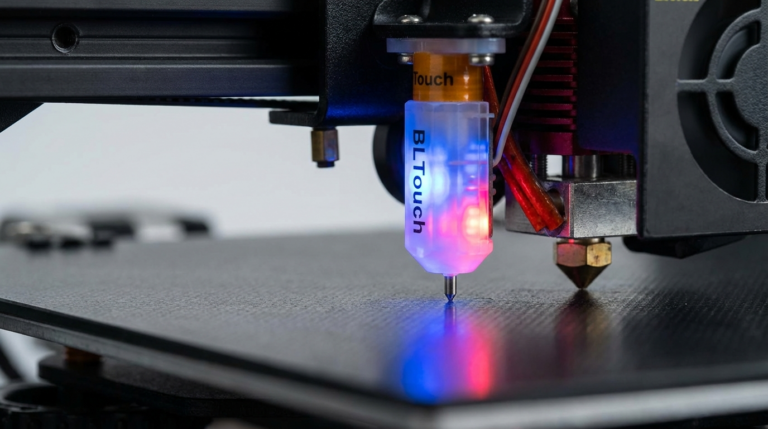
- Mount an ADXL345 accelerometer to your printhead
- Run the resonance measurement macro:
SHAPER_CALIBRATE - The system measures your printer’s resonance frequencies on both X and Y axes
- Klipper automatically selects the best shaping algorithm (MZV, EI, or 2HUMP_EI) and frequency
- Save the results and ringing artifacts virtually disappear
Marlin Input Shaping
Recent Marlin firmware versions (2.1.2+) include basic input shaping support. It’s less sophisticated than Klipper’s implementation but still effective:
- Configure via
M593G-code command - Set the shaping frequency manually (typically 30-60 Hz for most printers)
- Requires some trial and error to find the optimal frequency
Bambu Lab / Creality Printers
Most modern printers from Bambu Lab and Creality come with built-in vibration compensation that runs automatically during calibration. For these printers, simply run the calibration routine and let the firmware handle the rest.
Frame Rigidity Upgrades
For printers with flex-prone frames (Ender 3, CR-10, etc.), adding structural reinforcement can dramatically improve print quality at higher speeds:
- Z-axis braces: 3D printed or aluminum brackets that connect the Z-axis uprights to the base frame at an angle. This triangulates the structure and eliminates front-to-back wobble.
- Dual Z-axis upgrade: Adding a second lead screw eliminates the single-point-of-support wobble common on budget printers. This also prevents X-axis gantry sag.
- Frame squaring: Use a precision square to verify all frame joints are at exactly 90°. Even 1-2° of misalignment causes vibration at speed.
- Linear rail conversion: Replacing V-slot wheels with MGN12 linear rails eliminates play and reduces friction, both of which contribute to vibration.
The Vibration Fix Checklist
Work through these fixes in order — they’re arranged from easiest/most impactful to more involved:
- Tighten all bolts — especially pulley grub screws (free, 15 minutes)
- Adjust V-slot wheels — eliminate play without overtightening (free, 20 minutes)
- Check belt tension — match X and Y belt tension (free, 10 minutes)
- Add sorbothane feet — or place printer on a concrete paver ($5-30, 5 minutes)
- Enable input shaping — Klipper or Marlin, the biggest quality improvement ($10-15 for accelerometer)
- Install stepper dampers — if using older stepper drivers ($10-15, 30 minutes)
- Add Z-axis braces — for i3-style printers ($0 if 3D printed, 30 minutes)
- Dual Z-axis upgrade — eliminates gantry wobble ($20-40, 1-2 hours)
- Linear rail conversion — the ultimate motion system upgrade ($50-100, several hours)
When Speed is the Problem
Sometimes the real fix is accepting that your printer has a speed limit. Every printer has a maximum speed where quality begins to degrade — and that speed depends on the rigidity of the frame, the quality of the motion system, and the mass of the moving components.
If you’ve done everything on this list and still see vibration artifacts at 200mm/s, try printing at 150mm/s. The quality difference between a clean 150mm/s print and a ringing-covered 200mm/s print is enormous. Speed matters, but quality matters more.
That said, with proper dampening, tight mechanics, and input shaping enabled, most modern printers can comfortably handle 100-200mm/s (or much more on CoreXY machines) without visible vibration artifacts. Take the time to address the root causes, and you’ll be rewarded with consistently clean, professional-looking prints at speeds that actually make sense for your machine.