How to Fix Bad Bridging in 3D Printing: Complete Guide
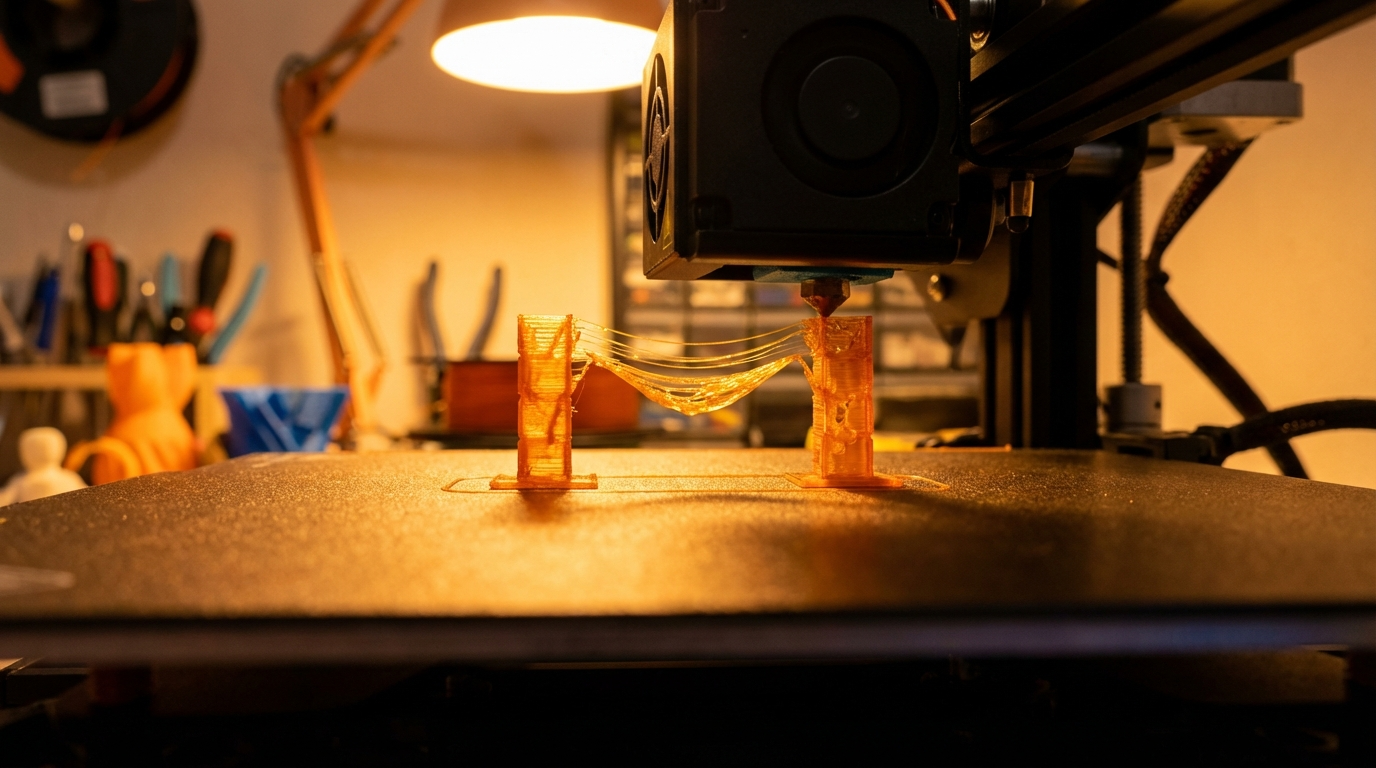
If you’ve ever watched your 3D printer attempt to span a gap between two points and produce a droopy, stringy mess instead of a clean horizontal surface, you’ve encountered a bridging problem. Bridging is one of the most common challenges in FDM 3D printing, and it can make or break the quality of your prints — literally.
In this guide, I’ll walk you through everything you need to know about fixing bad bridges on your 3D printer. We’ll cover what causes poor bridging, the slicer settings that matter most, and some clever tricks that can turn your saggy spans into rock-solid connections.
What Is Bridging in 3D Printing?
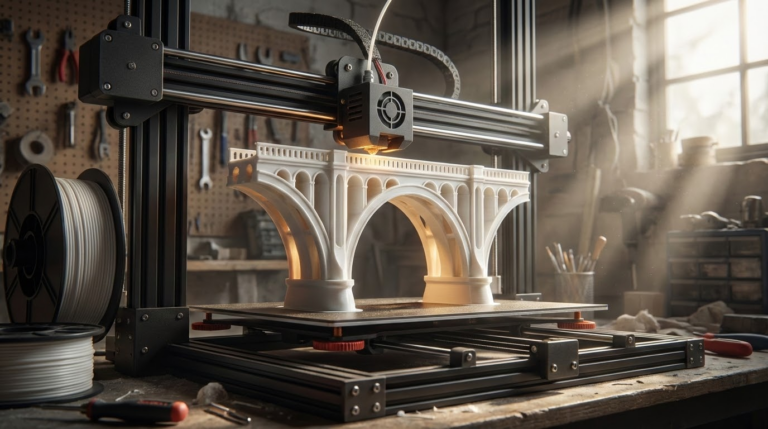
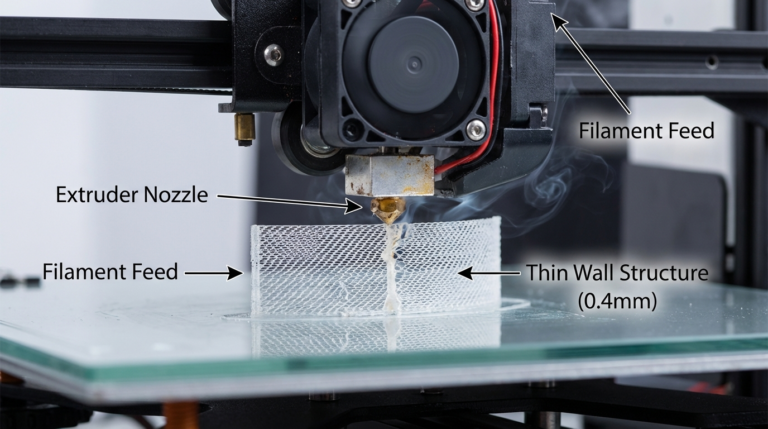
Bridging occurs when your printer needs to extrude filament across an unsupported gap — essentially printing in mid-air between two anchor points. Unlike overhangs, which gradually extend outward with some support from the layer below, bridges have zero support underneath for their entire span.
Every FDM printer can bridge to some degree. The question is how far and how cleanly. A well-tuned printer can bridge 50mm or more without significant drooping, while a poorly configured one might struggle with gaps as small as 10mm.
Why Do Bridges Fail? Common Causes
Before diving into solutions, let’s understand why bridges go wrong in the first place:
1. Print Speed Too High
This is the number one cause of bad bridges. When the printhead moves too fast across a gap, the extruded filament doesn’t have time to cool and solidify before gravity pulls it down. The result is sagging strands that look like dental floss stretched between two teeth.
2. Cooling Fan Not Running at Full Power
Bridges rely heavily on rapid cooling. The moment filament leaves the nozzle and spans the gap, it needs to solidify almost instantly to maintain its shape. Without adequate part cooling, the material stays soft and droops under its own weight.
3. Extrusion Rate Too High
Over-extruding during a bridge means more material hanging in mid-air — and more weight pulling everything down. A slight reduction in flow rate during bridging can work wonders.
4. Nozzle Temperature Too High
Hotter filament takes longer to cool. If your nozzle temperature is at the upper end of your filament’s range, bridging performance will suffer. The material remains pliable for too long as it crosses the gap.
5. Bridge Distance Too Long
Physics is undefeated. Even with perfect settings, there’s a practical limit to how far any printer can bridge without supports. For most setups, anything beyond 60-80mm is going to need some help.
Slicer Settings That Fix Bridging
The good news is that most bridging problems can be solved through slicer settings alone. Here are the key parameters to adjust:
Bridge Speed
This is the single most impactful setting. Most slicers have a dedicated bridge speed parameter. As a starting point, try 15-25 mm/s — roughly half or less of your normal print speed. Slower movement gives the filament more time to cool and solidify before it sags.
In Cura, look for “Bridge Wall Speed” and “Bridge Skin Speed.” In PrusaSlicer, it’s under “Bridges” in the speed section. Start at 20 mm/s and adjust from there.
Bridge Fan Speed
Set your part cooling fan to 100% during bridges, regardless of what material you’re printing. Even ABS and PETG, which normally prefer moderate cooling, benefit from maximum fan speed during bridging. The localized cooling on bridges won’t cause the layer adhesion problems you’d see with full cooling everywhere.
Bridge Flow Rate
Reducing the flow rate (or extrusion multiplier) specifically for bridges helps reduce the weight of material hanging in the air. Start with 85-95% of your normal flow rate. Going too low will create gaps in the bridge, so find the sweet spot where the strands are continuous but not heavy.
Bridge Direction
Some slicers let you control the direction of bridge lines. Ideally, bridge lines should span the shortest possible distance. PrusaSlicer automatically detects bridge areas and optimizes the fill direction, but you can override this if needed.
Step-by-Step: Tuning Your Bridge Settings
Here’s a systematic approach to dialing in perfect bridges:
- Print a bridge test model. Download a bridging test from Thingiverse — they usually have gaps of 10mm, 20mm, 30mm, 40mm, and 50mm side by side.
- Start with default settings and print the test. Note which distances succeed and which fail.
- Reduce bridge speed to 20 mm/s and set bridge fan to 100%. Print again.
- Lower bridge flow to 90%. Print the test once more.
- If still sagging, reduce nozzle temperature by 5-10°C below your normal printing temperature, but only if your slicer supports per-feature temperature control. Otherwise, lower it globally for the test.
- Compare results and fine-tune. Most printers will find their sweet spot within 3-4 test prints.
Hardware Tweaks for Better Bridging
Settings will get you 90% of the way there, but a few hardware considerations can push your bridging performance even further:
Upgrade Your Part Cooling Fan
Stock cooling fans on many budget printers are barely adequate. A better fan — or a dual-fan duct — delivers more air directly to the printed area. The Satsana, Hero Me, and Briss Fang are popular fan duct upgrades for Ender-series printers.
Use a Smaller Nozzle
A 0.4mm nozzle bridges better than a 0.6mm or 0.8mm because the thinner extrusion cools faster. If you’re printing something with extensive bridging, consider switching down to a 0.3mm nozzle for the best results.
Check Your Filament Quality
Wet filament bridges poorly because moisture turns to steam and creates bubbles, weakening the strand as it spans the gap. Make sure your filament is properly dried before attempting long bridges.
Material-Specific Bridging Tips
PLA
PLA is the bridging champion. It cools quickly and has low thermal expansion, making it the easiest material to bridge with. You can often bridge 50mm+ with properly tuned PLA. Bridge speed: 15-25 mm/s, fan: 100%, flow: 90%.
PETG
PETG bridges decently but tends to string more. Use slightly lower flow (85%) and max cooling. PETG bridges are a bit rougher than PLA but still functional. Bridge speed: 15-20 mm/s.
ABS
ABS is the worst common material for bridging. It warps, it stays soft, and you normally can’t use much cooling. For bridge sections only, crank the fan to 100% and go slow — 10-15 mm/s. Keep bridges short (under 30mm) if possible, or redesign with supports.
TPU
Flexible filaments don’t bridge well at all. The material is inherently soft and stretchy, so it sags under its own weight regardless of cooling. Use supports for any significant gaps when printing TPU.
When to Just Use Supports
Sometimes the answer isn’t to fix your bridging settings — it’s to add supports. Consider using supports when:
- The bridge distance exceeds 50-60mm
- The bridge is structural and needs to bear load
- You’re printing with materials that bridge poorly (ABS, TPU)
- The surface finish on the underside needs to be clean
- Multiple bridge layers stack on top of each other
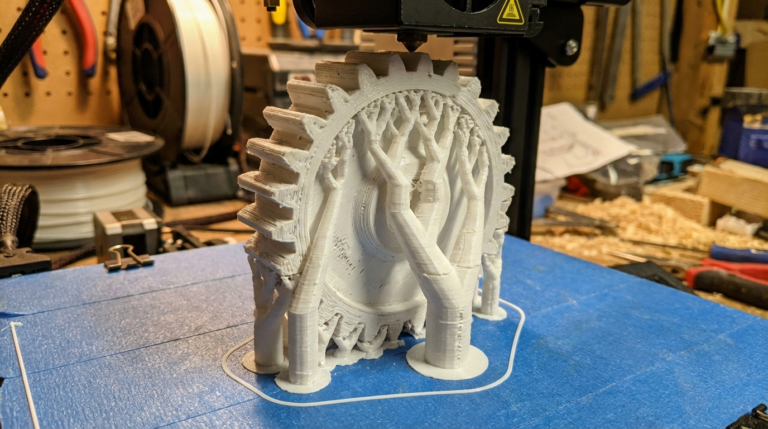
Tree supports in Cura or organic supports in PrusaSlicer can provide support with minimal contact, making them easy to remove while still giving your bridges the foundation they need.
Advanced Technique: Bridge Anchoring
Here’s a trick the pros use: if your model allows it, add small “anchor pillars” in your CAD design at the midpoint of long bridges. These 1-2mm diameter pillars give the bridge a resting point in the middle of the span. After printing, snip them off with flush cutters. It’s not elegant, but it works beautifully for bridges that would otherwise be impossible.
Troubleshooting Specific Bridge Problems
Bridge Lines Are Curling Up at the Ends
This usually means too much cooling — the material is cooling and contracting before it bonds to the anchor points. Reduce fan speed slightly (try 80% instead of 100%) or increase bridge flow a tiny bit.
Bridge Surface Is Rough but Not Sagging
This is actually a sign your speed and cooling are dialed in, but your flow rate might be slightly off. Try increasing bridge flow by 2-3%. A slightly thicker strand will produce a smoother surface.
First Bridge Layer Is Fine, Second Layer Sags
The second layer of a bridge is laying down on an already somewhat uneven surface. Increase the number of bridge layers your slicer generates (if available) and slow down the second bridge layer even more than the first.
Wrapping Up
Bad bridging is frustrating, but it’s also one of the most fixable problems in 3D printing. The formula is simple: slow down, cool aggressively, reduce flow slightly, and test iteratively. With a bit of patience and a bridging test print, you can dial in settings that produce clean, strong bridges on virtually any FDM printer.
Remember — every printer is a little different, so what works perfectly for one machine might need tweaking on another. Print those test models, make incremental changes, and keep notes on what works. Your bridges will thank you.