How to Fix PETG Warping: Complete Settings and Solutions Guide
Why PETG Warps Differently Than PLA
If you’ve made the jump from PLA to PETG, you’ve probably already discovered that PETG has its own personality when it comes to warping. PLA warps because of rapid cooling. PETG warps for partly the same reason — but it’s more stubborn about it, and the solutions that work for PLA don’t always work for PETG.
PETG has a higher glass transition temperature (around 80°C versus PLA’s 55–60°C), a different shrinkage rate, and it’s stickier when molten. These properties mean that standard anti-warping advice often falls short. You need PETG-specific strategies.
In this guide, we’ll cover everything you need to know about preventing and fixing PETG warping — from bed temperature tuning to enclosure considerations and the slicer settings that make the biggest difference.
Understanding PETG Shrinkage and Warping
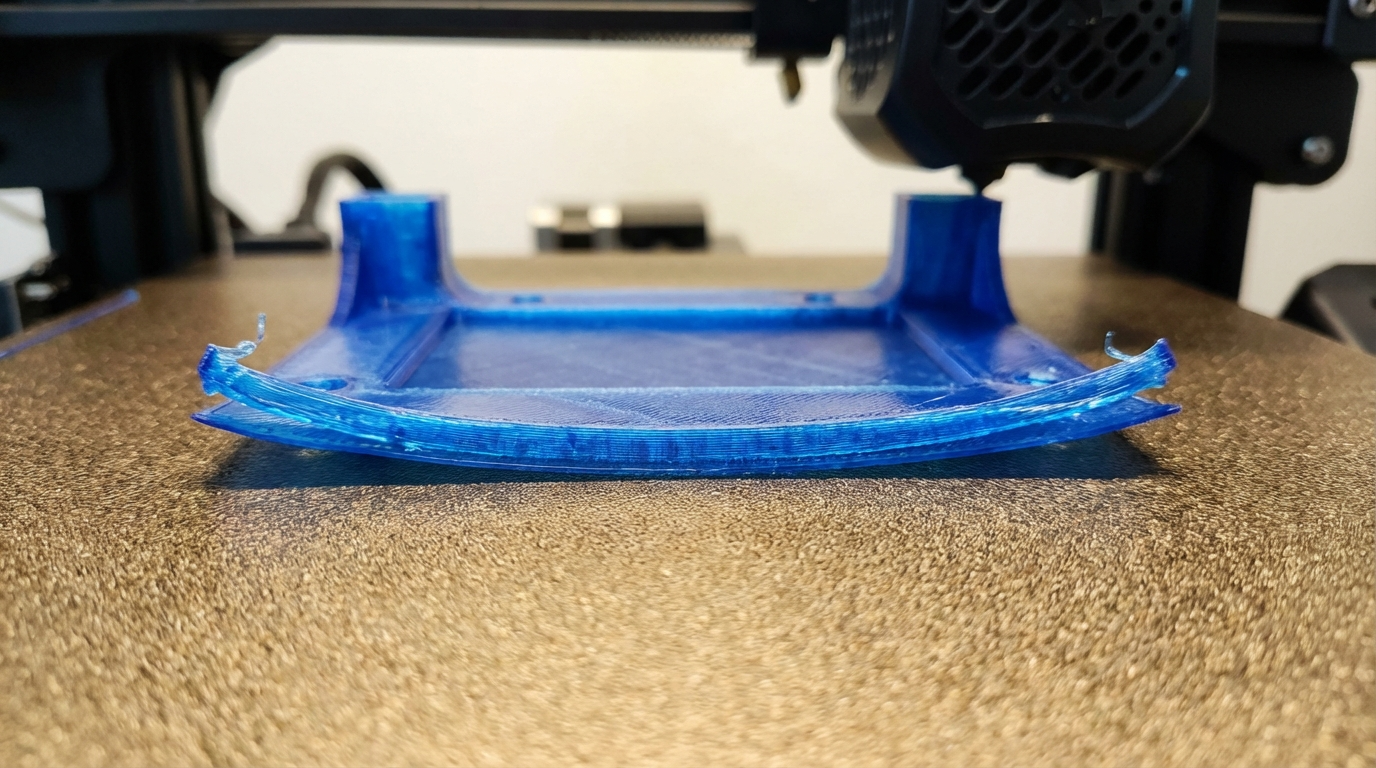
PETG shrinks about 0.3–0.6% as it cools — less than ABS (0.7–0.8%) but more than PLA (0.2–0.3%). This shrinkage is what causes warping: as upper layers cool and contract, they pull on the lower layers and corners, causing them to lift off the bed.
The warping is most severe at:
- Sharp corners: Where stress concentrates
- Long straight edges: Where accumulated shrinkage is greatest
- Large flat parts: More material = more total shrinkage force
- Thin-walled sections: Less material to resist the warping forces
The Perfect Bed Temperature for PETG
Bed temperature is the single most important factor in preventing PETG warping. Too cold, and the part lifts. Too hot, and you get a different problem: elephant’s foot and difficulty removing the print.
Recommended Bed Temperatures by Surface
- PEI (smooth): 75–85°C
- PEI (textured): 80–90°C
- Glass: 80–90°C (with adhesive)
- BuildTak: 70–80°C
The sweet spot for most setups is 80°C. Start there and adjust in 5°C increments based on your results. If corners lift, go up. If you get elephant’s foot or can’t remove the part, go down.
First Layer Bed Temperature Trick
Some slicers let you set a different bed temperature for the first layer versus subsequent layers. Try this approach:
- First 3–5 layers: 85–90°C (extra hot for maximum adhesion)
- Remaining layers: 75–80°C (lower to reduce elephant’s foot)
This gives you the best of both worlds: strong initial adhesion without the downsides of running hot throughout the entire print.
Nozzle Temperature: Finding the Balance
PETG’s recommended printing temperature is typically 225–250°C. For warping prevention, temperature matters more than you might think:
- Too hot (>245°C): The filament stays molten longer, allowing more time for stress to build before it solidifies. This can actually increase warping on large parts.
- Too cold (<225°C): Poor layer adhesion. The layers don’t bond well, which can lead to delamination (a different kind of failure).
- Sweet spot: 230–240°C for most PETG brands
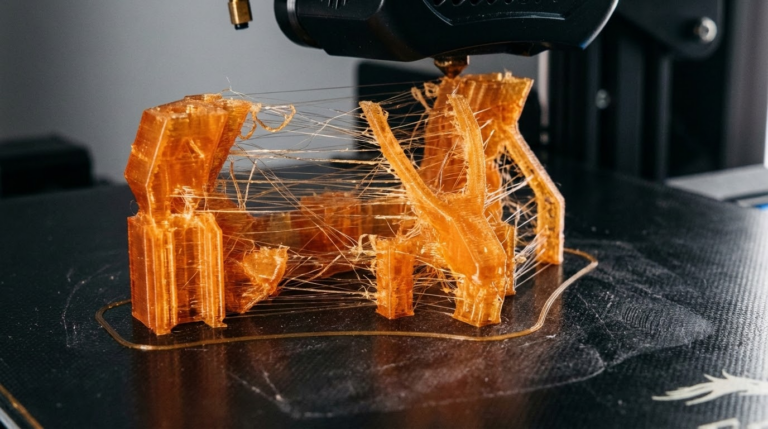
Fan Speed: The Secret Weapon Against PETG Warping
Here’s where PETG gets counterintuitive. With PLA, you blast the cooling fan at 100% for best results. With PETG, that’s a recipe for warping.
Recommended fan settings for PETG:
- First 3–4 layers: Fan OFF (0%)
- Remaining layers: 30–50% (never 100%)
- Bridges and overhangs: You can temporarily boost to 70–80% for bridges only
Excessive cooling creates a large temperature differential between the layer being printed and the layers below it. This differential is exactly what drives warping. By keeping the fan moderate, you allow the part to cool more uniformly.
Slicer Settings That Prevent PETG Warping
Use a Brim
A brim is the most effective slicer-side anti-warping tool for PETG. It adds extra material around the base of your print, increasing the surface area that’s bonded to the bed.
- Brim width: 8–15 mm for parts prone to warping
- Brim lines: 10–20 lines
- Brim gap: 0 mm (touching the part for maximum adhesion)
For very large parts, don’t hesitate to use a 15 mm brim. It’s easy to remove and saves hours of reprinting warped parts.
Use a Raft for Problem Parts
If a brim isn’t enough, a raft provides even more security. The raft absorbs the warping stress instead of your part. Modern slicers create rafts that separate cleanly from PETG with the right air gap setting (typically 0.15–0.20 mm).
Slow Down the First Layer
A slow first layer gives the PETG more time to bond with the bed surface. Use 15–25 mm/s for the first layer, even if your normal speed is much higher.
Increase First Layer Width
Setting your first layer line width to 120–150% of your nozzle diameter squishes more material against the bed, improving adhesion. With a 0.4 mm nozzle, try a first layer width of 0.5–0.6 mm.
Bed Adhesion Solutions for PETG
PEI Sheets
PETG adheres extremely well to PEI — sometimes too well. Smooth PEI can bond so strongly that removing the part tears the PEI surface. To prevent this:
- Use a thin layer of glue stick as a release agent between PETG and smooth PEI
- Or use textured PEI, which provides great adhesion with easier release
- Wait until the bed cools completely before attempting removal — PETG releases much more easily when cold
Glass Beds
PETG doesn’t stick well to bare glass. You’ll need an adhesive:
- Glue stick: The most popular option. Apply a thin, even layer. Reapply every 3–5 prints.
- Hairspray: Unscented, strong-hold hairspray works well. Apply a light coat from 6 inches away.
- Magigoo: Purpose-built 3D printing adhesive. More expensive but very consistent.
Spring Steel
Magnetic spring steel plates with PEI coating are ideal for PETG. The flexible plate lets you pop prints off by flexing the sheet — which is much safer than prying with a scraper.
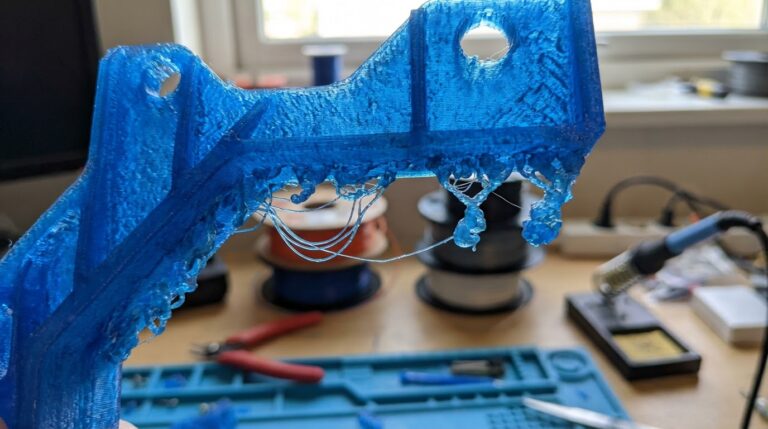
Environmental Factors
Drafts Are the Enemy
PETG is sensitive to uneven cooling from air currents. Even a gentle breeze from an open window or an HVAC vent can cause one side of your print to warp while the other stays flat.
Solutions:
- Move your printer away from windows, doors, and air vents
- Close the room door during printing
- Use a basic enclosure (even a cardboard box works)
Do You Need an Enclosure for PETG?
Unlike ABS, PETG doesn’t strictly require an enclosure. But for large parts or in drafty environments, an enclosure helps tremendously by maintaining consistent ambient temperature around the print.
A simple enclosure doesn’t need to be heated — just draft-free. An IKEA Lack enclosure, a grow tent, or even a large plastic tub over the printer will work.
Design Tips to Minimize Warping
If you’re designing your own parts, these tips help reduce warping at the design stage:
- Add rounded corners: Sharp 90° corners concentrate stress. A 2–5 mm fillet on base corners dramatically reduces lifting.
- Add mouse ears: Small circular pads at corners act like targeted brims. Many slicers can add these automatically.
- Avoid large flat bases: If possible, break large flat surfaces into sections or add a grid pattern to the bottom to interrupt the stress path.
- Orient for minimal bed contact: Sometimes rotating a part 45° or standing it up reduces the warping-prone footprint.
Troubleshooting: When Nothing Seems to Work
If you’ve tried everything above and PETG is still warping, work through this checklist:
- Verify bed is clean: Wash with soap and water, then wipe with IPA
- Check bed level across the entire surface: A bed that’s flat in the center but tilted at the edges will cause corner lifting
- Verify actual bed temperature: Use an IR thermometer to check. Some beds read 80°C on the display but are only 70°C at the edges.
- Try a different PETG brand: Filament quality varies significantly. Some cheap PETG has higher shrinkage rates.
- Check Z-offset: If your first layer is too high, it won’t squish enough into the bed for a strong bond.
- Try printing at 10–15% slower speed overall: Faster printing = faster cooling = more warping stress
Quick Reference: PETG Anti-Warping Settings
- Bed temperature: 80°C (± 5°C based on surface)
- Nozzle temperature: 230–240°C
- Fan speed: 0% for first 3 layers, then 30–50%
- First layer speed: 15–25 mm/s
- First layer width: 120–150% of nozzle diameter
- Brim: 10–15 mm for large parts
- Environment: Draft-free, consider basic enclosure
- Bed adhesion: Textured PEI (best), or glue stick on smooth PEI/glass
PETG warping is completely solvable. It just requires a different approach than PLA. Dial in these settings, keep your bed clean, and block those drafts — your PETG prints will stay flat and firmly attached to the bed from start to finish.