How to Fix Ringing and Ghosting in High-Speed 3D Printing
What Is Ringing (Ghosting) in High-Speed 3D Printing?
If you’ve recently upgraded to a high-speed 3D printer — or simply cranked up the speed on your trusty machine — you’ve probably noticed something frustrating: wavy, echo-like patterns on the surfaces of your prints, especially around corners and sharp edges. This artifact is called ringing (also known as ghosting or echoing), and it’s one of the most common problems in high-speed FDM printing.
Ringing occurs when the printhead changes direction rapidly, causing vibrations that propagate through the frame and show up as ripples on your print surface. At 60 mm/s, you might never see it. Push to 150 mm/s or beyond, and suddenly every corner has a shadow of itself trailing across flat walls.
The good news? Ringing is entirely fixable. In this guide, we’ll walk through every cause and solution — from simple slicer tweaks to hardware upgrades — so you can print fast and clean.
Why High-Speed Printing Makes Ringing Worse
At its core, ringing is a physics problem. Your printhead has mass, and when it accelerates or decelerates (especially around corners), it generates forces that flex your printer’s frame, belts, and rails. Those vibrations take a moment to dampen out — and during that time, the nozzle wobbles slightly, leaving visible ripples on the print surface.
The faster you print, the greater the acceleration forces, and the more pronounced the ringing becomes. This is why a print that looked perfect at 50 mm/s can look terrible at 200 mm/s with the same settings.
Key Factors That Influence Ringing Severity
- Print speed and acceleration: Higher values = stronger vibrations
- Frame rigidity: A wobbly frame amplifies vibrations instead of absorbing them
- Belt tension: Loose belts allow the printhead to oscillate longer
- Printhead mass: Heavier hotends and extruders create more inertia
- Jerk settings: High jerk values cause sudden direction changes
Step 1: Reduce Acceleration (The Quickest Fix)
Before touching any hardware, start with your slicer. Acceleration is the single biggest factor in ringing artifacts. Most slicers let you set acceleration values independently for different move types.
Recommended starting points for high-speed printers:
- Outer wall acceleration: 2,000–3,000 mm/s² (even if your printer supports 10,000+)
- Inner wall acceleration: 5,000–8,000 mm/s²
- Infill acceleration: 10,000+ mm/s² (ringing doesn’t matter here)
- Travel acceleration: 10,000+ mm/s²
The key insight is that you don’t need to slow down everything — just the outer walls where ringing is visible. This approach keeps your total print time low while dramatically improving surface quality.
Step 2: Tune Jerk (Instantaneous Speed Change)
Jerk controls how fast the printer transitions between speeds at direction changes. High jerk values mean the printhead slams into corners at full speed before decelerating, which generates maximum vibration.
Try reducing jerk to 8–12 mm/s for outer walls. In Klipper firmware, the equivalent setting is square_corner_velocity, which you should set between 5–8 mm/s for clean surfaces.
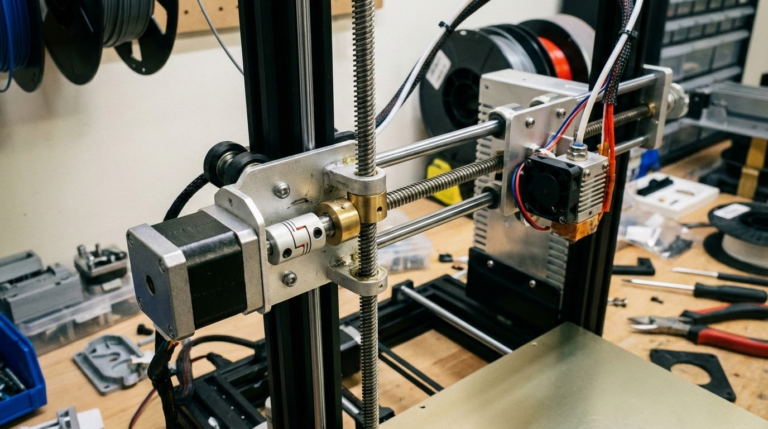
Step 3: Check and Tighten Belts
Loose belts are one of the most overlooked causes of ringing. When belts aren’t properly tensioned, the printhead continues to oscillate after direction changes instead of stopping cleanly.
How to Check Belt Tension
- Power off your printer and move the printhead to the center of the bed
- Pluck each belt like a guitar string — it should produce a low, audible twang
- The belt should deflect about 2–3 mm when pressed firmly with one finger
- Both X and Y belts should have similar tension
Many modern printers like the Bambu Lab X1C and Creality K1 have belt tensioners built in. If yours doesn’t, you may need to loosen the motor mount, pull the belt tighter, and re-tighten.
Step 4: Enable Input Shaper (Klipper Users)
If you’re running Klipper firmware, Input Shaper is the single most effective tool against ringing. It works by pre-calculating counter-vibrations that cancel out the natural resonance of your printer.
How to Set Up Input Shaper
- Install an accelerometer (ADXL345 or LIS2DW) on your printhead
- Run
SHAPER_CALIBRATEin the Klipper console - Klipper will vibrate the printer at different frequencies and measure the response
- It automatically recommends the best shaper type (usually MZV or EI) and frequency
- Add the recommended values to your
printer.cfg
With Input Shaper properly tuned, many printers can run at 300+ mm/s with virtually zero visible ringing. It’s that effective.
Step 5: Reduce Printhead Weight
Newton’s second law: Force = Mass × Acceleration. A lighter printhead generates less vibration at the same acceleration. Here’s how to shed grams:
- Switch to a direct-drive lightweight extruder like the Sherpa Mini or Orbiter v2
- Use a smaller stepper motor (NEMA 14 instead of NEMA 17) if your extruder supports it
- Remove unnecessary fans or shrouds that add weight
- Use carbon fiber or titanium components where possible
Step 6: Stiffen Your Frame
A rigid frame doesn’t flex under acceleration forces, which means vibrations dampen faster. Here’s what you can do:
- Tighten all frame bolts: Go around every bolt on your frame and ensure they’re snug
- Add corner braces: Printed or aluminum corner brackets add significant rigidity
- Check for play in linear rails/rods: Any looseness allows vibrations to propagate
- Consider a frame upgrade: Moving from V-slot to linear rails, or from aluminum extrusion to steel, makes a huge difference
Step 7: Use Pressure Advance / Linear Advance
While not directly related to ringing, Pressure Advance (Klipper) or Linear Advance (Marlin) helps clean up corners at high speed by adjusting extrusion pressure during acceleration and deceleration. This prevents the material buildup at corners that can make ringing artifacts look even worse.
Typical Pressure Advance values range from 0.02 to 0.08 for direct-drive setups and 0.3 to 0.8 for Bowden setups. Run a PA calibration test to find your optimal value.
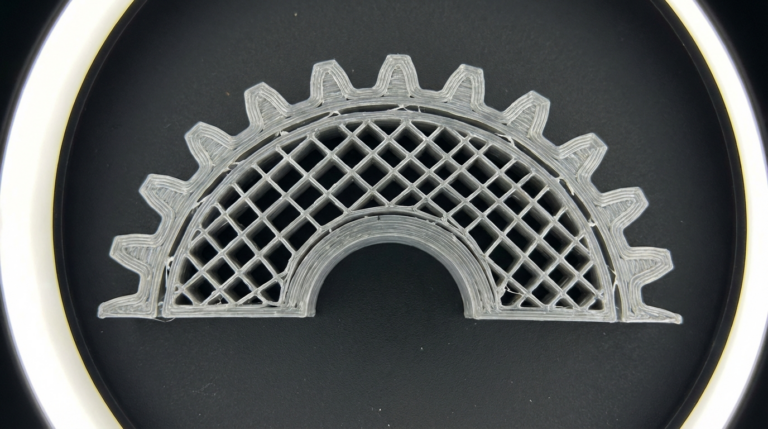
Step 8: Print a Ringing Test
To evaluate your progress, print a dedicated ringing test model. The most popular is the Klipper Ringing Tower, but any model with flat walls and sharp corners will reveal ringing patterns.
Print it at your target speed and examine the walls under good lighting, angled so the light catches any surface ripples. Compare before and after each adjustment to see what’s working.
Advanced: CoreXY vs. Bed-Slinger Considerations
Your printer’s kinematics significantly affect ringing behavior:
- Bed-slingers (i3-style): The Y-axis moves the entire bed, which is heavy. Ringing on Y is typically worse than X. Reducing Y acceleration is often the biggest win.
- CoreXY: Both motors contribute to both axes, so ringing is more evenly distributed. Input Shaper works exceptionally well here.
- Delta: Ringing manifests differently due to the parallel arm geometry. Resonance is speed-dependent and harder to tune manually.
The “Fast Outer Walls” Trick
Some slicers (notably OrcaSlicer and PrusaSlicer) offer a setting to print outer walls at a different speed than inner walls. Use this to your advantage:
- Inner walls: 200–300 mm/s (fast, since they’re hidden)
- Outer walls: 100–150 mm/s with lower acceleration
- Infill: Maximum speed
This approach typically adds only 5–10% to total print time while dramatically improving surface quality.
Summary: Quick Reference Table
Solution priority (easiest to hardest):
- Lower outer wall acceleration to 2,000–3,000 mm/s²
- Reduce jerk/square_corner_velocity to 5–8 mm/s
- Check and tighten belts
- Enable Input Shaper (Klipper) or install Klipper
- Calibrate Pressure Advance
- Reduce printhead weight
- Stiffen frame and check for mechanical play
- Use separate speeds for inner/outer walls
High-speed 3D printing doesn’t have to mean ugly prints. With the right combination of slicer settings, firmware features, and hardware tuning, you can push your printer to its mechanical limits while maintaining excellent surface quality. Start with the software fixes — they’re free — and work your way through the hardware upgrades as needed.