How to Post-Process 3D Prints: Sanding, Painting, and Finishing Guide
A 3D print fresh off the build plate is rarely a finished product. Layer lines, support marks, small imperfections, and a generally rough texture are all par for the course with FDM printing. But with some basic post-processing techniques, you can transform a rough print into something that looks injection-molded — or even better.
This guide covers the full post-processing pipeline from removing supports to achieving a glass-smooth painted finish. You don’t need to do everything listed here for every print, but knowing your options means you can choose the right level of finishing for each project.
Step 1: Support Removal and Initial Cleanup
Before any finishing work, you need to remove supports, brims, and rafts. Start by pulling off supports by hand — work slowly and methodically to avoid damaging the print surface underneath. Needle-nose pliers are invaluable for getting into tight spaces and snapping off support stubs.
For stubborn support material, a flush cutter (the kind used for electronics work) lets you clip support stubs close to the surface without gouging the print. A hobby knife or X-Acto blade can clean up any remaining bumps or zits.
Pro tip: If you’re planning extensive post-processing, print with support settings that are easy to remove — lower density (10-15%), larger Z-gap, and thinner interface layers. The surface under easily-removed supports will need less finishing work.
Step 2: Sanding
Sanding is the foundation of all other finishing techniques. It’s tedious, but there’s no substitute for it if you want smooth surfaces.
Dry Sanding
Start with a coarse grit (80-120) to remove major layer lines and imperfections. Work in circular motions, applying even pressure. Don’t stay in one spot too long — PLA and PETG generate heat from friction, and you can warp or melt the surface if you sand too aggressively.
Progress through grits: 120 → 220 → 400 → 600 → 800. Each grit removes the scratches left by the previous one. You don’t always need to go all the way to 800 — if you’re planning to prime and paint, 400 grit is usually sufficient.
Wet Sanding
For the smoothest possible finish, switch to wet sanding at 400 grit and above. Dip the sandpaper in water (or use waterproof sandpaper under running water) to lubricate the surface. Wet sanding produces a finer finish, generates less dust, and reduces the risk of heat damage.
Wet sand from 400 → 600 → 800 → 1000 → 1500 → 2000 for a near-mirror finish. This level of sanding is overkill for most projects but produces stunning results on display pieces.
Sanding Tips
- Sand along the layer lines first (to remove them), then switch to circular motions for overall smoothing
- Use sanding sticks or files for hard-to-reach areas
- Wear a dust mask — PLA sanding dust isn’t toxic, but inhaling any fine particles isn’t good for your lungs
- Rinse the print between grits to remove debris that can cause scratches
- Check progress by wiping the surface with a damp cloth — water reveals the true surface quality better than dry inspection
Step 3: Filling
Even thorough sanding won’t always eliminate deep layer lines, especially on curved surfaces. That’s where filler comes in.
Spot Putty / Filler Primer
Automotive spot putty (like Bondo Spot Putty or 3M Acryl Green) fills layer lines and small imperfections. Apply a thin layer with a palette knife or your finger, let it cure (usually 20-30 minutes), then sand smooth. Multiple thin coats are better than one thick coat.
Filler Primer Spray
Filler primer (like Rust-Oleum Filler Primer) is a thick spray primer that fills minor layer lines while also providing a paintable surface. Apply 2-3 light coats, letting each dry completely. Then sand with 400-600 grit between coats. This is the most popular filling method for painted prints because it combines filling and priming in one step.
Epoxy Coating
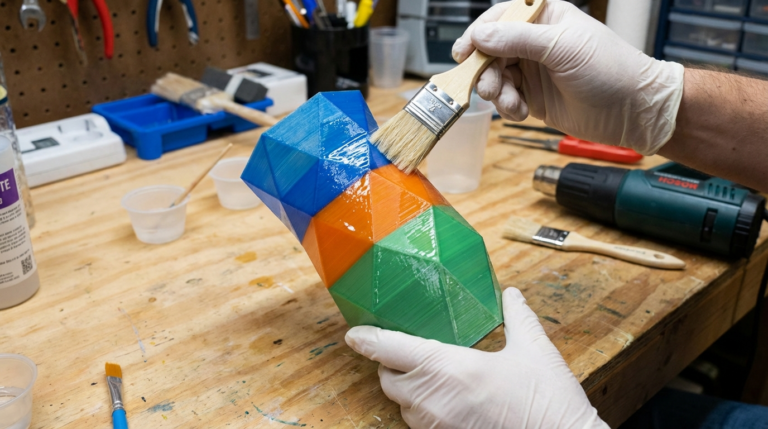
For the ultimate smooth finish, a thin coat of epoxy resin can completely eliminate layer lines. XTC-3D by Smooth-On is specifically designed for this purpose — it’s a brush-on epoxy that self-levels and cures to a smooth, glossy surface in about 4 hours.
Apply XTC-3D with a disposable brush in thin, even strokes. It has a short working time (about 10 minutes), so work in sections on larger prints. The result is a glass-smooth surface that’s ready for paint or looks great on its own.
Step 4: Priming
If you’re going to paint, priming is essential. Primer does three important things: it provides a uniform base color, it reveals surface imperfections you missed during sanding (fix them before painting), and it gives paint something to grip onto.
Use a spray primer in light, even coats. Gray primer is the most versatile — it works under any paint color. White primer is better under light colors, and black primer can add depth to dark finishes.
After priming, inspect the surface carefully under good lighting. Any layer lines or imperfections that are visible through the primer will be visible through the paint too. If you see problems, sand the primer, fill as needed, and prime again. It’s much easier to fix issues at the primer stage than after painting.
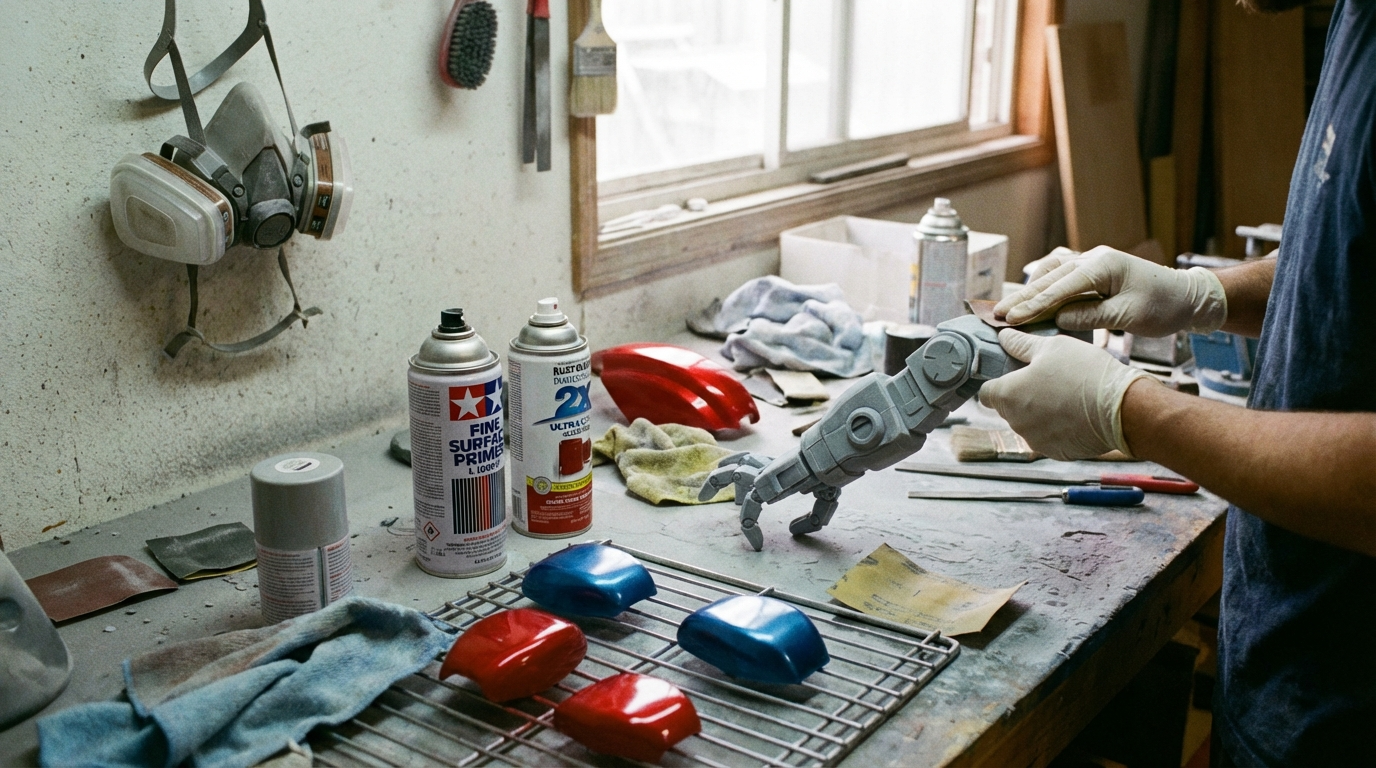
Step 5: Painting

Spray Paint
For most projects, spray paint gives the best results with the least skill required. Use the following technique:
- Shake the can thoroughly (2+ minutes)
- Hold the can 8-12 inches from the surface
- Apply in thin, even passes — move the can across the surface at a steady speed
- Apply 3-4 light coats rather than 1-2 heavy coats
- Wait the recommended dry time between coats (usually 10-15 minutes for re-coat)
- Rotate the print between coats to ensure even coverage from all angles
Montana GOLD, Tamiya, and Rust-Oleum 2X are all excellent choices for 3D print painting. For metallic finishes, Alclad II lacquers produce incredibly realistic metal effects.
Brush Painting
Brush painting works well for detail work and multi-color prints. Acrylic paints (like Citadel, Vallejo, or Apple Barrel) are the go-to choice. Thin your paints slightly with water — multiple thin coats prevent brush strokes from showing.
Use a wet palette to keep your paints at the right consistency during extended painting sessions. Apply a base coat first, then build up layers for shadows and highlights. Dry brushing (wiping most of the paint off the brush before applying) is great for highlighting raised details and texture.
Airbrushing
If you’re serious about painted prints, an airbrush produces the best results. Entry-level airbrush kits start around $50-80 and include a compressor and basic airbrush. The learning curve is steeper than spray cans, but the control over paint application is unmatched.
Airbrushes excel at smooth gradients, thin even coats, and detailed work. They also use far less paint than spray cans, which saves money in the long run if you paint frequently.
Step 6: Clear Coating
A clear coat protects your paint job from scratches, UV damage, and handling wear. It also gives you control over the final sheen — matte, satin, semi-gloss, or gloss.
Apply 2-3 light coats of clear coat after the paint has fully cured (not just dry — wait at least 24 hours for spray paint). Matte clear coat hides minor surface imperfections better than gloss, which tends to highlight any remaining flaws.
For props and cosplay items that will be handled frequently, a polyurethane clear coat provides the most durable protection. For display pieces, a acrylic clear coat is usually sufficient.
Alternative Finishing Techniques
Acetone Vapor Smoothing (ABS Only)
ABS prints can be smoothed by exposing them to acetone vapor. The acetone melts the surface slightly, causing layer lines to flow together. The result is a smooth, glossy surface without any sanding.
To vapor smooth: place the print on a platform inside a sealed container, add a small amount of acetone to the bottom (on paper towels), and seal the container. Check every 5-10 minutes until the desired smoothness is achieved. Over-exposure will distort fine details and round edges.
Warning: Acetone vapor is flammable and toxic. Work in a well-ventilated area, away from heat sources, and wear appropriate respiratory protection. This technique does NOT work with PLA or PETG.
Heat Gun Smoothing
A heat gun can smooth PLA surfaces, but it requires a delicate touch. Hold the heat gun 6-8 inches away and keep it moving constantly. The surface will become glossy as the plastic slightly reflows. It’s easy to over-do this and deform your print, so practice on test pieces first.
Electroplating
Yes, you can electroplate 3D prints to give them a real metal surface. The process involves coating the print with a conductive paint (like nickel or copper spray), then electroplating in a chemical bath. The result is a genuine metal coating that looks and feels like solid metal.
Home electroplating kits are available for $50-100. Copper plating is the easiest to start with. The process requires patience and practice, but the results can be truly stunning.
Material Considerations
PLA
PLA is the easiest material to post-process. It sands well, takes primer and paint beautifully, and can be filled with any standard filler. The main limitation is heat — avoid techniques that generate excessive heat (aggressive sanding, heat gun) as PLA softens at relatively low temperatures (60°C).
PETG
PETG is tougher to sand than PLA — it tends to gum up sandpaper rather than powder cleanly. Use wet sanding exclusively for PETG, and work through grits more slowly. PETG also doesn’t react to acetone, so vapor smoothing isn’t an option.
ABS
ABS is the most post-processing-friendly material. It sands well, takes paint easily, and can be vapor smoothed with acetone for a beautiful finish. It also bonds well with superglue and plastic cement, making assembly of multi-part prints easy.
Wrapping Up
Post-processing is where 3D prints go from “obviously 3D printed” to “wait, that was 3D printed?” The key is matching your finishing effort to the project requirements. A functional bracket doesn’t need anything beyond support removal. A cosplay helmet deserves the full treatment — sand, fill, prime, paint, clear coat. And everything in between has its own appropriate level of finish.
Start with sanding and filler primer — those two techniques alone will dramatically improve the look of your prints. As you get comfortable, add painting and more advanced techniques to your repertoire. Like 3D printing itself, post-processing is a skill that improves with practice.