How to Print ABS Without an Enclosure: Tips, Settings, and Tricks That Work
ABS has a reputation problem. Ask any 3D printing forum about printing ABS without an enclosure and you’ll get a chorus of “don’t even try” and “just use PETG instead.” But the truth is more nuanced. Yes, ABS is easier to print with an enclosure. But with the right techniques, you can print ABS successfully on an open-frame printer — and many people do it every day.
This guide covers practical strategies for printing ABS without spending money on an enclosure, along with honest expectations about what you can and can’t achieve.
Why ABS Is Difficult Without an Enclosure
ABS (Acrylonitrile Butadiene Styrene) has a high glass transition temperature (~105°C) and significant thermal shrinkage as it cools. When one layer cools and contracts while the next layer is still being deposited hot, the differential creates internal stress. That stress manifests as warping — corners lifting, layers splitting, and prints curling off the bed.
An enclosure solves this by keeping the ambient temperature elevated (typically 40-60°C), which reduces the temperature differential between newly printed layers and previously printed ones. Without an enclosure, you’re fighting convection currents, room drafts, and ambient temperature fluctuations.
Realistic Expectations
Let’s be upfront: printing ABS without an enclosure works well for small to medium parts. Large prints (over 150mm in any dimension) become progressively harder because there’s more surface area for uneven cooling. If you regularly print large ABS parts, an enclosure is a worthwhile investment.
For parts under 100mm, functional brackets, electronics housings, and similar objects? You can absolutely get good results on an open printer with the techniques below.
Essential Settings for Open-Frame ABS Printing
Nozzle Temperature: 240-260°C
ABS needs to be printed hot. Start at 245°C and adjust based on your specific filament. Higher temperatures improve layer adhesion (critical for ABS strength) but increase stringing. Don’t go below 235°C — poor layer adhesion is worse than a few strings.
Bed Temperature: 100-110°C
A hot bed is non-negotiable for ABS. 100°C is the minimum; 110°C works better for larger parts. The goal is to keep the first several layers warm enough to prevent warping from the bottom. If your bed can’t reach 110°C, stick to the lower end and compensate with other techniques.
First Layer Settings
Your first layer is everything. Use these settings as a starting point:
- First layer height: 0.28mm or 0.3mm (thicker = more squish = better adhesion)
- First layer speed: 20-25mm/s (slow for maximum adhesion)
- First layer flow: 105% (slight over-extrusion pushes filament into the bed texture)
- First layer fan: 0% (absolutely no cooling for ABS first layers)
Part Cooling Fan: Off or Minimal
This is the biggest adjustment from PLA printing. ABS wants to cool slowly. For most ABS prints, keep the part cooling fan at 0% for the entire print. The only exception is small overhangs or bridges, where 10-20% fan can help prevent drooping — but never more than that.
Print Speed: Moderate
Print ABS at 40-50mm/s without an enclosure. Faster speeds are possible with an enclosure because the ambient heat keeps things stable, but on an open printer, slower speeds give each layer more time to bond before the next one goes down.
Bed Adhesion Strategies
ABS Slurry (The Classic)
Dissolve ABS scraps in acetone to create a thin paste. Apply a thin layer to your heated glass or PEI bed. As the bed heats up, the acetone evaporates and leaves a thin ABS film that creates an incredible bond with fresh ABS. This is the most reliable adhesion method for ABS, period.
Recipe: Drop a few pieces of ABS filament into a small glass jar of acetone. Wait 12-24 hours until fully dissolved. Apply with a paper towel in thin, even coats.
Glue Stick
The humble Elmer’s glue stick works surprisingly well for ABS. Apply a thin layer on heated glass or PEI. It provides good adhesion during printing and releases cleanly once the bed cools. Reapply every 3-5 prints.
Kapton Tape
Polyimide (Kapton) tape on a heated bed gives good ABS adhesion. It’s heat-resistant and durable. Apply in overlapping strips, smooth out air bubbles, and heat the bed before printing.
Anti-Warping Techniques (No Enclosure)
1. Use a Brim — Always
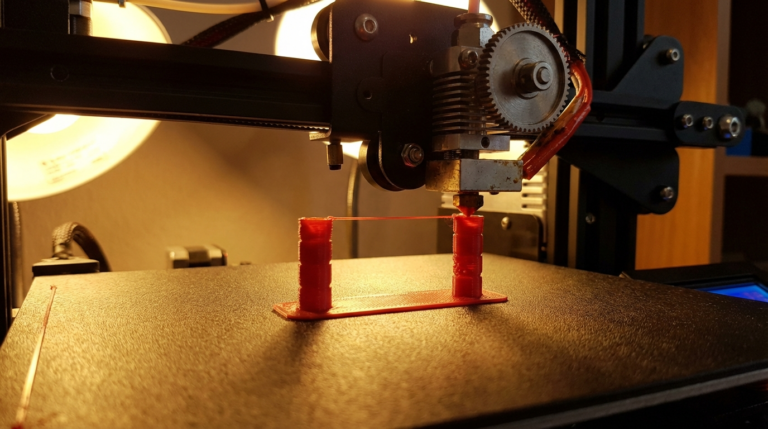
A 10-15mm brim dramatically reduces corner lifting by spreading the attachment area across a larger surface. The brim keeps the edges pinned while the part builds height. For ABS without an enclosure, a brim isn’t optional — it’s mandatory.
2. Eliminate Drafts
ABS’s worst enemy is uneven cooling. A gentle breeze from an air vent, an open window, or even someone walking past the printer can cause one side to cool faster than the other, triggering warping. Print in the most enclosed room you have. Close windows. Turn off fans.
Some people place a cardboard box over their printer as a makeshift draft shield. It’s not a real enclosure (there’s no heat retention), but it blocks air currents — and that alone can be the difference between a successful print and a warped one.
3. Round Your Corners in CAD
Sharp 90-degree corners are stress concentrators. ABS warping almost always starts at sharp corners because that’s where thermal stress is highest. If you have control over the model, add 2-3mm fillets to all bottom edges. This single design change can eliminate warping on parts that would otherwise fail.
4. Orient Parts Strategically
Long, flat parts warp more than tall, narrow ones. If you can orient your part so the largest dimension is vertical rather than flat on the bed, you’ll have fewer warping issues. Of course, this introduces other considerations like layer adhesion for structural parts, so balance accordingly.
5. Print in Smaller Sections
If you need to print a large ABS part, consider splitting it into smaller pieces and gluing them together with acetone welding. Two smaller parts that print successfully are better than one large part that warps. Acetone-welded ABS joints are nearly as strong as the parent material.
6. Slow Down the First 5-10 Layers
Many slicers let you set special speeds for the first N layers. Slowing down the first 5-10 layers to 25mm/s gives the base of your print maximum time to bond and stabilize. Once a solid foundation is established, the rest of the print is much less likely to warp.
The Cardboard Box Trick (Budget Enclosure)
If you’re somewhere between “no enclosure” and “proper enclosure,” a large cardboard box placed over your printer provides 80% of the benefit at 0% of the cost. Seriously.
Cut a viewing window and cover it with clear packaging tape. Leave the bottom open (the printer sits on the table, box goes over it). The box traps enough heat from the bed and hotend to raise the internal temperature by 10-15°C above ambient. That’s often enough to make ABS printing reliable.
It’s not pretty, it’s not Instagram-worthy, and fire safety people would raise an eyebrow. But it works. Just keep it away from the hotend and heated bed directly, and never leave it unattended.
ABS Alternatives That Print Like ABS
If ABS is giving you grief, consider these alternatives that offer similar properties but print more easily:
ASA: Same strength and heat resistance as ABS, better UV resistance, and significantly less warping. ASA is essentially “outdoor ABS” with better printability. It’s the first material I recommend when people struggle with ABS.
ABS+/ABS Pro: Many filament manufacturers sell modified ABS formulations that warp less than standard ABS. The additives reduce shrinkage without sacrificing much strength. Brands like eSun, Polymaker, and SUNLU all make solid ABS+ options.
PETG: If you only need moderate heat resistance (up to ~80°C) and don’t need the post-processing options of ABS (acetone smoothing), PETG prints much more easily and offers comparable strength.
Post-Processing ABS Prints
One of ABS’s biggest advantages is acetone smoothing. Exposing ABS prints to acetone vapor dissolves the surface slightly, filling layer lines and creating a glossy, injection-molded appearance. This is impossible with PLA or PETG.
Without an enclosure, your prints might have slightly more visible layer lines than enclosure-printed ABS. Acetone smoothing can completely eliminate this difference. A 15-minute vapor bath can transform a rough print into something that looks professionally manufactured.
Troubleshooting Common Issues
Warping Despite Following All Tips
Check your bed level. An uneven first layer causes uneven stress distribution. Also verify your bed temperature is actually reaching the set point — use an IR thermometer to check the surface temperature, which can be 10-15°C lower than the sensor reading on some printers.
Layer Splitting (Delamination)
This means your print temperature is too low or your fan speed is too high. Increase nozzle temperature by 5°C and verify the part cooling fan is off. Also check for drafts — delamination often happens on the side facing an air current.
Excessive Stringing
ABS strings more than PLA because it’s printed at higher temperatures. Increase retraction distance by 0.5mm compared to your PLA settings. If stringing is severe, drop the temperature by 5°C, but don’t go below 235°C or you’ll risk layer adhesion issues.
Nozzle Clogging
ABS can leave carbon deposits in the hotend, especially at temperatures above 260°C. If you notice increasing under-extrusion, do a cold pull with nylon to clear the residue. Consider using a hardened steel nozzle if you print ABS frequently.
Conclusion
Printing ABS without an enclosure is entirely possible for most practical parts. The key is managing temperature: hot bed, no fan, no drafts, and always a brim. Combine these basics with an ABS slurry bed surface and strategic part orientation, and you’ll get reliable results without spending a dollar on an enclosure.
Is it harder than printing PLA? Yes. Is it impossible without an enclosure? Absolutely not. Save the enclosure budget for your next filament order and start printing.