How to Reassemble a 3D Printer Hotend After Cleaning: Step-by-Step Guide
You pulled your hotend apart to clear a stubborn clog, swap a nozzle, or replace a worn heat break — and now you’re staring at a pile of small metal parts wondering if you’ll ever get clean extrusion again. Reassembling a 3D printer hotend isn’t complicated, but doing it wrong creates air gaps, filament leaks, and clogs that are even worse than whatever you took it apart to fix.
This guide covers the complete reassembly process for standard V6-style hotends (including clones), Creality-style hotends, and Bambu Lab / Revo-style quick-change systems. Follow these steps and you’ll get a proper seal every time.
Why Proper Hotend Assembly Matters
The hotend is where solid filament becomes molten plastic, and the tolerances involved are tighter than most people realize. The nozzle, heat break, and heater block must form an airtight seal. Even a gap of 0.1mm between the nozzle and heat break creates a pocket where molten filament accumulates, carbonizes, and eventually blocks the entire flow path.
The symptoms of a bad reassembly include:
- Filament oozing from between the nozzle and heater block
- Intermittent clogs that clear temporarily but keep coming back
- Under-extrusion that gets worse over time
- Burnt filament smell even at normal temperatures
- Dark flecks or carbonized bits in your extrusion

Tools You’ll Need
Before you start, gather these tools. Having everything ready prevents the frustration of hunting for a wrench while holding hot parts:
- Socket wrench or spanner for your nozzle size (usually 6mm or 7mm)
- Crescent wrench or pliers for holding the heater block
- Thermal paste (optional but recommended for the heat break threads)
- Small torque wrench (if you have one — helpful but not essential)
- Heat-resistant gloves — you’ll be working at 250°C+
- Paper towels or brass brush for cleaning residual filament
- Needle or acupuncture needle (0.3–0.4mm) for clearing the nozzle bore
Step-by-Step: V6-Style Hotend Reassembly
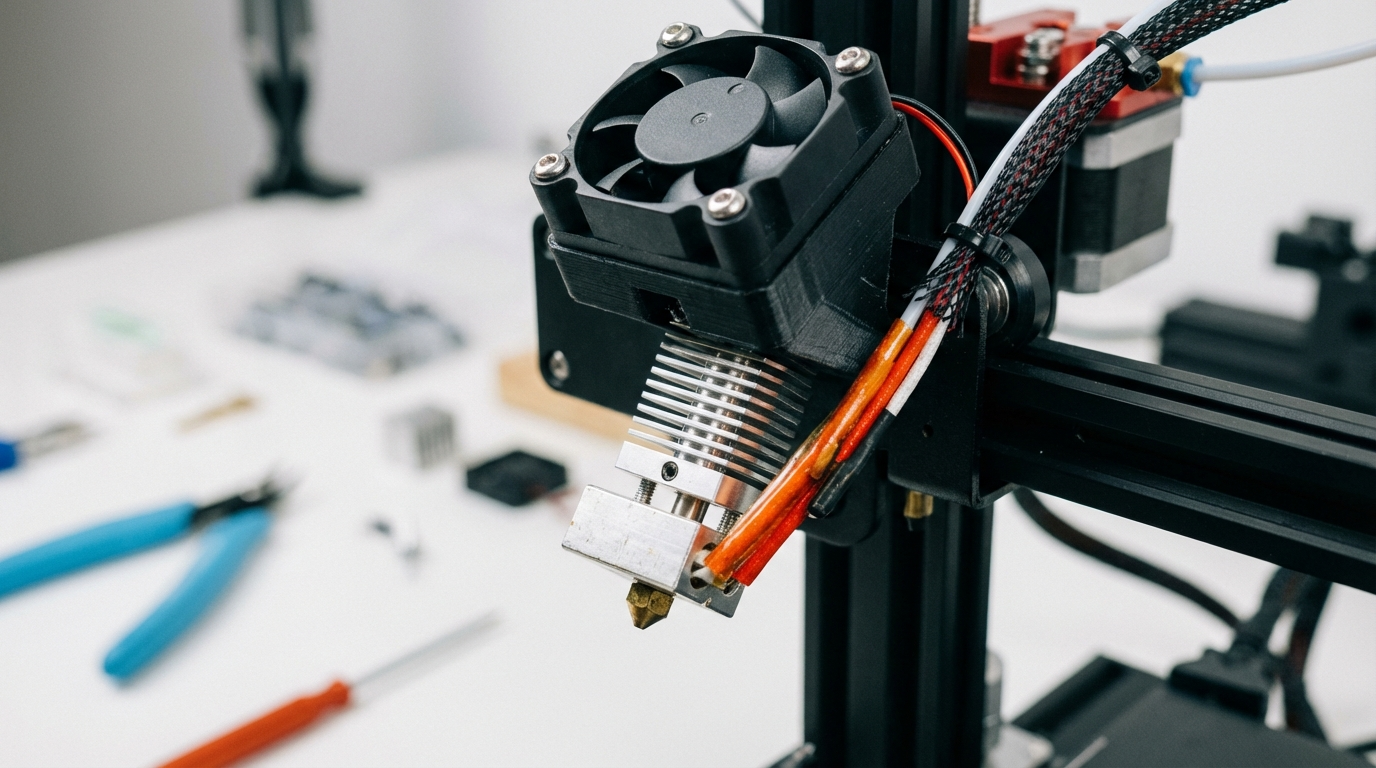
The V6 design (used by E3D, Slice Engineering, and most clones) is the most common hotend architecture. Here’s how to put it back together properly:
Step 1: Clean All Components
Before reassembly, make sure every part is clean. Use a brass brush on the nozzle threads. If there’s carbonized filament caked on any part, heat it with a heat gun to soften the residue, then scrape it off. Inspect the heat break for any filament stuck inside the bore — push a cleaning needle through from both ends.
Step 2: Thread the Heat Break into the Heater Block
Screw the heat break into the top of the heater block. Thread it in until it’s snug but don’t crank it — you want it seated firmly, not stripped. If you’re using thermal compound on the threads, apply a tiny amount to help with heat transfer and prevent seizing.
Step 3: Thread the Nozzle In (Leave a Gap)
This is the critical step most people get wrong. Thread the nozzle into the bottom of the heater block, but stop about one full turn before it’s fully tightened. The nozzle should NOT bottom out against the heater block. Instead, it needs to press firmly against the end of the heat break inside the block, creating a metal-to-metal seal.
Step 4: Hot Tighten the Nozzle
This is the most important step in the entire process. Heat the hotend to 250°C (or your typical printing temperature), then use a wrench to give the nozzle a final tighten — about 1/4 to 1/2 turn. Hold the heater block with a second wrench to prevent it from rotating.
Why hot tighten? Metals expand when heated. If you only tighten at room temperature, the parts will expand at different rates when heated to printing temps, creating tiny gaps. Hot tightening ensures the seal is solid at operating temperature.
Step 5: Check for Leaks
With the hotend at temperature, manually push some filament through. Watch the junction between the nozzle and heater block carefully. If you see any molten filament seeping out, the seal isn’t right. Let it cool, disassemble, clean, and try again — making sure the nozzle contacts the heat break before the heater block.
Reassembly for Creality-Style Hotends
Creality printers (Ender 3, CR-10, etc.) use a similar principle but with a slightly different configuration. The main difference is that the heat break on many Creality machines is a PTFE-lined throat tube where a piece of PTFE (Bowden tube) extends all the way down to the nozzle.
The PTFE-Lined Approach
- Cut a fresh piece of Bowden tube with a perfectly flat, square end (use a PTFE tube cutter, not scissors)
- Thread the heat break into the heater block
- Thread the nozzle in but leave it about 1 turn loose
- Push the PTFE tube down through the heat break until it touches the top of the nozzle
- Hot tighten the nozzle — it will press up against the PTFE tube, creating the seal
- Secure the PTFE tube at the top with the pneumatic fitting
The most common failure point on Creality hotends is a gap between the PTFE tube and nozzle. If the tube isn’t cut perfectly square, or if it retracts slightly over time due to heat, filament fills the gap and creates a chronic clog. This is why many owners upgrade to an all-metal heat break.
Quick-Change Systems (Revo, Bambu Lab)
Modern hotends like the E3D Revo and Bambu Lab’s integrated system eliminate most reassembly headaches. The Revo uses a hand-tightened nozzle that threads directly into the heatsink, skipping the heater block entirely. No hot tightening required — just screw it in until snug at room temperature.
Bambu Lab’s hotend uses a simple nozzle-swap mechanism. Push the locking lever, pull the old nozzle out, insert the new one, and close the lever. The machine handles all calibration automatically.
If you’re frequently swapping nozzles or materials, these systems save enormous amounts of time and virtually eliminate reassembly errors.
Common Reassembly Mistakes and How to Avoid Them
Mistake 1: Tightening the Nozzle Against the Heater Block
The nozzle must seal against the heat break, not the heater block. If you tighten until the nozzle flange is flush with the block, there’s likely a gap between the nozzle tip and heat break inside. Always leave that small visible gap between the nozzle flange and heater block.
Mistake 2: Skipping the Hot Tighten
Cold-only tightening will almost always result in a leak once the hotend reaches operating temperature. Don’t skip this step. It takes two minutes and prevents hours of troubleshooting later.
Mistake 3: Cross-Threading
Start all threads by hand before using a wrench. If a thread feels crunchy or resistant, back it out and try again. Cross-threaded nozzles or heat breaks are extremely common and often ruin the heater block threads permanently.
Mistake 4: Over-Tightening
You need a firm seal, not maximum torque. Over-tightening can strip the soft brass threads on a nozzle, crack the heater block (especially aluminum), or deform the heat break. Firm and snug — not gorilla-tight.
Mistake 5: Forgetting to Reassemble the Thermistor and Heater Cartridge
If you removed the thermistor or heater cartridge during disassembly, make sure they’re securely reseated. A loose thermistor gives inaccurate temperature readings, and a loose heater cartridge can shift and melt nearby wiring.
Post-Reassembly Testing
After reassembly, run these checks before starting a real print:
- PID tune: If you replaced any thermal components, run a PID autotune to recalibrate temperature control
- Extrude 100mm of filament: Manually feed filament and watch for smooth, consistent flow
- Print a calibration cube: Check for under-extrusion, layer adhesion issues, or surface artifacts
- Monitor for 30 minutes: Watch the hotend during a print for any signs of leaking filament
When to Replace Instead of Reassemble
Sometimes parts are too worn to reuse:
- Nozzles: Replace after 500+ print hours (brass) or when the bore is visibly enlarged
- Heat breaks: Replace if threads are stripped, the bore is scored, or the PTFE liner is damaged
- Heater blocks: Replace if threads are stripped or the block is cracked
- PTFE tubes: Replace if the end is burned, deformed, or no longer perfectly round
Budget a few dollars for spare nozzles and PTFE tubes — they’re consumables, and having spares means less downtime when something wears out.
Final Thoughts
Hotend reassembly is one of those skills that seems intimidating the first time but becomes routine quickly. The key takeaway: nozzle seals against heat break (not heater block), and always hot tighten. Get those two things right and you’ll eliminate 90% of post-reassembly problems. Keep a set of spare nozzles and heat breaks on hand, and you’ll never have extended downtime from a clog or leak again.