How to Split Large 3D Prints: Complete Guide to Printing Oversized Models
When Your Model Is Too Big for Your Build Plate
It happens to every 3D printing enthusiast eventually. You find the perfect model — a cosplay helmet, an architectural model, a custom enclosure — and then reality hits: it’s bigger than your print bed. Maybe you have an Ender 3 with a 220×220mm build plate and your model is 400mm wide. Maybe you want to print a full-size prop sword. Whatever the case, you’re looking at a model that simply won’t fit.
The solution is splitting. Cut the model into pieces that fit your printer, print them separately, and assemble them into the final object. It sounds simple in theory, but doing it well — with strong joints, invisible seams, and proper alignment — takes some technique. This guide covers everything you need to know.
Software for Splitting Models
Several tools can split 3D models, ranging from dead-simple to professional-grade. Here are the best options:
Meshmixer (Free)
Autodesk Meshmixer is the go-to free tool for model splitting. Its “Plane Cut” feature lets you slice a model along any plane with a simple drag-and-drop interface. You can position the cut anywhere and rotate the cutting plane to find the optimal split location.
How to split in Meshmixer:
- Import your model (File → Import)
- Go to Edit → Plane Cut
- Position the cutting plane by dragging the arrows
- Set “Cut Type” to “Keep Both” to preserve both halves
- Click Accept
- Export each piece separately (File → Export)
Meshmixer’s strength is its simplicity. For straightforward cuts, it’s all you need. Its weakness is that it only does planar cuts — you can’t create complex interlocking joints without additional work.
Lychee Slicer (Free/Pro)
Primarily a resin slicer, Lychee includes a surprisingly good model cutting tool. Its cut feature supports custom-shaped cuts including puzzle-piece interlocking joints, which makes alignment during assembly much easier. The free version handles basic cuts; the Pro version adds more joint styles.
3D Builder (Free, Windows)
Microsoft’s 3D Builder comes pre-installed on Windows and includes a simple split tool. It’s basic but functional — good for quick, no-fuss splits when you don’t want to install additional software.
Bambu Studio / PrusaSlicer Cut Tool
Both Bambu Studio and recent versions of PrusaSlicer include built-in cut tools. PrusaSlicer’s cut tool (introduced in version 2.6) supports connectors — pins and holes that help align pieces during assembly. This is particularly convenient because you can split the model and slice it for printing in the same software.
Using PrusaSlicer’s cut tool:
- Import your model
- Click the Cut tool (scissors icon) in the toolbar
- Position the cutting plane
- Enable “Connectors” to add alignment pins
- Add pin locations by clicking on the cut surface
- Click “Perform Cut”
Blender (Free, Advanced)
For complex splits that require precise control, Blender’s Boolean operations let you cut models with any shape you want. The learning curve is steep, but the flexibility is unmatched. Use the Bisect tool for planar cuts or Boolean modifiers for complex cuts.
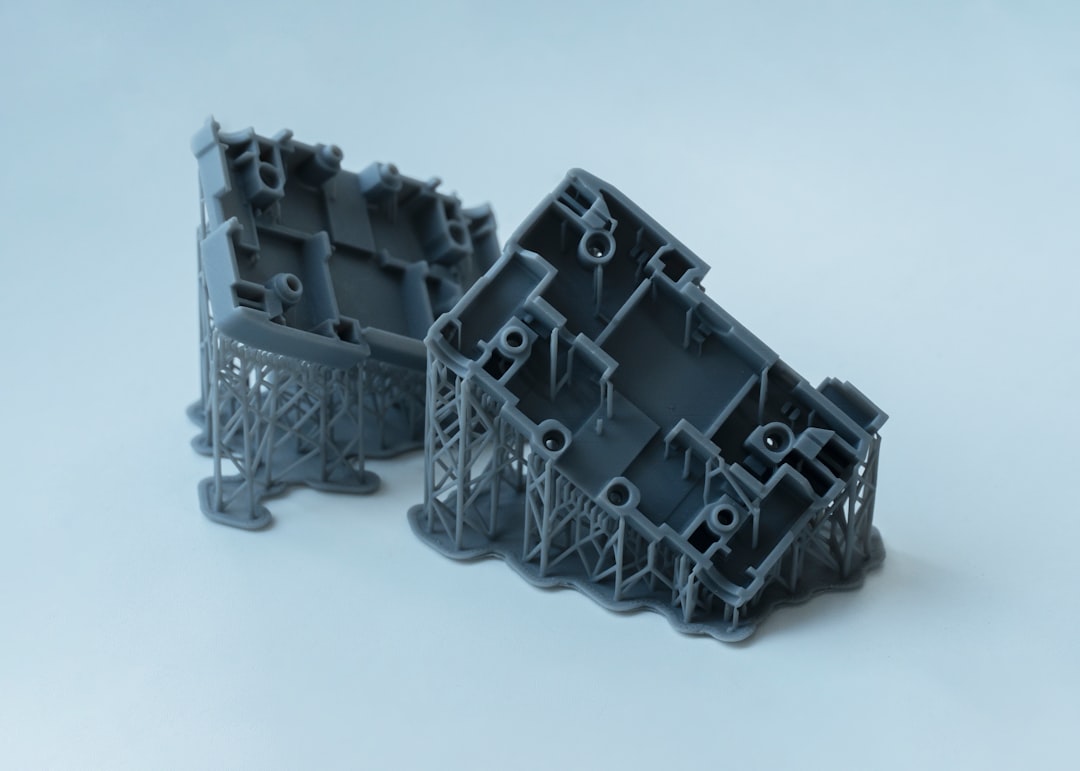
Planning Your Cuts: Strategy Matters
Where you split a model matters as much as how you split it. Poor cut placement leads to weak joints, visible seams, and assembly headaches. Here’s how to plan smart cuts:
Cut Along Natural Seam Lines
Look for natural boundaries in the model where a seam would be least noticeable. Panel lines on a helmet, joints on a character figure, edges on an architectural model — these are all natural places to hide a seam. A well-placed cut line can be virtually invisible after assembly.
Avoid Cutting Through Thin Features
Splitting through a thin wall or delicate feature creates a weak point. Try to place cuts through the thickest, most structural parts of the model. If you must cut through a thin area, plan for reinforcement (internal pins, backing plates) during assembly.
Consider Print Orientation
Each split piece needs to be printable. Think about how each piece will sit on the build plate. The best split reduces or eliminates the need for supports on each individual piece. Sometimes an angled cut that follows the model’s geometry produces pieces that print flat with no supports, even if the cut itself seems unintuitive.
Minimize the Number of Cuts
Every cut is a potential failure point and additional assembly work. Split into as few pieces as possible while still fitting your build plate. Use diagonal cuts to maximize the effective print area — a diagonal cut across a 220mm bed gives you about 310mm of cutting length.
Flat Cut Surfaces
Whenever possible, make cuts that produce flat surfaces on both pieces. Flat surfaces are easy to glue, easy to align, and easy to clamp during assembly. Curved cuts might follow the model’s aesthetics better but make assembly much harder.
Adding Alignment Features
The trickiest part of assembling split prints is getting pieces aligned perfectly. Even a 0.5mm misalignment is visible and feels wrong. Here are several approaches:
Dowel Pins
Drill matching holes in both pieces and insert metal or wooden dowel pins during assembly. This provides precise alignment and additional joint strength. You can model the pin holes into the digital model before printing, or drill them after printing.
For a 3D-printed approach: model cylindrical pegs directly onto one cut surface and matching holes on the other. Use 3-4mm diameter pegs, 5-8mm long, with 0.1-0.2mm clearance on the holes for easy insertion.
PrusaSlicer Connectors
As mentioned earlier, PrusaSlicer’s cut tool can automatically add cylindrical or puzzle-piece connectors. This is the easiest method because it’s built into the slicing workflow. Choose 2-4 connector points distributed evenly across the cut surface.
Registration Keys
Model small registration keys (squares, triangles, or other non-symmetrical shapes) on one surface and matching recesses on the other. Non-symmetrical keys prevent assembling pieces in the wrong orientation — useful for parts that look similar from multiple angles.
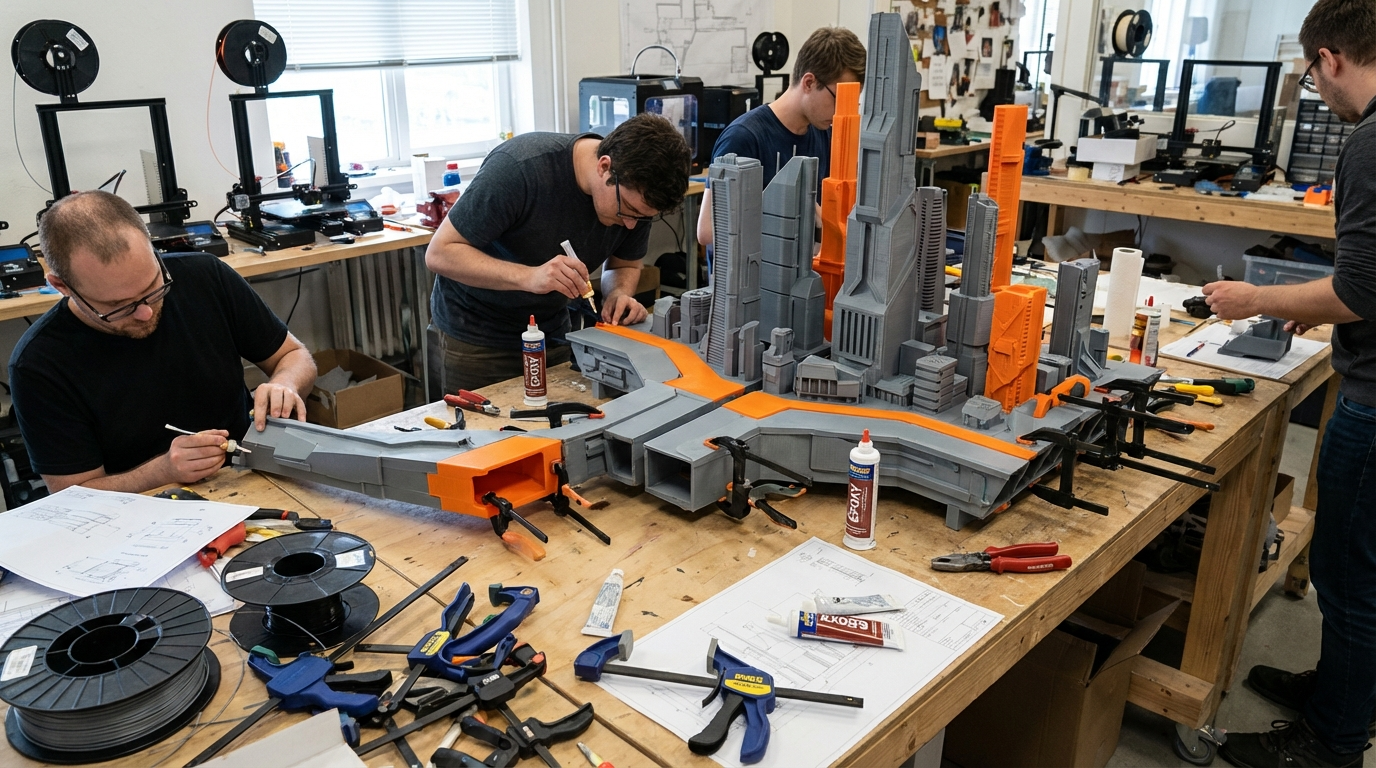
External Jig
For large or complex assemblies, design and print a simple alignment jig that holds multiple pieces in the correct position while glue cures. This is extra work upfront but pays off when you’re trying to hold 6 pieces together simultaneously.
Assembly: Joining Your Pieces
Adhesives
The right glue depends on your filament material:
- PLA: Cyanoacrylate (super glue) works well. For structural joints, use two-part epoxy (JB Weld, Gorilla Epoxy). Epoxy is stronger and fills small gaps.
- PETG: Super glue works but isn’t as strong as on PLA. Epoxy is the better choice for structural joints.
- ABS/ASA: Acetone welding. Brush acetone on both surfaces, press together, and hold. The acetone dissolves the plastic and creates a chemical weld that’s as strong as the surrounding material. This is the strongest joint method available for ABS.
- Nylon: Epoxy is your best bet. Super glue works poorly on nylon due to its flexibility.
Surface Preparation
Before gluing, prepare your surfaces:
- Dry fit first. Make sure pieces align correctly without glue. Sand any high spots or elephant’s foot that prevents flush contact.
- Sand the mating surfaces. Lightly sand with 120-220 grit sandpaper. This creates micro-scratches that glue bonds to more effectively.
- Clean with isopropyl alcohol. Remove dust from sanding and any oils from your hands. Clean surfaces bond dramatically better.
- Apply glue and clamp. Use even pressure across the joint while the adhesive cures. Rubber bands, spring clamps, or painter’s tape all work for holding pieces together.
Reinforcement for Structural Joints
For joints that need to bear weight or stress:
- Internal metal rods: Drill holes through both pieces and insert threaded steel rod or aluminum tubing, secured with epoxy.
- Fiberglass or carbon fiber backing: Apply fiberglass cloth and epoxy to the inside of the joint for massive strength improvement.
- Printed internal brackets: Design and print brackets that span the joint internally. Glue them in place for additional strength without visible external reinforcement.
- Screws: For joints that might need disassembly, design screw holes into the model. Heat-set threaded inserts in one piece, through-holes in the other.
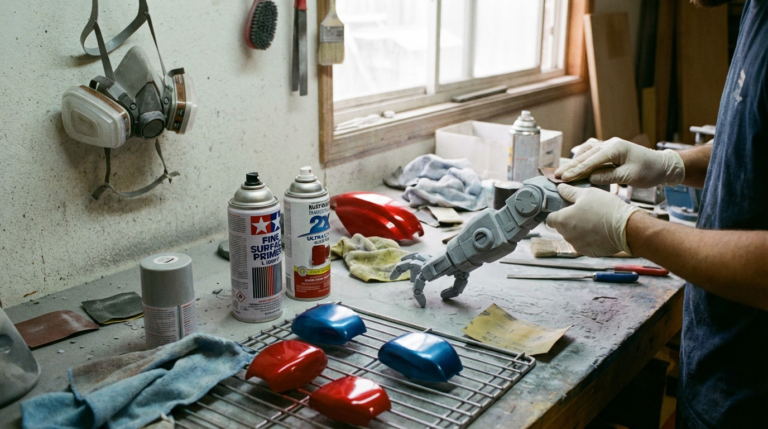
Finishing: Making Seams Disappear
The whole point of a good split is an invisible join. Here’s how to make seams vanish:
Filler
After gluing, fill any remaining gaps or seam lines with:
- Bondo (spot putty): The classic choice. Apply with a putty knife, let cure, sand smooth. Multiple thin applications work better than one thick one.
- Super glue + baking soda: Sprinkle baking soda on the seam, then wick super glue into it. Creates a rock-hard fill that can be sanded smooth. Fast-curing and extremely strong.
- Epoxy putty (Milliput, Apoxie Sculpt): Moldable putty that hardens to a sandable finish. Excellent for larger gaps or sculpting details across seams.
Sanding Progression
Sand the seam area through progressively finer grits:
- 120 grit: Remove bulk filler and level the surface
- 220 grit: Smooth out scratches from coarse sanding
- 400 grit: Prepare for priming
- 600-800 grit (optional): For mirror-smooth finishes
Priming and Painting
A coat of filler primer (like Rust-Oleum Filler Primer) reveals imperfections you can’t see with the naked eye. Spray a coat, let it dry, and check for remaining seam lines. If you see any, add more filler, sand, and prime again. Two or three cycles of fill-sand-prime typically produces a seamless result.
Final paint completely hides the seam. Even a simple spray paint job makes a properly prepared seam invisible.
Tips for Common Large Print Projects
Cosplay Helmets and Armor
Split along panel lines or natural edges. Use the inside surface for reinforcement (fiberglass, internal brackets) since it won’t be visible. Plan for 2-3mm wall thickness on each piece for structural integrity.
Figurines and Statues
Split at natural joints: neck, waist, wrists, ankles. Arms and weapons can often be printed separately and attached with pins. Test-fit before gluing — figurine joints are difficult to adjust after adhesive sets.
Functional Enclosures and Cases
Design screw bosses into the model so pieces bolt together. For enclosures that need to be opened, use heat-set inserts and machine screws instead of glue. This also makes future modifications easier.
Architectural Models
Split floor-by-floor or room-by-room. These can often be designed as a stacking assembly that doesn’t even need glue — gravity and registration pins hold everything in place.
Final Thoughts
Splitting large models for 3D printing isn’t just a workaround for small build plates — it’s a skill that opens up an entire category of projects. Once you’re comfortable with the workflow (split → print → prepare → glue → finish), you can print objects of virtually any size on even the smallest printer.
Start with a simple split project (a two-piece model with flat cut surfaces) to practice the workflow before tackling complex multi-piece assemblies. The techniques are straightforward, but like everything in 3D printing, they improve dramatically with practice.