Over-Extrusion in 3D Printing: Causes and Fixes
By Mike Reynolds
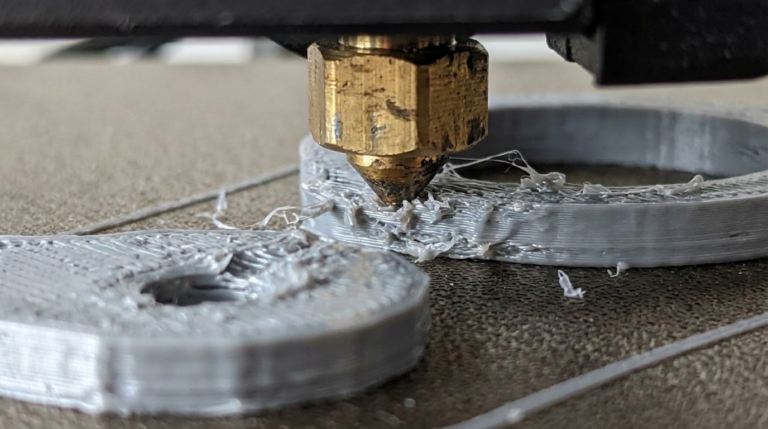
Over‑extrusion is one of the easiest 3D printing problems to spot—and one of the easiest to fix once you understand the cause. If your prints have blobby surfaces, rough walls, and bulging corners, you’re likely pushing too much plastic. This guide breaks down the root causes and gives you a clean, step‑by‑step fix.
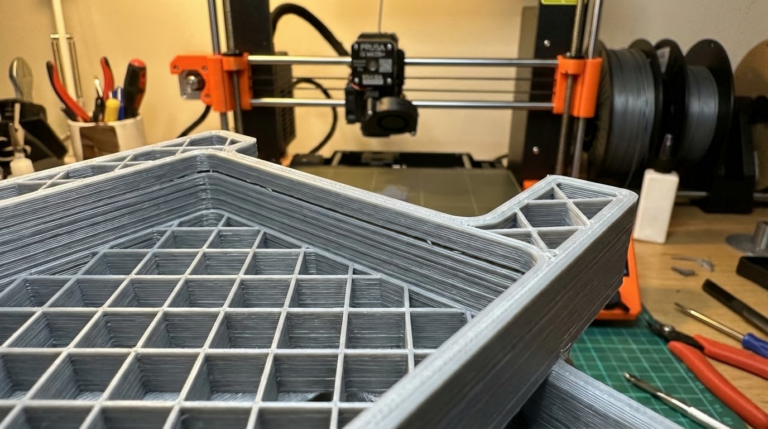
What Over‑Extrusion Looks Like
- Walls look rough or bumpy
- Corners bulge outward
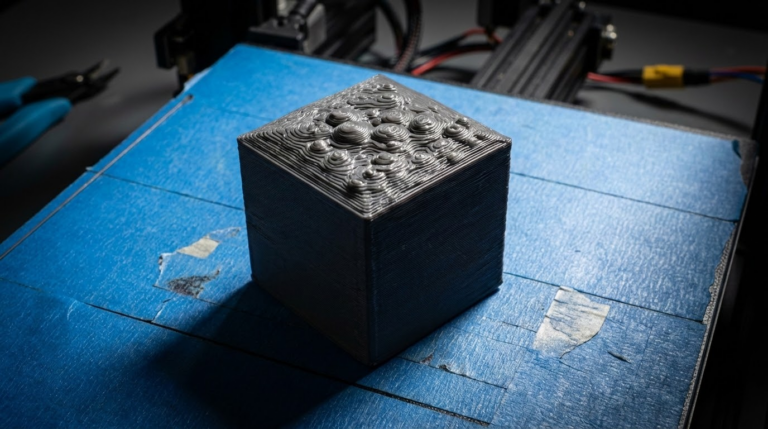
- Top surfaces have ridges or blobs
- Dimensional accuracy is poor (parts too big)
Over‑extrusion is the opposite of under‑extrusion. The printer is pushing more filament than the slicer expects, so each line of plastic is wider and taller than it should be.
Common Causes of Over‑Extrusion
- E‑steps not calibrated
- Incorrect filament diameter setting
- Flow rate / extrusion multiplier too high
- Nozzle partially clogged (yes, partial clogs can cause over‑extrusion artifacts)
- Printing too hot
Step‑by‑Step Fixes
1) Calibrate E‑Steps
E‑steps tell your printer how much filament to push for each step of the motor. If they’re off, everything else is off. Mark 120 mm on your filament, extrude 100 mm, and measure what actually moved. Adjust E‑steps in firmware until the printer extrudes exactly 100 mm.
2) Check Filament Diameter
Most filament is 1.75 mm, but it can vary. Use calipers to measure in several spots and average the value. Enter that value in your slicer. If you’re still set to 1.75 but your filament is 1.70, you’ll over‑extrude.
3) Tune Flow Rate (Extrusion Multiplier)
In most slicers, flow is set to 100%. Print a single‑wall cube and measure wall thickness. If the wall is thicker than expected, lower the flow in 2–3% increments until it matches.
4) Lower Nozzle Temperature
Too much heat makes filament flow more easily, which can exaggerate over‑extrusion. Drop temperature by 5–10°C and check if the surface improves.
Understanding the Flow Rate vs. E‑Steps Relationship
E‑steps are a hardware calibration. Flow rate is a slicer adjustment. If E‑steps are wrong, you’ll be chasing your tail with flow settings. Always fix E‑steps first, then use flow rate for fine tuning per filament brand.
Over‑Extrusion vs. Z‑Offset Problems
Sometimes a too‑low Z‑offset makes the first layer look like over‑extrusion. If only the first layer is blobby but the rest looks fine, raise the Z‑offset slightly and re‑test.
Advanced Fixes
Check for Partial Clogs
A dirty nozzle can make extrusion inconsistent. That can look like over‑extrusion on some layers and under‑extrusion on others. Do a cold pull or replace the nozzle if you see uneven flow.
Review Pressure Advance / Linear Advance
If you’ve enabled pressure advance, incorrect values can cause corner blobs. Reduce K‑values and test with a calibration print.
FAQ: Over‑Extrusion
Why are my dimensions too large?
Because extra filament adds thickness to walls. Fix E‑steps, flow, and confirm your line width settings in the slicer.
Does a bigger nozzle cause over‑extrusion?
Only if the slicer still thinks you’re using a smaller nozzle. Update nozzle diameter and line width settings after any nozzle change.
Quick Calibration Routine
- Calibrate E‑steps
- Measure filament diameter
- Print a single‑wall cube
- Adjust flow by 2–3%
- Lower temperature if needed
Final Thoughts
Over‑extrusion is frustrating, but it’s not mysterious. Most of the time, it’s just an incorrect calibration or slicer setting. Do the quick routine above and your prints will clean up fast.
Detailed E‑Steps Calibration (The 5‑Minute Method)
- Heat the nozzle to printing temperature and load filament.
- Mark a point 120 mm above the extruder entry with a permanent marker.
- Use your printer or terminal to extrude exactly 100 mm.
- Measure the remaining distance to the mark. If it’s 25 mm, you only pushed 95 mm.
- Calculate new E‑steps:
new_steps = old_steps × 100 / actual_extruded. - Update firmware and save settings.
Once E‑steps are accurate, you’ll notice smoother walls and more consistent layer bonding.
Flow Rate Tuning With a Single‑Wall Cube
Print a 20 × 20 × 20 mm cube with one perimeter and no infill. Measure the wall thickness with calipers. Compare it to your slicer’s expected line width (often 0.4 or 0.45 mm). If the wall is thicker, reduce flow. If it’s thinner, increase flow slightly.
Example: expected 0.45 mm, measured 0.50 mm. Flow should be 0.45/0.50 = 0.90 (90%). Adjust in 2–3% steps and re‑test.
Slicer Settings That Affect Over‑Extrusion
- Line width: If set too large for your nozzle, walls will look fat.
- Top/bottom flow: Some slicers allow higher flow for top layers—check it.
- Overlap settings: Excessive infill overlap can create bulges at walls.
Temperature and Material Effects
Hotter filament flows more easily and can look like over‑extrusion. PLA at 220°C might be perfect for speed but too hot for quality. Try 200–210°C for PLA and 230–240°C for PETG, then tune from there.
Also remember that different brands of filament behave differently. I often end up with one flow profile per brand.
Case Study: “Blobby Corners on PLA”
I had a PLA print with perfect walls but fat, shiny corners. The fix wasn’t E‑steps—it was pressure advance. Reducing K from 0.25 to 0.12 eliminated corner blobs. If your corners are the only problem, don’t skip pressure advance tuning.
Troubleshooting Table
| Symptom | Likely Cause | Fix |
|---|---|---|
| Bulging corners | Flow too high or pressure advance off | Lower flow 2–3% and re‑tune pressure advance |
| Rough walls | E‑steps off | Calibrate E‑steps |
| Top layer blobs | Top flow too high | Reduce top/bottom flow |
| Parts too large | Flow or filament diameter wrong | Measure filament and adjust flow |
When Over‑Extrusion Is Not the Problem
Some defects look like over‑extrusion but aren’t. Z‑seam blobs, for example, are retraction or pressure advance issues. Elephant’s foot is usually a bed temperature or Z‑offset problem. If the defect is localized instead of uniform across the print, investigate those settings instead.
Final Calibration Checklist
- Correct filament diameter in slicer
- E‑steps calibrated
- Flow tuned with a single‑wall cube
- Temperature reduced to the lowest stable value
- Pressure advance tuned if corners bulge
Material‑Specific Flow Tips
PLA is forgiving, but PETG tends to ooze and can look over‑extruded if flow is too high. TPU is flexible and compresses in the extruder, which can cause inconsistent flow if your tension is too tight. It’s normal to have separate flow profiles for PLA, PETG, ABS, and TPU.
Start with a generic profile, then run a quick single‑wall cube for each material. Save the flow value as a separate filament preset. That 10‑minute investment saves hours of sanding later.
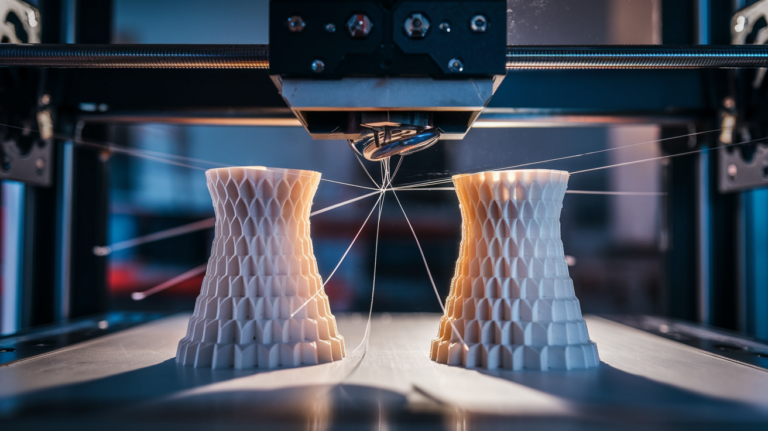
Retraction and Over‑Extrusion Artifacts
Retraction doesn’t directly change flow, but poor retraction settings can create blobs that look like over‑extrusion. If you see a raised “zit” at the end of a wall, that’s often retraction or Z‑seam placement. Try reducing retraction distance slightly or enabling coasting/pressure advance if your slicer supports it.
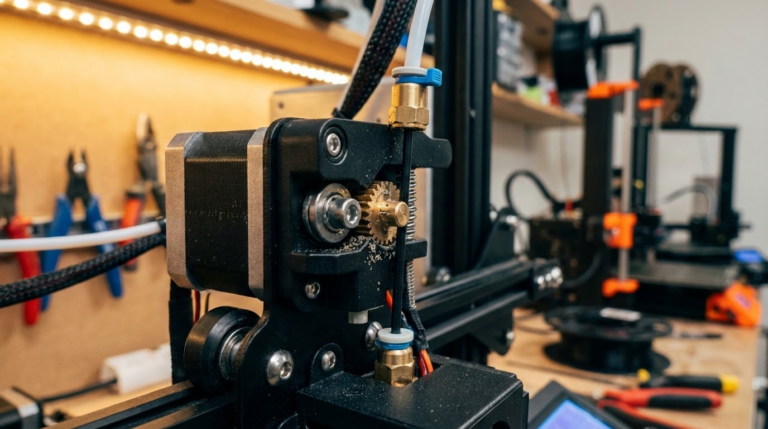
Extruder Tension and Filament Grind
An overtightened extruder can flatten filament, which changes how it feeds and can create inconsistent flow. The gear should bite firmly but not crush the filament. If you see deep teeth marks, back off the tension a little.
FAQ: Over‑Extrusion Fixes
Should I lower flow for every print?
No. Fix E‑steps first, then tune flow once per filament type. After that, keep it consistent unless you change brands.
Can nozzle wear cause over‑extrusion?
Yes. A worn nozzle has a slightly larger opening, which increases flow. If your nozzle has seen a lot of abrasive filaments, replace it.
Why do my infill lines look okay but walls are messy?
Wall line width and overlap settings can exaggerate over‑extrusion on perimeters. Check wall settings separately from infill settings.
Calibration Prints That Make Over‑Extrusion Obvious
A simple cube helps, but two prints make it crystal clear:
- Flow cube: Single‑wall cube for precise wall measurements.
- Temperature tower: Lets you see when heat starts to cause blobs and stringing.
Run the flow cube first, then the temperature tower. If the tower still shows blobbing at higher temperatures, you know it’s heat‑related, not flow‑related.
Quick Summary
Over‑extrusion isn’t a mystery. It’s math and calibration. Fix E‑steps, verify filament diameter, tune flow, and keep temperatures reasonable. Do that and your prints will stop looking like they’ve been over‑fed.
If you want the fastest path to a clean profile, keep a simple checklist taped to your printer: calibrate E‑steps after any extruder change, measure filament diameter for new spools, and run a flow cube whenever you switch brands. Those three habits eliminate most over‑extrusion issues before they even start.
Remember: if the defect is uniform across the entire print, think flow. If it’s localized to corners, seams, or the first layer, it’s usually a different setting. That simple distinction saves a lot of wasted calibration time.
Once you dial it in, save the profile and don’t touch it unless you change hardware. Consistency is the secret to good prints.
That’s it—calibrate once, print happily for months.