PVA Soluble Support Material: Complete 3D Printing Guide
What Is PVA Support Material?
PVA (Polyvinyl Alcohol) is a water-soluble filament designed specifically for use as support material in dual-extrusion 3D printers. Instead of wrestling with pliers, knives, and sandpaper to remove traditional supports, you simply drop your finished print into warm water and let chemistry do the work. The PVA dissolves completely, leaving behind a clean part with smooth surfaces where the supports used to be.
If you’ve ever spent twenty frustrating minutes trying to remove supports from a complex print — damaging the surface finish in the process — PVA feels like a revelation. It’s not without its challenges (this stuff is notoriously moisture-hungry), but for complex geometries, moving assemblies, and parts with internal cavities, PVA support material is genuinely transformative.
How PVA Supports Work
The concept is straightforward: your dual-extrusion printer uses one nozzle for the main model material (usually PLA or PETG) and the second nozzle for PVA support structures. The slicer generates support geometry wherever overhangs, bridges, or floating features need physical support during the print.
Once the print finishes, you submerge the entire part in warm water. The PVA gradually absorbs water and dissolves, leaving only your model material behind. No cutting, no scarring, no post-processing beyond a quick rinse and dry.
Compatible Model Materials
- PLA: The best pairing. PLA and PVA print at similar temperatures and bond well at the interface. This is the combination most users should start with.
- PETG: Works, but requires careful temperature management. PVA’s maximum printing temperature (~215°C) is below PETG’s typical range (230–250°C), so you need PETG that prints well at lower temperatures, or use a PVA variant rated for higher temps.
- ABS/ASA: Generally not compatible. The temperature gap is too large, and the materials don’t bond well at the interface.
- Nylon: Some users have had success, but it’s tricky. Nylon’s bed temperature requirements and warping tendency make it a difficult pairing.
Printer Requirements
PVA is a dual-extrusion material by nature. You need:
Dual Extrusion System
This is the obvious one — you need a printer with two nozzles or a multi-material system. Popular options include:
- Bambu Lab X1 Carbon / P1S with AMS: The AMS (Automatic Material System) handles filament switching and works well with PVA, though the AMS boxes aren’t sealed enough for long-term PVA storage.
- Prusa MK4 with MMU3: Prusa’s Multi Material Unit supports PVA, though the purge waste can be significant.
- IDEX printers (Flashforge Creator, Raise3D): Independent dual extrusion gives the best results since both nozzles can maintain different temperatures simultaneously.
- Ultimaker S5/S7: These machines have excellent PVA support built into their slicer profiles and handle the material very well.
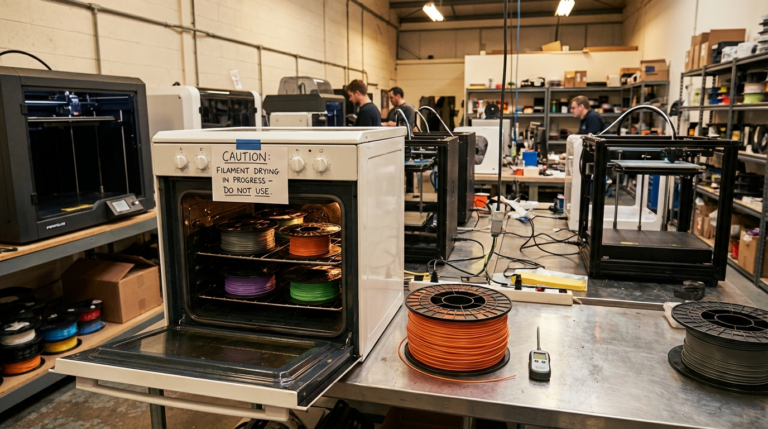
Filament Dry Storage (Critical)
PVA is one of the most hygroscopic filaments available — it absorbs moisture from the air faster than nylon, and much faster than PLA. Wet PVA strings, clogs nozzles, and produces weak supports that crumble instead of dissolving cleanly.
You need either:
- A filament dryer running continuously while printing (eSun eLite Dryer, Sunlu S2, PrintDry Pro)
- A sealed dry box with desiccant that feeds directly to the printer
- Or at minimum, dry the spool for 4–6 hours at 45–50°C before every print session
Print Settings for PVA
Temperature
- Nozzle temperature: 190–215°C (start at 200°C)
- Bed temperature: 50–60°C (match your primary material’s bed temp)
- PVA doesn’t need high temperatures — in fact, overheating causes degradation and clogs
Speed
- PVA print speed: 20–40 mm/s (slower than your model material)
- PVA travel speed: Same as model material is fine
- Don’t rush PVA — it’s more viscous than PLA and doesn’t flow as freely
Retraction
- Direct drive: 1–3mm at 25–35 mm/s
- Bowden: 4–6mm at 25–35 mm/s
- Important: Excessive retraction with PVA can cause the softened filament to jam in the heatbreak. Use the minimum retraction that prevents stringing.
Support Interface Settings
These settings control how PVA supports connect to your model and are critical for clean dissolution:
- Support Z distance (top/bottom): 0.1–0.15mm — closer than regular supports since you’re dissolving them
- Support interface layers: 2–3 layers of PVA touching the model, with the rest as your model material if possible (reduces PVA usage)
- Support density: 15–25% — less dense than rigid supports since they don’t need to be as strong
The Dissolution Process
Removing PVA supports is the fun part — but there’s a right way and a wrong way to do it.
Step-by-Step Dissolution
- Remove loose supports by hand first. Any PVA that isn’t directly touching the model surface can be pulled or broken off. This speeds up the water dissolution significantly.
- Prepare warm water. Use water at 40–60°C (warm tap water is usually fine). Hot water dissolves PVA faster, but don’t use boiling water — it can warp PLA parts.
- Submerge the part completely. Place it in a container large enough that the part is fully covered with at least an inch of water on all sides.
- Add agitation. Still water works, but slowly. A magnetic stirrer, ultrasonic cleaner, or even just stirring occasionally speeds things up dramatically. Some users use a small aquarium pump to create constant water circulation.
- Wait. Depending on the amount of PVA and water temperature, complete dissolution takes 2–12 hours. Thicker support structures take longer. Change the water every few hours for faster results.
- Rinse and dry. Once all PVA has dissolved, rinse the part under clean water and let it air dry. PLA parts may have a slightly cloudy surface where PVA was attached — this clears up as it dries.
Tips for Faster Dissolution
- Warmer water = faster dissolution (but stay under 60°C with PLA)
- Agitation helps more than temperature
- Fresh water dissolves PVA faster than PVA-saturated water — change it periodically
- An ultrasonic cleaner is the luxury option but cuts dissolution time in half
- Adding a small amount of dish soap can help break the surface tension
Common PVA Problems and Solutions
PVA Won’t Stick to the Model
If PVA supports are detaching from your PLA/PETG model during printing, the interface temperature isn’t right.
Fixes:
- Increase PVA nozzle temperature by 5°C
- Reduce the Z gap between support and model (try 0.1mm)
- Slow down the interface layer speed to 15–20 mm/s
- Make sure the nozzle primes properly during filament switches
PVA Clogs the Nozzle
This is the most frustrating PVA problem and almost always traces back to moisture or temperature.
Fixes:
- Dry the filament (this is the cause 90% of the time)
- Lower the nozzle temperature — degraded PVA carbonizes inside the nozzle
- Reduce retraction distance
- If PVA sits idle in a hot nozzle during long stretches of model-only printing, the heat degrades it. Configure your slicer to park the PVA nozzle at a standby temperature (160°C) during long pauses
PVA Strings Everywhere
Stringy PVA supports are almost always wet PVA.
Fixes:
- Dry. Your. Filament. (Sensing a theme?)
- Increase retraction slightly
- Enable “wipe on retract” in your slicer
- Lower temperature by 5°C
PVA Won’t Dissolve Completely
If parts of the PVA remain rubbery or don’t dissolve after hours in water, the PVA degraded during printing (likely from moisture or excessive heat) and lost its water-solubility.
Fixes:
- Use hotter water (up to 70°C if your model material can handle it)
- Add agitation — still water barely dissolves degraded PVA
- For future prints: ensure PVA is dry and print at the lowest working temperature
- Stubborn remnants can sometimes be softened with isopropyl alcohol
Cost and Waste Considerations
PVA filament isn’t cheap — expect to pay $40–$60 per kilogram, which is 2–3 times the cost of PLA. Here are ways to minimize waste and cost:
- Use PVA only at the interface. Configure your slicer to print the support body in your model material and only use PVA for the top 2–3 interface layers. This cuts PVA usage by 60–80%.
- Orient parts to minimize support. Before reaching for PVA, ask if a different print orientation would reduce or eliminate the need for supports entirely.
- Don’t waste dissolved PVA water. PVA is biodegradable and the water can be safely poured down the drain or used to water plants (in small quantities).
- Seal unused PVA immediately. Every hour of ambient air exposure costs you print quality. Vacuum seal bags with desiccant are your friend.
Best PVA Filament Brands
- Ultimaker PVA: The gold standard. Expensive but incredibly reliable. Optimized for Ultimaker printers but works on any dual-extrusion setup.
- Polymaker PolySupport: A more affordable alternative that dissolves quickly and prints well. Available in both PVA and BVOH (faster-dissolving) variants.
- eSUN PVA+: Budget-friendly option with decent quality. The “+” formula is slightly easier to print than standard PVA.
- Verbatim BVOH: BVOH (Butenediol Vinyl Alcohol Co-Polymer) dissolves faster than PVA and works with a wider range of model materials. Worth the premium if you print PVA supports frequently.
- MatterHackers PVA: Reliable mid-range option with good customer support if you run into issues.
PVA vs. Other Support Materials
- PVA vs. HIPS: HIPS dissolves in limonene (a citrus-based solvent) and pairs with ABS. It’s better for high-temperature prints but the solvent is more expensive and smellier than water. PVA wins on convenience.
- PVA vs. BVOH: BVOH is essentially PVA’s newer, faster cousin. It dissolves faster, works with more materials, and is slightly less moisture-sensitive. It’s also more expensive.
- PVA vs. breakaway supports: Breakaway supports are cheaper and simpler (single extrusion), but they leave marks and can’t handle complex internal geometries. PVA wins for quality; breakaway wins for cost and simplicity.
When to Use PVA (And When Not To)
Use PVA when:
- Your model has complex internal cavities that traditional supports can’t reach
- Surface finish matters and you can’t afford support scarring
- You’re printing moving assemblies or interlocking parts in place
- The geometry requires supports on detailed surfaces (miniatures, figurines)
Skip PVA when:
- Simple overhangs that regular supports handle fine
- Budget is tight — regular PLA supports are free (same material)
- You can redesign the part to eliminate support needs
- You don’t have a filament dryer or dry storage solution
Final Thoughts
PVA support material isn’t for every print — but for the prints that need it, nothing else comes close. The ability to produce complex geometries with perfect surface finish, straight out of a water bath, fundamentally changes what’s possible on a desktop 3D printer.
The biggest barrier isn’t the material itself — it’s moisture management. Invest in proper drying and storage, pair PVA with PLA for the most forgiving experience, and keep your PVA nozzle temperature on the low end. Do those three things, and you’ll wonder why you ever fought with breakaway supports.
Just remember: if something goes wrong with PVA, dry it first and ask questions later. Nine times out of ten, that’s the answer.