3D Printer Filament Runout Sensor: Upgrade and Setup Guide
What Is a Filament Runout Sensor?
Picture this: you’re 18 hours into a 20-hour print. You walk into the room to check on it and find your printer happily moving through the motions — but extruding nothing. The filament ran out two hours ago, and the printer didn’t know or care. Your print is ruined, your filament is wasted, and you’re staring at 18 hours you’ll never get back.
A filament runout sensor prevents this exact scenario. It’s a simple device that detects whether filament is present in the feed path. When the filament runs out or breaks, the sensor tells the printer to pause, giving you time to load a new spool and resume. It’s one of the cheapest and most practical upgrades you can add to any 3D printer.
How Filament Runout Sensors Work
Most filament runout sensors use one of two detection methods, and understanding the difference helps you choose the right one.
Mechanical Switch Sensors
The simplest and most common type. A small mechanical switch (like a microswitch or lever switch) sits in the filament path. When filament is present, it presses the switch lever, keeping the circuit closed. When the filament runs out, the lever releases, the circuit opens, and the printer detects the change.
Pros: cheap ($3-5), reliable, simple to install, no false triggers. Cons: only detects complete filament absence — won’t catch a partial clog, tangled spool, or grinding extruder that’s still technically “feeding” but not extruding.
Optical/Encoder Sensors
More advanced sensors use an optical encoder or motion detector to verify that filament is actually moving through the sensor, not just present. A small wheel or encoder disc turns as filament passes through. If the filament stops moving (even if it’s still physically present), the sensor triggers a pause.
Pros: catches tangles, jams, and grinding in addition to runout. Cons: more expensive ($10-20), slightly more complex to install, and some models can give false triggers if the filament slips on the encoder wheel during retractions.
Which Type to Get
For most users, a basic mechanical switch sensor is the best starting point. It catches the most common failure mode (empty spool) and works reliably without false positives. If you print unattended frequently and want extra safety, upgrade to an encoder-based sensor — the BTT SFS V2.0 (Smart Filament Sensor) is a popular choice that detects both runout and jams.
Installation Guide
Choosing the Mounting Location
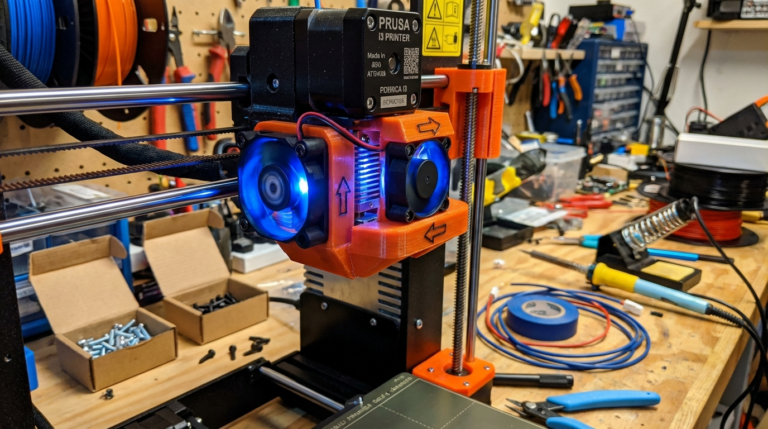
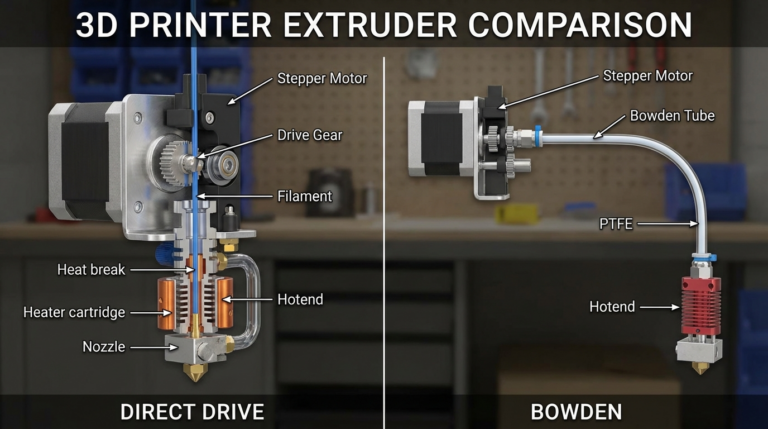
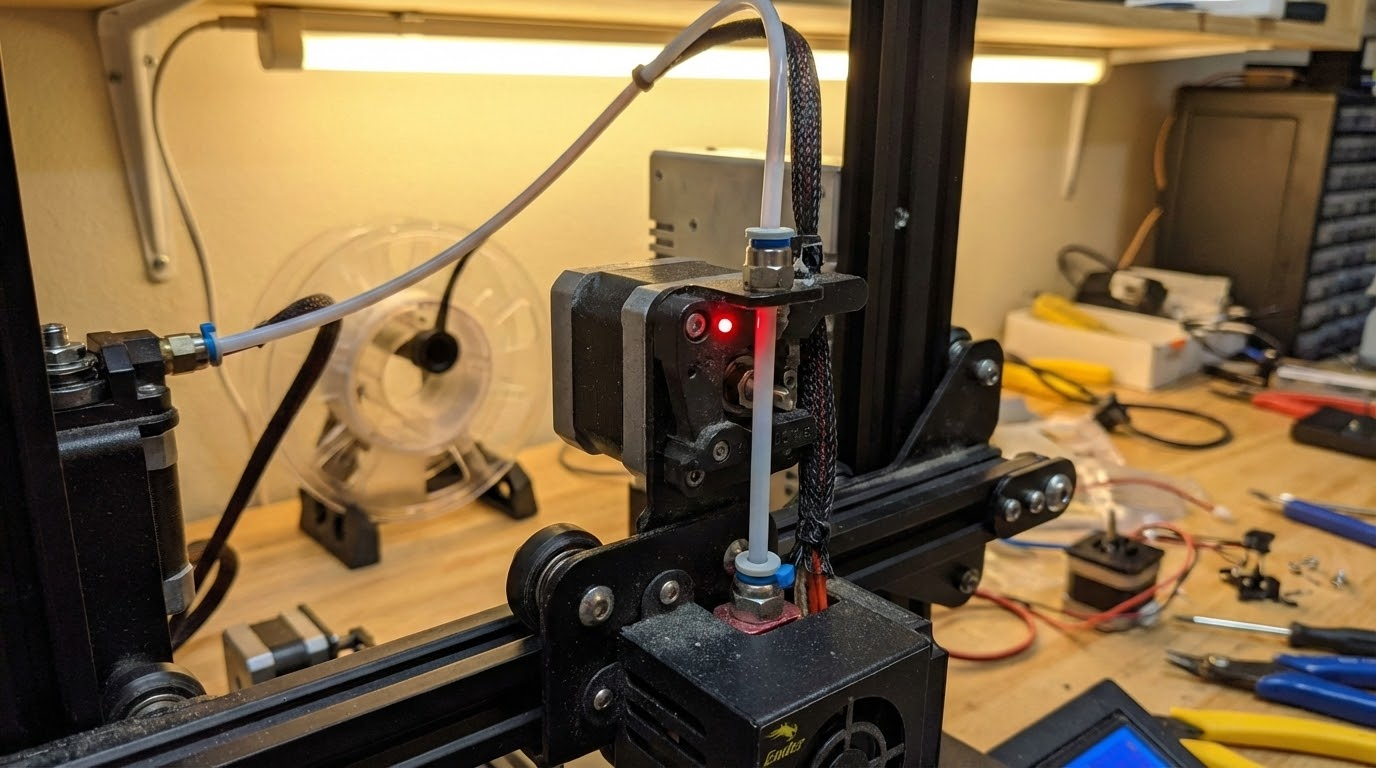
The sensor goes between the spool holder and the extruder. For Bowden setups, mount it just before where the PTFE tube enters the extruder. For direct drive, mount it on the frame near the spool holder, before the filament makes the turn into the extruder assembly.
Key considerations:
- The filament path through the sensor should be straight — no sharp bends that add friction
- Mount it securely so it doesn’t vibrate loose during printing
- Leave enough clearance for the filament to feed smoothly from the spool
- Make sure you can still easily access the sensor to thread new filament through it
Wiring to Your Mainboard
Most modern 3D printer mainboards have a dedicated filament runout sensor connector, usually labeled “FIL_RUNOUT” or “E0_STOP.” It’s typically a simple two-pin connector (signal and ground). Check your mainboard’s documentation for the exact pinout.
If your board doesn’t have a dedicated port, you can often repurpose an unused endstop connector. The sensor is essentially a switch, so it connects the same way as an endstop — signal pin and ground.
Route the sensor wire along existing cable paths and secure with zip ties. Keep the sensor cable away from stepper motor cables to avoid electromagnetic interference, which can cause false triggers on some sensor types.
Firmware Configuration
Marlin: In Configuration.h, find and enable these settings:
FILAMENT_RUNOUT_SENSOR— enables the featureFIL_RUNOUT_PIN— set to the pin number your sensor is connected to (check your board’s pins file)FIL_RUNOUT_STATE— set to LOW or HIGH depending on your sensor’s logic (most mechanical switches trigger LOW when filament is absent)FILAMENT_RUNOUT_SCRIPT "M600"— tells the printer to run the M600 filament change command when runout is detected
You’ll also want to enable ADVANCED_PAUSE_FEATURE and PARK_HEAD_ON_PAUSE so the printer parks the nozzle safely during a filament change instead of just stopping in place (which would leave a blob on your print).
Klipper: Add a [filament_switch_sensor] section to your printer.cfg:
switch_pin— the GPIO pin your sensor is connected topause_on_runout: True— automatically pauses the printrunout_gcode— custom G-code to execute on runout (park head, notify user, etc.)
For encoder-based sensors in Klipper, use [filament_motion_sensor] instead, which monitors filament movement rather than just presence.
Testing Your Sensor
Before trusting the sensor with a long print, test it thoroughly:
1. Basic trigger test: With filament loaded, check the sensor status in your printer’s interface or with M119 (Marlin) or QUERY_ENDSTOPS (Klipper). It should show “triggered” or “TRIGGERED.” Pull the filament out — it should change to “open” or “open.” If the logic is inverted, flip the FIL_RUNOUT_STATE or add/remove the ! prefix on the Klipper pin definition.
2. Pause test: Start a test print and pull the filament out of the sensor mid-print. The printer should pause within a few seconds, park the head, and wait for you to load new filament. If it doesn’t pause, double-check your firmware configuration.
3. Resume test: Load filament back through the sensor and resume the print. Verify that the printer purges any ooze before continuing and that the print resumes cleanly without a visible seam (some seam is normal, but it shouldn’t be a blob or gap).
Handling the Filament Change
When the sensor triggers a pause, the printer executes the filament change routine. Here’s what typically happens and how to handle it:
- The printer retracts filament slightly to prevent oozing
- The print head parks at a predefined position (usually front-center of the bed, raised up)
- The printer beeps or displays a message prompting you to change filament
- You remove the old filament (or it’s already gone if it ran out)
- You load the new spool and feed filament into the extruder
- You tell the printer to purge (extrude some filament to clear any gap)
- You confirm the filament change, and the printer resumes
The key to a clean resume is adequate purging. If the nozzle sat idle during the change, there may be a small gap in the melt zone. Purge at least 50-100mm of filament before resuming. Most firmware handles this automatically, but you may need to tune the purge length in your filament change settings.
Advanced: Multi-Sensor Setups
If you have a dual extruder printer, you’ll want a sensor for each filament path. Marlin supports multiple runout sensors — enable NUM_RUNOUT_SENSORS 2 and configure each one’s pin separately. Klipper naturally supports multiple sensors as separate config sections.
Some users also add a second sensor between the extruder gears and the hotend to detect jams or partial clogs. If the first sensor shows filament present but the second shows no movement, you’ve got a jam. This is overkill for most setups but valuable for print farms or machines running unattended for days.
Troubleshooting Common Issues
False Triggers (Pausing When Filament Is Present)
If the printer pauses randomly during normal printing, check: loose wiring causing intermittent contact, electromagnetic interference from nearby stepper cables, or the sensor sensitivity being too high (for encoder types). Try re-routing the cable, adding a ferrite core, or adjusting the detection threshold in firmware.
Sensor Doesn’t Trigger When Filament Runs Out
Check the sensor state with M119 — if it doesn’t change when you remove filament, the sensor may be wired to the wrong pin, the trigger logic may be inverted, or the sensor itself may be faulty. Swap the trigger state setting and test again.
Print Fails After Filament Change Resume
If the printer resumes but the print has a gap, increase the purge length. If the print shifts position after resume, your stepper motors may have lost position during the pause — make sure PARK_HEAD_ON_PAUSE is enabled so the motors stay energized. If the nozzle clogs after resume, the pause time may have been too long with a hot nozzle — consider enabling a temperature drop during pause.
Recommended Sensors by Printer
- Ender 3 / Ender 3 V2: Creality’s own filament sensor kit is designed for these printers and includes the mounting bracket. Alternatively, the generic BIGTREETECH SFS V2.0 works great with the BTT SKR boards popular in upgraded Ender 3s.
- Prusa MK3S+ / MK4: These come with a built-in filament sensor. If yours isn’t working, it’s likely a firmware or cable issue rather than needing a replacement sensor.
- Voron / custom builds: The BTT SFS V2.0 is the community favorite. It’s well-supported in Klipper and catches both runout and jams.
- Any printer with a spare endstop port: A generic mechanical microswitch sensor ($3-5 from Amazon or AliExpress) gets the job done. Just print a mounting bracket for your specific printer — there are dozens on Thingiverse and Printables.
Is a Filament Runout Sensor Worth It?
For the price of a cup of coffee ($3-10 for a basic sensor, $15-20 for an encoder type), you get insurance against one of the most frustrating 3D printing failures. If you’ve ever lost a long print to an empty spool, you already know the answer.
It’s especially valuable if you print unattended, use small spools, or like to start prints before bed. The installation takes 30 minutes, the firmware setup takes another 15, and from then on you never lose a print to runout again. It’s one of those no-brainer upgrades that should come standard on every printer.