3D Printer Endstop Not Triggering? How to Fix Homing Failures on Any Printer
Why Your 3D Printer Endstop Fails — And How to Fix It
You hit “Home” on your 3D printer and instead of gently tapping the endstop and backing off, the axis keeps slamming into the frame with a horrible grinding noise. Or maybe it stops randomly in the middle of the bed, nowhere near where home should be. Either way, your endstop isn’t doing its job and nothing will print correctly until you sort it out.
Endstop failures are one of those problems that seem catastrophic but usually come down to something simple: a loose wire, a misconfigured firmware setting, or a switch that’s physically damaged. In this guide, I’ll walk you through every common cause and the exact steps to fix each one.
What Endstops Actually Do
Before we start troubleshooting, it helps to understand what’s going on under the hood. Endstops (also called limit switches or homing sensors) tell your printer’s control board where the physical limits of each axis are. When you home your printer, each axis moves toward its endstop until it triggers, and that point becomes the zero reference for all coordinates.
There are three main types of endstops used in consumer 3D printers:
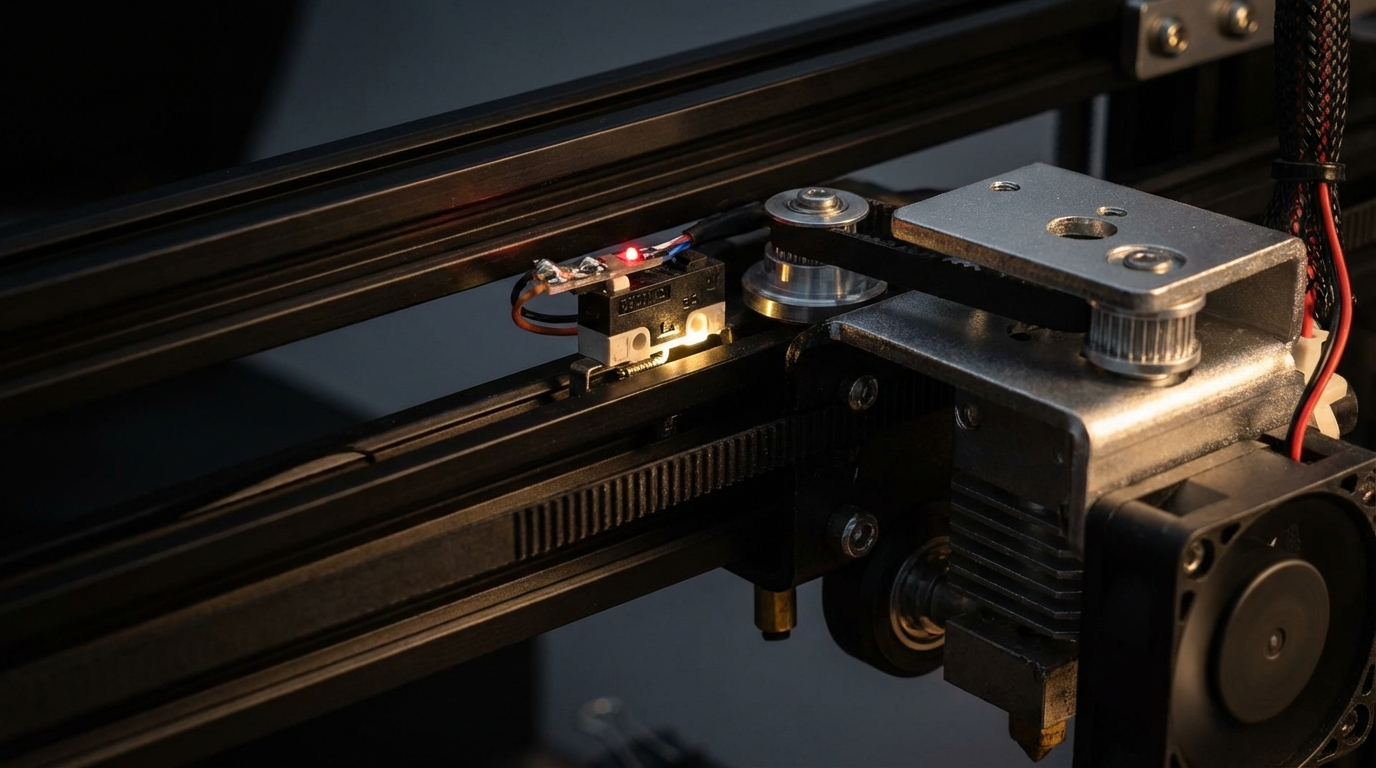
- Mechanical microswitches — the most common type on budget printers. A small lever physically clicks when the carriage pushes against it.
- Optical endstops — use an infrared LED and sensor. A flag on the carriage breaks the beam to trigger.
- Inductive/capacitive probes — mostly used for Z-axis bed leveling. They detect metal or surfaces without physical contact.
Symptom 1: Axis Doesn’t Stop During Homing
This is the scary one. The motor keeps driving the carriage into the frame, making grinding or clicking noises. If you don’t hit the emergency stop quickly, you can bend rods, skip belt teeth, or damage the motor driver.
Check the Wiring First
Nine times out of ten, this is a wiring issue. Here’s what to check:
- Connector seated properly? Pull the endstop connector off the mainboard and plug it back in firmly. Vibration from printing can loosen connections over time.
- Correct port? If you recently did mainboard work, you might have plugged the X endstop into the Y port or vice versa. Check your board’s pinout diagram.
- Wire continuity. Use a multimeter in continuity mode. Touch the probes to both ends of each wire. If you get no beep, the wire is broken internally — common where the cable flexes near the connector.
- Connector pins. Look for bent or pushed-back pins in the JST connector. A magnifying glass helps here.
Test the Switch Manually
Send an M119 command through your terminal (Pronterface, OctoPrint console, or the printer’s built-in terminal). This reports the current state of all endstops. You should see something like:
x_min: open
y_min: open
z_min: open
Now physically press the endstop switch with your finger and send M119 again. The triggered axis should change to “TRIGGERED.” If it doesn’t change, your switch is dead or miswired.
Replace a Dead Microswitch
Mechanical endstops are cheap — a pack of 5 costs about $3 on Amazon. Desolder or unplug the old one and swap it. If you’re using a pre-wired endstop board (common on Creality printers), just swap the whole board. They’re standardized and widely available.
Symptom 2: Axis Homes to Wrong Position
The endstop triggers, but the nozzle ends up offset from where it should be. Maybe it’s 5mm too far left, or the Z-home position leaves a gap between the nozzle and bed.
Endstop Mounting Position
On printers like the Ender 3, the endstop switch is mounted on an adjustable bracket. If this bracket has shifted, the home position shifts with it. Loosen the screws, reposition the bracket so the switch triggers at the correct physical location, and retighten.
Firmware Offset (M206 / Endstop Offset)
If the physical position is correct but prints are still offset, you may need to set a software offset. In Marlin firmware:
M206 X-2.5would shift the X home position 2.5mm in the negative direction- Save with
M500after adjusting - In Klipper, adjust the
position_endstopvalue in your printer.cfg
Symptom 3: Endstop Triggers Randomly or Too Early
The axis starts moving toward home, then immediately stops as if the endstop was already triggered — even though the carriage is nowhere near it. This is usually electrical noise or a stuck switch.
Electrical Noise (EMI)
Stepper motors generate electromagnetic interference that can cause false triggers on endstop wires, especially if those wires run parallel to motor cables. Solutions:
- Separate the cables. Route endstop wires away from stepper motor cables. Even a few centimeters of separation helps.
- Add a capacitor. A 100nF ceramic capacitor across the switch terminals filters out high-frequency noise. Many aftermarket endstop boards already include one.
- Use shielded cable. If noise is persistent, replace the endstop wire with shielded cable. Ground the shield at the mainboard end only.
- Enable software filtering. In Marlin, enable
ENDSTOP_NOISE_THRESHOLDin Configuration.h. This requires multiple consecutive reads before accepting a trigger.
Stuck or Damaged Switch
Mechanical switches wear out. If the lever doesn’t spring back fully, the switch stays partially triggered. Press and release it a few times — it should click crisply. If it feels mushy or doesn’t click, replace it.
Symptom 4: Z-Endstop / Probe Issues
Z-axis endstop problems are the most common because they directly affect first layer quality. If your Z endstop isn’t working right, you’ll get either a nozzle crash into the bed or a first layer that’s way too high.
Mechanical Z-Endstop
On printers with a mechanical Z-endstop (like stock Ender 3), the switch height determines your Z-home position. If your first layer is too high even after bed leveling:
- Loosen the endstop bracket
- Lower it by about 1mm
- Re-home and test with a piece of paper
- Repeat until you get the right nozzle gap
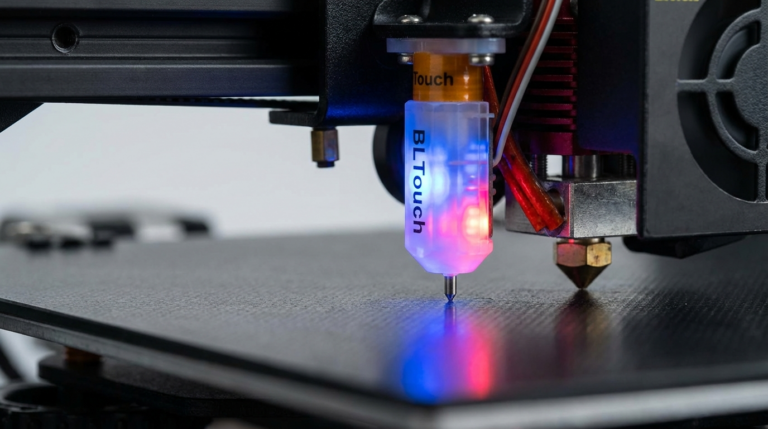
BLTouch / CR Touch Issues
Auto bed leveling probes have their own set of problems:
- Probe doesn’t deploy: Check the servo wire connection. On BLTouch, the signal wire (orange/yellow) carries the deploy/retract command. A bad connection here means no deployment.
- Probe deploys but doesn’t retract: The magnet inside may be weak or the pin is bent. Push the pin up with tweezers — it should snap back magnetically. If it doesn’t, the unit needs replacement.
- Inconsistent readings: Ensure the probe mount is rigid. Any wobble in the mount translates to inconsistent Z measurements. Tighten all mounting screws and check for cracked printed mounts.
- Red LED flashing: On BLTouch, a flashing red LED indicates an error state. Send
M280 P0 S160to reset it. If it keeps flashing, there’s a hardware fault.
Symptom 5: Homing Works Sometimes But Not Always
Intermittent endstop failures are the hardest to diagnose because the problem isn’t consistent. The most common causes are:
- Loose wire: A wire that’s barely hanging on will work when the carriage isn’t moving (no vibration) but lose contact during homing moves. Wiggle each wire while watching M119 output — if the state flickers, you found it.
- Cracked solder joint: Especially common on budget printers where the endstop board solder quality is marginal. Reflow the solder joints with a soldering iron.
- Marginal switch: A switch at end of life might trigger at slightly different pressures each time. Replace it.
Optical Endstop Troubleshooting
Optical endstops are less common but found on some printers (notably Prusa i3 MK2 and some Delta designs). They’re more reliable than mechanical switches since there are no moving parts to wear out, but they have their own failure modes:
- Dirty sensor: Dust or filament debris between the LED and sensor blocks the beam. Clean with compressed air.
- Ambient light interference: Strong sunlight or LED panels can trigger optical endstops. Shield the sensor or move the printer away from direct light.
- Flag position: The trigger flag on the carriage needs to fully break the beam. If it’s too short or misaligned, the trigger is unreliable.
- LED burnout: The infrared LED can fail. You can verify with a phone camera — most phone cameras can see IR light as a purple glow. If there’s no glow, the LED is dead.
Preventing Future Endstop Problems
Once you’ve fixed the immediate issue, take these steps to prevent it from happening again:
- Cable management: Use zip ties or cable chains to prevent endstop wires from snagging or flexing excessively. Leave enough slack for full axis travel without tension.
- Periodic checks: Add M119 to your pre-print routine. Run it once a month to verify all endstops are responding correctly.
- Keep spares: Microswitches are dirt cheap. Keep 2-3 spares in your toolkit so a dead switch doesn’t stop your printing for days while you wait for a delivery.
- Strain relief: Add strain relief to endstop wire connections, especially near the connector. A small zip tie or drop of hot glue on the wire near the connector prevents flexing at the solder joint.
Quick Diagnostic Cheat Sheet
Here’s a fast reference for the most common endstop symptoms and their likely causes:
- Axis slams into frame → Dead switch, disconnected wire, wrong port
- Homes to wrong position → Bracket shifted, firmware offset needed
- Triggers immediately → EMI noise, stuck switch, inverse logic wrong
- Works sometimes → Loose wire, cracked solder, dying switch
- Z too high/low → Endstop bracket position, probe offset, Z offset calibration
Final Thoughts
Endstop problems feel intimidating because the printer behaves erratically — axes slamming, homing to wrong positions, or refusing to home at all. But the root causes are almost always straightforward: a loose connector, a dead microswitch, or a firmware setting that needs adjusting. Work through the diagnostics systematically, starting with M119 and physical inspection, and you’ll have it sorted in under an hour. Keep a few spare switches on hand, manage your cables properly, and endstop issues will be a rare occurrence rather than a recurring headache.