Wet Filament Mid-Print Rescue — How to Pause, Dry, and Resume Without Losing the Part
Why a Wet Filament Mid Print Rescue Is Worth Attempting at All
Most filament moisture content guides discuss prevention or pre-print drying, leaving the wet filament mid print rescue dry oven resume saved tip space almost entirely unaddressed. That is unfortunate, because a long print already eight or ten hours in is exactly when you discover the spool was wetter than you thought. Throwing the print away and restarting after a twelve-hour dry cycle costs you a full day. Pausing intelligently, drying the spool in place, and resuming can preserve most of that work — if you understand what is recoverable and what is not.
The decision branches at one question: has the wet filament damaged the part below it? If layer adhesion has failed in the bottom half, the rescue is theatrical at best — the part will fail under any meaningful load. If the issues are limited to surface artifacts (popping noise, fuzzy strings, mild stringing) that started in the last hour, you are inside the rescue window. This guide walks through the diagnostic, the pause technique, two viable drying methods that work without removing the spool, and the resume settings that give you the best chance of a usable part.
Diagnosis — Catching Wet Filament Mid-Print Before It Compounds
The earliest warnings of wet filament are auditory. A dry spool of PLA or PETG produces a steady soft hiss from the hotend. A wet spool starts producing intermittent pops — the sound of microscopic steam pockets bursting through the molten filament as it exits the nozzle. The pops are usually faint at first, often masked by the printer fans. Pause your printer for fifteen seconds and stand within an arm’s length of the hotend; if you hear popping at the nozzle during the brief moment the extruder is still pushing material, you have moisture.
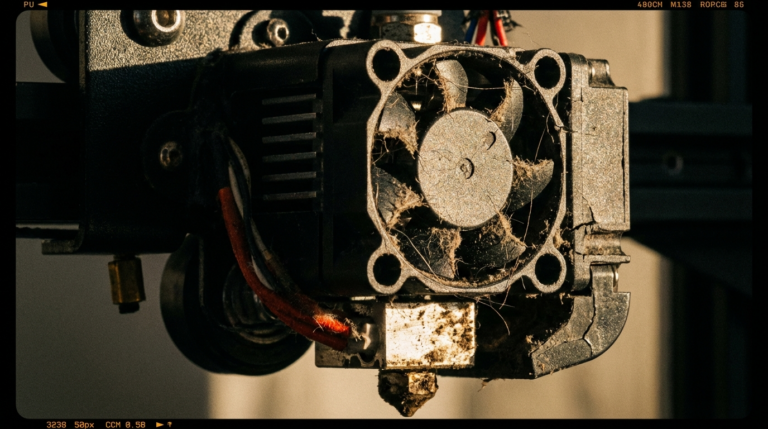
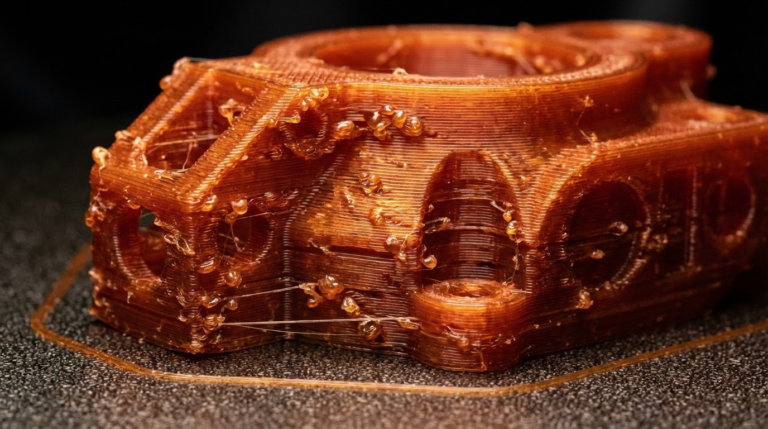
Visual signs follow the auditory ones by an hour or two. Look for fuzzy single-strand stringing across travel moves, a frosted or matte appearance on what should be a glossy top layer, and tiny surface bubbles on smooth flat surfaces. PETG specifically will go from clear-ish to milky-white opacity when wet — this is the most reliable visual diagnostic for any transparent material. Nylon and PVA produce the most violent visible signs, often visible bubbling at the extrusion point, because they absorb moisture orders of magnitude faster than PLA or PETG.
Once symptoms are confirmed, decide quickly. Every additional layer printed wet bonds poorly to the layer below it. Mid-print rescue is only worth attempting if you act within the first hour of confirmed symptoms.
The Pause — How to Stop the Print Without Losing Your Spot
The wet filament mid print rescue dry oven resume saved tip workflow lives or dies on whether the pause leaves you with a printer that can resume cleanly. A naive pause-and-walk-away is the worst possible move — the nozzle parks over your part, oozes a blob, and creates a defect that propagates through every layer above it on resume.
Use Klipper’s PAUSE macro, OctoPrint’s pause-with-park plugin, or Marlin’s M600-with-park behavior to move the toolhead away from the part on pause. The toolhead should move to a parked position — typically the front-left corner — and lift the Z by at least two millimeters. If your firmware does not park automatically, abort the print and restart from the saved layer using your slicer’s “print from layer N” feature after drying.
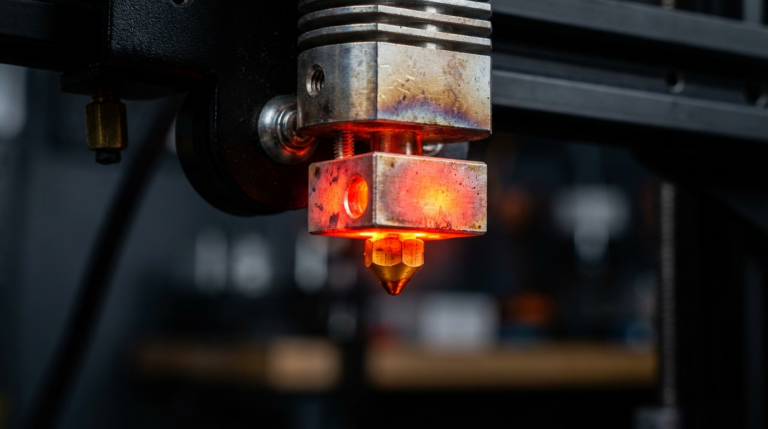
Once paused, immediately heat the nozzle to 230 °C and extrude fifty millimeters of filament manually to clear the wet material currently in the hotend. The first thirty centimeters of filament after a wet exposure remain wet themselves; purging that material from the hot zone before the dry cycle prevents you from re-introducing moisture as soon as you resume.

Drying Method 1 — In-Enclosure Heated Bed Drying
If your printer is enclosed (Bambu X1, Voron, Prusa XL with optional enclosure, any DIY enclosure), you have an in-place dryer already. Set the bed to 60 °C for PLA, 70 °C for PETG, 80 °C for ABS or ASA. Close the enclosure. Place the spool either on the existing spool holder if it sits inside the enclosure or transfer to an internal spool peg. Run a chamber thermometer to verify the chamber climbs to at least 45 °C — this is the threshold above which moisture will reliably migrate out of PLA over a four-hour window.
This method requires four to six hours for PLA, six to eight for PETG, and ten or more for nylon. It is slow but it works without removing the spool from the printer. Set a timer and check chamber temperature every hour to ensure it does not climb above 50 °C, which can soften PLA enough to deform spool windings under their own tension.
Drying Method 2 — External Filament Dryer With In-Place Loading
The faster path is a dedicated filament dryer (Sunlu S2 / S4, Polymaker PolyDryer, eSun eBox) with a pass-through PTFE port. Pause the print, manually retract about five centimeters of filament so the tip exits the extruder, then route the filament through the dryer’s pass-through and load the spool inside the dryer. Set 50 °C for PLA, 65 °C for PETG, 80 °C for ABS / ASA / nylon, and run for four to six hours.
This method has two crucial advantages over enclosure drying: the dryer maintains a consistent low humidity (typically below 15 percent inside the chamber), and the filament is dried while in transit to the printer rather than only on the spool. Set the dryer somewhere stable above the printer or beside it so the filament path stays gentle. Tape the pass-through port closed around the filament with painter’s tape to prevent ambient moisture from sneaking in during the dry cycle.
The Resume — Settings That Make Wet Filament Mid Print Rescue Viable
Resuming naively will reproduce all the original problems. The wet filament mid print rescue dry oven resume saved tip workflow has specific resume parameters that compensate for the fact that the layer below the resume point was printed wet and is therefore weaker than it should be.
Drop print speed by thirty percent for the first ten resumed layers. Slower extrusion gives the polymer time to flow into the slightly degraded layer below and make the best possible bond. Bump the nozzle temperature five degrees above your normal setting for PLA and PETG, ten degrees for ABS / ASA. The extra heat helps remelt the surface of the layer beneath the resume point and improves adhesion across the boundary.
Increase retraction by 0.5 mm for the rest of the print to compensate for the residual oozing tendency of any wet filament still in the early hot zone. Disable any “first layer” speed compensation in your slicer for resume — that compensation was already applied at the real first layer and will misbehave when triggered again at a non-zero Z height. Most slicers handle this automatically when you use “resume from layer,” but it is worth verifying.
Watch the first thirty minutes of the resumed print attentively. If popping persists, the dry cycle was insufficient and you should pause again and extend it. If the first resumed layer shows visible delamination at the boundary, the part below was too damaged and the rescue has failed — abort and restart fresh once the spool is fully dry.
What Cannot Be Rescued — Knowing When to Cut Losses
Some wet-filament situations are unrecoverable mid-print. If the bottom layers of a structural part show clear popping artifacts, layer adhesion in those layers has been compromised and no amount of upper-layer rescue will produce a part that meets its original mechanical specification. Functional parts — drone frames, RC chassis, hinges, prints intended to bear load — should be discarded and reprinted.
Decorative parts have more flexibility. A vase, a planter, a display piece, or a costume prop can survive a noticeable wet-band scar mid-height; the lower section will not be load-bearing. The rescue makes sense for these items because the alternative is throwing away ten hours of material and time.
For prevention rather than rescue, a properly stored spool inventory eliminates ninety percent of these incidents. See our deep-dive on PETG outdoor moisture and UV behavior for the long-term humidity story, and our post on diagnosing wet filament before a print starts for the upstream version of this same workflow that prevents needing the rescue at all.
Material-Specific Notes for the Wet Filament Mid Print Rescue
The general rescue framework adapts to each common filament with small but important modifications. PLA is the most forgiving — its low extrusion temperature means hotend dwell time during the pause does the least damage to the material in the melt zone. PLA tolerates a single rescue cycle without measurable mechanical impact on the resumed print. Multiple rescues on the same spool are not recommended; thermal cycling slowly degrades the polymer’s molecular weight and accumulating that damage across several pauses produces measurably weaker parts.
PETG is the second-most rescue-friendly material. Its higher extrusion temperature (240 °C) means more thermal load on filament sitting in the hot zone during the pause, and that translates to a longer purge requirement on resume. Extrude eighty millimeters rather than fifty before resuming. PETG also benefits from a one-time bed temperature spike — raise the bed five degrees above your normal print setting for the first ten resumed layers to encourage interlayer adhesion at the rescue boundary.
ABS and ASA require the most aggressive rescue protocol because their wet behavior is the most violent and their interlayer chemistry is the most sensitive to thermal differentials. The chamber must remain hot during the entire pause and dry cycle — letting the chamber drop to ambient guarantees the part below the resume point will detach from the bed or split along an existing layer. If your chamber cannot hold heat during a six-hour drying cycle, ABS and ASA prints generally cannot be rescued and must be restarted.
Nylon, PVA, and TPU are functionally unrescuable mid-print. Nylon absorbs moisture so quickly that a thirty-minute pause exposes the spool to enough humidity to undo most of the dry cycle’s progress. PVA dissolves in itself when wet enough — it is generally a one-and-done print attempt regardless. TPU’s flexibility means thermal contraction differentials at a rescue boundary almost always produce visible delamination. For these materials the only rescue is to restart with a freshly dried spool from a well-controlled dry box.