Blobs and Zits on 3D Prints: Complete Fix Guide
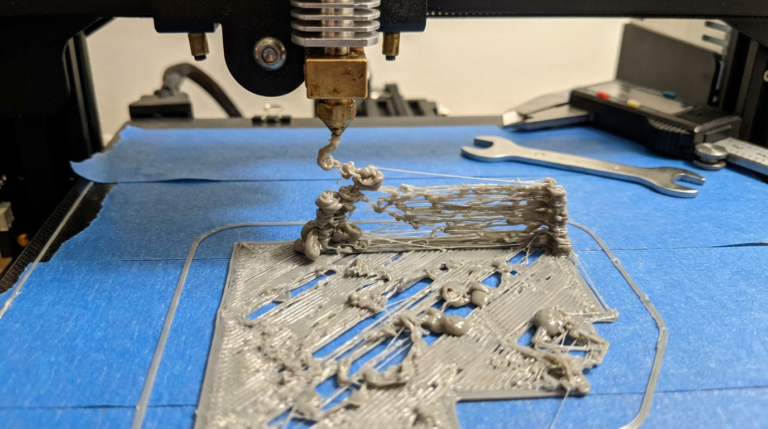
You’ve just pulled a print off the bed, and the overall shape looks great — but the surface is covered in tiny bumps, zits, and blobs that make it look rough and unprofessional. This is one of the most common and most annoying 3D printing problems, and it affects everyone from beginners to experienced makers. The good news? It’s almost always fixable with the right slicer settings.
In this guide, I’ll explain what causes blobs and zits, how to identify the specific type you’re dealing with, and the exact settings changes that will clean up your prints.
What Are Blobs and Zits?
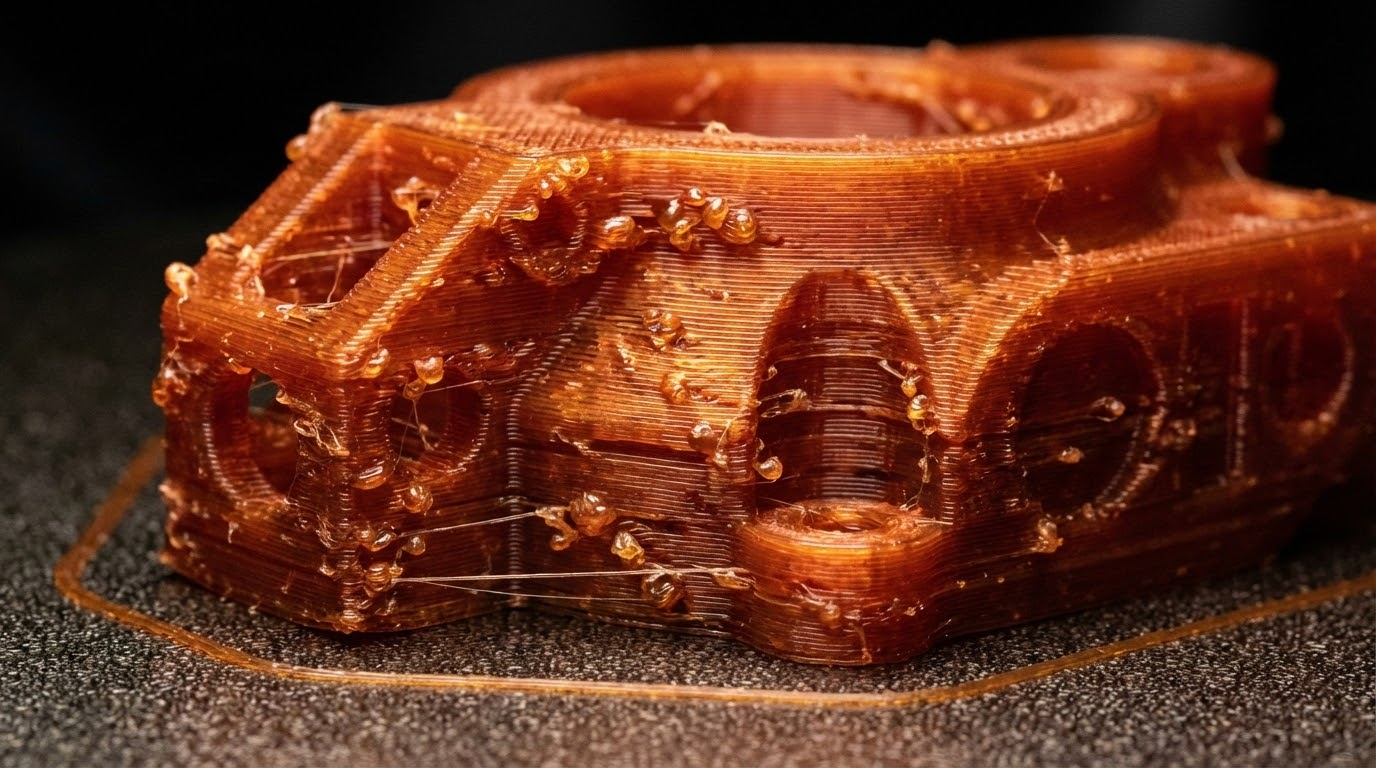
Blobs and zits are small raised bumps on the surface of your 3D print. They happen when excess plastic accumulates at certain points during printing. While the terms are sometimes used interchangeably, there are actually several distinct types:
- Z-seam zits — small bumps that appear in a vertical line or pattern where each layer starts and stops
- Random blobs — scattered bumps across the surface with no obvious pattern
- Travel blobs — bumps that appear where the nozzle moves from one section to another
- Pressure blobs — larger bumps caused by pressure buildup in the hotend
Identifying which type you have is the first step to fixing the problem, because each has different root causes and solutions.
Z-Seam: The Vertical Line of Bumps
The most common type of zit is the Z-seam. Every layer of your print has a start point and an end point. Where these meet, there’s a tiny overlap of filament that creates a visible bump. Multiply that by hundreds of layers, and you get a visible line running up your print.
How to Fix Z-Seam Artifacts
Seam position: In your slicer, you can control where the seam is placed. The options are typically “nearest” (puts it at the point closest to where the nozzle already is), “random” (scatters it), “sharpest corner” (hides it in corners), or “aligned” (puts all seams in a vertical line). For most prints, “sharpest corner” gives the best visual result because the bump is hidden where it’s least noticeable. If your model doesn’t have sharp corners, “random” distributes the bumps so no single line stands out.
Coasting: This setting tells the printer to stop extruding slightly before the end of each perimeter, relying on residual pressure in the nozzle to lay down the last bit of filament. In Cura, enable “Coasting” and set the volume to 0.04-0.08mm³. Start low and increase if you still see seam bumps. In PrusaSlicer, this is handled through the “Seam gap” setting under Print Settings → Perimeters.
Wipe: After finishing a perimeter, the wipe setting moves the nozzle back along the already-printed path for a short distance. This cleans off any oozing filament onto existing material rather than leaving it as a blob at the seam point. Set wipe distance to 2-5mm. Combined with coasting, this can nearly eliminate visible seams.
Linear Advance / Pressure Advance: If your printer’s firmware supports it, this is the most effective solution for Z-seam artifacts. Linear Advance (Marlin firmware) or Pressure Advance (Klipper) adjusts extrusion in real-time to account for the pressure dynamics in your hotend. It anticipates speed changes and adjusts the filament feed accordingly. A properly calibrated K-factor can make Z-seams virtually invisible.
Random Blobs and Zits
If your bumps don’t follow a pattern and appear scattered across the print surface, you’re dealing with a different set of issues.
Retraction Settings
The most common cause of random blobs is poor retraction. When the nozzle travels between two points, it retracts (pulls back) the filament to prevent oozing. If retraction is too slow, too short, or not happening at all, filament drips out during travel moves and deposits blobs when the nozzle arrives at its next position.
Retraction distance: For Bowden setups, 4-7mm is typical. For direct drive, 0.5-2mm. If you’re getting blobs, try increasing retraction distance by 0.5mm increments until they improve.
Retraction speed: 25-45mm/s is the sweet spot for most printers. Too slow and the filament doesn’t pull back fast enough; too fast and you can grind the filament or cause jams.
Retraction prime speed: This is how fast the filament pushes back after a retraction. Setting this slightly slower than retraction speed (e.g., retraction at 40mm/s, prime at 35mm/s) can reduce the pressure spike that causes blobs at the start of a new extrusion.
Over-Extrusion
If your printer is pushing out more filament than it should, excess plastic has to go somewhere — and it often shows up as bumps on the surface. Check your extrusion multiplier (flow rate). The default is 1.0 (100%), and many people crank it up to fix gaps without realizing it’s causing blobs elsewhere.
To calibrate properly: print a single-wall cube and measure the wall thickness with calipers. If your line width is set to 0.4mm but the wall measures 0.44mm, your flow is about 10% too high. Reduce accordingly. A properly calibrated flow rate should give you walls within 0.02mm of your target width.
Moisture in Filament
Wet filament can cause random popping and blobbing as moisture turns to steam inside the hotend. If you hear crackling or popping sounds during printing, moisture is likely the culprit. Dry your filament — 4-6 hours at 50°C for PLA, 65°C for PETG, 80°C for ABS. A food dehydrator or dedicated filament dryer works best, though an oven on its lowest setting can work in a pinch (just make sure it doesn’t overshoot temperature).
Travel Blobs
These appear specifically at points where the nozzle transitions from traveling (not extruding) to printing. They look like small dots or bumps at the start of wall segments or infill sections.
Fixes for Travel Blobs
Extra restart distance: In Cura, the “Retraction Extra Prime Amount” setting controls how much extra filament is pushed after a retraction. If it’s set to any positive value, you’re over-priming. Set it to 0 or even slightly negative (-0.02 to -0.05mm³) to reduce the blob at the restart point.
Travel speed: Faster travel moves mean less time for filament to ooze. Increase your travel speed to 150-200mm/s if your printer can handle it. Most modern printers have no problem with these speeds for non-print moves.
Combing/Avoid Crossing Perimeters: These slicer settings keep the nozzle traveling over already-printed areas rather than crossing open spaces. In Cura, set Combing Mode to “Within Infill” or “Not in Skin.” In PrusaSlicer, enable “Avoid crossing perimeters.” This doesn’t prevent blobs entirely, but it hides them where they won’t be visible on the outer surface.
Z-hop: Z-hop lifts the nozzle slightly during travel moves, which can prevent it from dragging across the print surface. However, Z-hop can actually make blobbing worse because the retract-lift-travel-lower-prime sequence gives more time for pressure changes. Try both with and without Z-hop to see which works better for your specific setup.
Pressure Blobs
These are larger, more noticeable bumps that usually appear at specific points in the print — often at the start of perimeters or where the print speed changes abruptly. They’re caused by pressure buildup in the hotend.
Understanding Pressure Dynamics
Your hotend is essentially a tube filled with melted plastic under pressure. When the extruder pushes filament in, it takes time for the pressure to equalize and filament to flow out the nozzle at the right rate. When the printer slows down or stops (like at a corner or the start of a new perimeter), the built-up pressure keeps pushing filament out, creating a blob.
Solutions
Linear Advance / Pressure Advance: I mentioned this for Z-seams, but it’s even more important for pressure blobs. This firmware feature is specifically designed to solve pressure-related extrusion issues. If you haven’t calibrated it yet, do it — it’s a game-changer. For Klipper, run the Pressure Advance tuning tower. For Marlin, print a K-factor calibration pattern.
Print speed consistency: Large speed differences between walls, infill, and travel cause pressure spikes. Try reducing the gap between your fastest and slowest speeds. If your infill prints at 80mm/s but walls print at 30mm/s, the transition creates pressure surges. Narrowing that to 60mm/s infill and 40mm/s walls can help.
Acceleration and jerk settings: Lower acceleration values mean smoother speed transitions, which means fewer pressure spikes. Try reducing acceleration from the typical 500-1000mm/s² to 300-500mm/s². The trade-off is slightly longer print times, but surface quality improves noticeably.

Temperature and Material Considerations
Temperature plays a significant role in blob formation. Higher temperatures make filament more liquid and more prone to oozing and blobbing. Here are material-specific recommendations:
PLA (190-215°C typical)
For blob-free prints, try printing at the lower end of your PLA’s recommended range. Many PLAs print beautifully at 195°C with far fewer blobs than at 210°C. Print a temperature tower to find the lowest temperature that still gives good layer adhesion.
PETG (220-250°C typical)
PETG is inherently stringy and blob-prone. Lower temperatures help, but you can’t go too low or layer adhesion suffers. 225-230°C is often the sweet spot. PETG also benefits significantly from slower retraction speeds — try 20-25mm/s instead of the 40+mm/s you’d use for PLA.
ABS/ASA (230-250°C typical)
ABS blobs are often temperature-related. Print at the lowest viable temperature and use coasting aggressively (0.08-0.12mm³). ABS also benefits from consistent chamber temperatures to avoid pressure fluctuations from thermal changes.
Mechanical Causes
Not all blobs are slicer-related. Check these hardware issues too:
- Loose nozzle: A nozzle that isn’t properly tightened can allow filament to leak at the heatbreak junction, causing inconsistent pressure and random blobs. Always tighten your nozzle while hot (to printing temperature).
- Worn nozzle: A nozzle worn larger than spec will over-extrude relative to your slicer’s expectations. Replace nozzles every 500-1000 print hours, or sooner if you print abrasive filaments.
- PTFE tube gap: On Bowden printers, a gap between the PTFE tube and the nozzle creates a chamber where filament accumulates, leading to inconsistent pressure. Make sure your PTFE tube is cut square and pushed fully against the nozzle.
- Extruder tension: Too much tension can deform the filament, causing irregular feeding. Too little causes slipping. Both lead to uneven extrusion and surface defects.
Step-by-Step Troubleshooting Checklist
When you’re seeing blobs on your prints, work through this list in order:
- Identify the pattern — are they in a line (Z-seam), random, at travel points, or at speed changes?
- Check filament moisture — dry your filament if there’s any doubt
- Calibrate extrusion multiplier — print a single-wall cube and measure
- Tune retraction — distance, speed, and prime amount
- Enable coasting and wipe in your slicer
- Lower print temperature by 5°C
- Reduce speed differences between print moves
- Calibrate Linear Advance / Pressure Advance if available
- Check hardware — nozzle tightness, PTFE tube, extruder tension
Wrapping Up
Blobs and zits are one of those problems that seem minor but can really drag down the quality of your prints. The fix usually isn’t a single magic setting — it’s a combination of properly tuned retraction, good temperature control, and ideally firmware-level pressure compensation. Work through the causes systematically, and you’ll get surfaces smooth enough that you barely need post-processing. Your prints (and your sanity) will thank you.