3D Printer Maintenance Schedule: Complete Checklist Guide
Your 3D printer is a machine with moving parts, heated components, and tight tolerances. Like any machine, it needs regular maintenance to perform at its best. Skip it, and you’ll spend more time troubleshooting failed prints than actually printing — trust me, I’ve learned this the hard way.
This guide lays out a complete maintenance schedule you can follow, from quick post-print checks to deep quarterly overhauls. Print it out, stick it next to your printer, and actually follow it. Your future self will thank you.
After Every Print (2 Minutes)
These are the bare minimum tasks you should do after every single print. They take almost no time and prevent the majority of common problems.
Clean the Build Plate
Wipe your build plate with isopropyl alcohol (IPA) after removing your print. Fingerprints, residual adhesive, and tiny filament fragments all reduce bed adhesion on the next print. Keep a spray bottle of 90%+ IPA and a microfiber cloth next to your printer.
Inspect the Nozzle
Glance at the nozzle. Is there filament buildup on the outside? A quick wipe with a brass brush while the nozzle is warm (150°C) prevents blob accumulation that can knock into your print later.
Remove Loose Debris
Pick off any stray filament strings, support remnants, or loose pieces from the bed and surrounding area. Small debris can get under your next print and cause adhesion failures.

Weekly Maintenance (15-20 Minutes)
Set aside time once a week for a slightly deeper check. If you print daily, this is essential. If you print a few times a week, bi-weekly is fine.
Check Belt Tension
Both the X and Y axis belts should be taut but not guitar-string tight. Press the belt with your finger — it should deflect slightly (about 2-3mm) with moderate pressure. A loose belt causes layer shifting and dimensional inaccuracy. An overtightened belt strains the stepper motors and bearings.
On most printers (Ender 3, Prusa, etc.), belt tension is adjusted via a screw at the end of the axis. Turn it a quarter turn at a time and check the tension after each adjustment.
Lubricate Linear Rails or Rods
Your printer’s motion system — whether it uses linear rails, smooth rods, or V-slot wheels — needs periodic lubrication:
- Linear rails: Apply a drop of machine oil or white lithium grease to each rail. Move the carriage back and forth to distribute it.
- Smooth rods (Prusa-style): Wipe with a thin layer of sewing machine oil. Don’t use WD-40 — it’s a solvent, not a lubricant.
- V-slot wheels: No lubrication needed, but check that wheels aren’t cracked, flat-spotted, or excessively worn.
Inspect PTFE Tube (Bowden Printers)
If you have a Bowden-style printer, check the PTFE tube for:
- Discoloration at the hotend connection (indicates heat damage)
- Kinks or tight bends in the tube path
- Secure seating in the pneumatic fittings — push it in and make sure it doesn’t slide out
A degraded PTFE tube is one of the most common causes of clogging and under-extrusion, especially on printers that run above 230°C regularly.
Level the Bed (or Verify Auto-Level)
Even printers with auto bed leveling should have their mechanical leveling checked periodically. Springs settle, knobs vibrate loose, and the bed can shift slightly over time. Run a first-layer test print and verify even squish across the entire bed surface.
Monthly Maintenance (30-45 Minutes)
Once a month, go deeper. This is where you catch developing problems before they become print-ruining failures.
Cold Pull (Nozzle Cleaning)
Even if your nozzle isn’t clogged, a monthly cold pull removes accumulated residue that gradually restricts flow. Here’s the quick version:
- Heat the nozzle to your normal print temperature.
- Push filament through until it extrudes cleanly.
- Cool the nozzle to 90°C (for PLA) or 160°C (for PETG/ABS).
- Firmly pull the filament out. The tip should come out shaped like the nozzle interior, pulling debris with it.
- Repeat 2-3 times until the filament tip comes out clean.
Tighten Frame Bolts
Vibration from printing gradually loosens bolts. Go through every bolt on your printer frame with the appropriate Allen key or wrench. Pay special attention to:
- Gantry mounting bolts
- Z-axis lead screw brackets
- Stepper motor mount screws
- Bed mounting hardware
Check Electrical Connections
With the printer powered off, visually inspect all visible wiring connections. Look for:
- Loose connectors (especially the heated bed connector, which carries high current)
- Frayed or damaged wires, particularly where they flex during movement
- Signs of melting or discoloration around connectors
The heated bed connector on some Ender 3 models is notorious for overheating. If you notice any discoloration, replace the connector immediately — this is a fire safety issue.
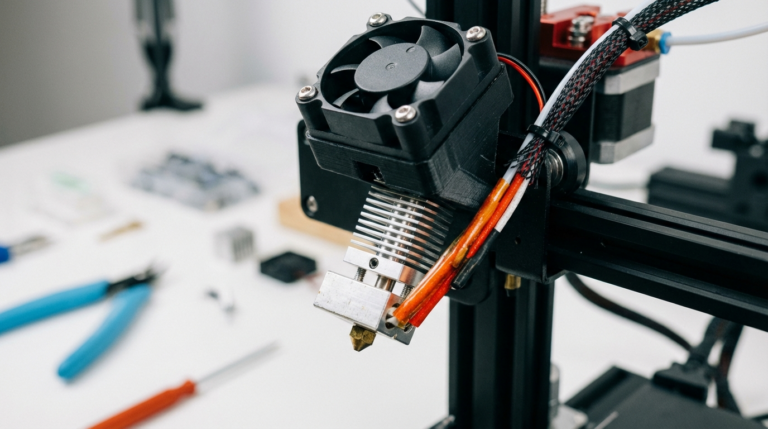
Clean and Inspect Fans
Dust accumulates in fans quickly. Use compressed air to blow out the part cooling fan and the hotend cooling fan. If a fan makes grinding noises or doesn’t spin freely, replace it. A failing hotend fan causes heat creep and clogs; a failing part cooling fan causes poor overhangs and bridging.
Calibrate Extruder E-Steps
E-steps can drift slightly over time, especially if you’ve changed nozzles or filaments. Mark 120mm of filament from the extruder entrance, command a 100mm extrusion, and measure what’s left. If it’s not exactly 20mm, recalibrate your e-steps. This takes 5 minutes and ensures consistent extrusion.
Quarterly Deep Maintenance (1-2 Hours)
Four times a year, do a thorough overhaul. This is preventive maintenance that catches wear before it causes problems.
Replace the Nozzle
Brass nozzles wear out. If you print with PLA exclusively, a nozzle might last 3-6 months. If you use abrasive filaments (carbon fiber, glow-in-the-dark, wood-fill), replace the nozzle every month or upgrade to a hardened steel nozzle.
Signs your nozzle needs replacement: inconsistent extrusion width, poor first-layer quality despite correct leveling, and stringing that wasn’t there before.
Replace PTFE Tube (Bowden Printers)
PTFE tubing degrades with heat over time. Even Capricorn premium tubing should be replaced every 3-6 months if you regularly print above 230°C. Cheap white PTFE tubes that came with your printer should be replaced sooner.
Deep Clean the Hotend
Disassemble the hotend, remove the nozzle and heat break, and clean everything thoroughly. Use a heat gun to soften any stuck filament, then wipe clean. Check the heat break for scoring or damage. Reassemble with fresh thermal compound on the heat break threads.
Inspect V-Slot Wheels or Linear Bearings
V-slot wheels develop flat spots over time. Spin each wheel by hand — it should rotate smoothly without wobble. Replace any wheels that are cracked, flat-spotted, or excessively worn. Linear bearings should move smoothly without play; if they feel crunchy, clean and re-lubricate them.
Update Firmware
Check for firmware updates from your printer manufacturer. Updates often include improved motion planning, thermal management, and bug fixes that genuinely improve print quality.
Check Z-Axis Lead Screw
The Z-axis lead screw should be straight, clean, and lightly lubricated. Wipe off old grease, apply fresh white lithium grease, and run the Z axis up and down to distribute it. Check that the anti-backlash nut (if equipped) isn’t excessively worn.
The Printable Checklist
Here’s a condensed version you can reference quickly:
Every Print: Clean bed (IPA), wipe nozzle, remove debris.
Weekly: Belt tension, lubricate rails/rods, check PTFE tube, verify bed level.
Monthly: Cold pull, tighten frame bolts, check wiring, clean fans, verify e-steps.
Quarterly: Replace nozzle, replace PTFE, deep clean hotend, inspect wheels/bearings, update firmware, lubricate lead screw.
Signs You’ve Been Skipping Maintenance
If any of these sound familiar, it’s time for a maintenance session:
- First layers that used to work perfectly now fail intermittently
- Clicking sounds from the extruder during printing
- Layer shifts that seem random
- Gradually worsening surface quality over weeks
- Increasing frequency of clogged nozzles
- Wobbly or inconsistent layer lines (Z-wobble)
- Strange grinding or squeaking noises during movement
Maintenance Kit Essentials
Keep these tools together in a small box next to your printer:
- Allen key set (metric, usually 1.5-4mm)
- Brass brush for nozzle cleaning
- Acupuncture needles (0.3-0.5mm) for nozzle clearing
- Isopropyl alcohol (90%+) and microfiber cloths
- Spare nozzles (keep 2-3 on hand)
- White lithium grease or PTFE-based lubricant
- Digital calipers for measuring filament and print dimensions
- Compressed air can for fan cleaning
- Small flashlight for inspecting tight spaces
Final Thoughts
Maintenance isn’t glamorous. Nobody posts their lubricated linear rails on Instagram. But the difference between a well-maintained printer and a neglected one is the difference between reliable prints and constant frustration.
Build the habit of post-print cleaning from day one, set a weekly reminder for basic checks, and commit to monthly and quarterly deep maintenance. Your printer will reward you with consistent, high-quality prints — and you’ll spend your time designing and creating instead of troubleshooting.