How to Print With Wood Filament: Complete Settings Guide
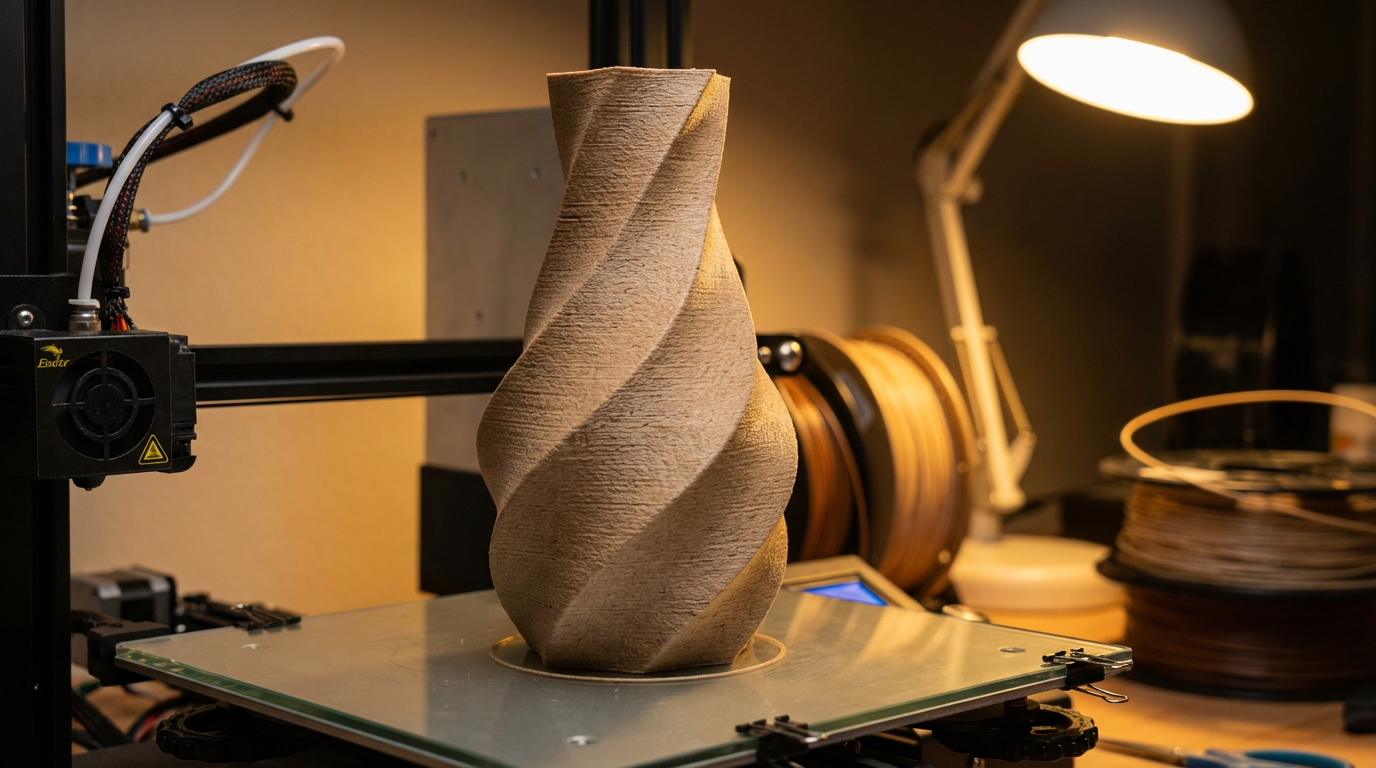
Wood filament is one of the coolest specialty materials in 3D printing. Made from a blend of PLA and fine wood particles (usually around 30-40% wood fiber), it produces prints that genuinely look and feel like real wood. You can sand it, stain it, and even smell the woody aroma while printing. But it’s also one of the trickiest filaments to work with if you don’t know the right settings.
I’ve printed hundreds of wood filament projects over the years — from decorative vases to cosplay props to custom chess sets — and in this guide I’ll share everything I’ve learned about getting consistently great results.
What Makes Wood Filament Different
Wood filament isn’t just PLA with a marketing gimmick. The wood particles fundamentally change how the material behaves:
- Higher friction: Wood fibers create more drag through the hotend and nozzle
- Prone to clogging: Wood particles can accumulate and block narrow nozzles
- Temperature-sensitive appearance: Higher temps darken the wood fibers, lower temps keep them lighter
- More brittle than standard PLA: The wood content reduces flexibility
- Matte, natural finish: Prints have a texture that hides layer lines remarkably well
Recommended Print Settings for Wood Filament
Temperature
This is where wood filament gets interesting. Unlike regular PLA where you’re just looking for good flow, with wood filament your temperature literally controls the color of your print:
- Light wood tone: 180–195°C
- Medium wood tone: 195–210°C
- Dark wood tone: 210–220°C
- Burnt/charred look: 220°C+ (not recommended — risk of clogging increases dramatically)
You can actually create a faux wood grain effect by varying the temperature during a print. Some slicers let you randomize the temperature within a range, which produces beautiful natural-looking variation in the wood color from layer to layer.
Nozzle Size
This is critical. Never use a 0.4mm nozzle with wood filament unless you enjoy unclogging nozzles. The wood particles are too large for a standard nozzle and will eventually accumulate into a clog.
- Minimum recommended: 0.5mm nozzle
- Ideal: 0.6mm nozzle (best balance of detail and reliability)
- For maximum reliability: 0.8mm nozzle
Use a hardened steel or stainless steel nozzle if possible. The wood fibers are slightly abrasive and will wear out a brass nozzle faster than standard PLA.
Print Speed
- Recommended: 30–50 mm/s
- First layer: 20–25 mm/s
- Never exceed: 60 mm/s
Slower speeds give the hotend more time to properly melt the filament and push the wood particles through without jamming.
Retraction
- Direct drive: 1–2mm distance, 25 mm/s speed
- Bowden: 4–6mm distance, 30 mm/s speed
- Minimize retractions where possible — each retraction is an opportunity for wood particles to accumulate in the heat break
Bed and Cooling
- Bed temperature: 50–60°C (same as PLA)
- Bed surface: PEI, glass with glue stick, or painter’s tape all work well
- Part cooling fan: 100% after the first two layers
Preventing Clogs: The #1 Challenge
Clogging is the number one reason people give up on wood filament. Here’s how to prevent it:
- Never leave the filament sitting in a hot nozzle. If you pause a print for more than a minute, the wood particles can carbonize and form a rock-hard plug. Either retract the filament or reduce temperature to 160°C during pauses.
- Do a purge line at the start of every print. A generous skirt or purge line helps clear any accumulated particles.
- Run cleaning filament between sessions. After printing with wood filament, run 20cm of regular PLA through to flush out any remaining wood particles.
- Keep your nozzle clean. Do a cold pull after every long wood filament session.
Post-Processing Wood Filament Prints
This is where wood filament truly shines. The post-processing options are incredible:
Sanding
Wood filament sands beautifully — much better than regular PLA. Start with 120-grit sandpaper and work your way up to 220-grit for a smooth finish. The wood particles create a natural texture that looks even more realistic after sanding.
Staining
You can use actual wood stain on wood filament prints. Apply it with a brush or rag, let it soak in for a few minutes, then wipe off the excess. The wood fibers absorb the stain just like real wood, creating a remarkably authentic look. Oil-based stains work better than water-based for most wood filaments.
Sealing
After staining, apply a coat of polyurethane or wood lacquer to protect the finish. This also gives the print a more polished, professional look. Spray-on sealants work well and avoid brush marks.
Wood Burning
Yes, you can actually use a wood burning tool (pyrography pen) on wood filament prints to add details, patterns, or text. The wood fibers respond to heat similarly to real wood, though the PLA matrix means you need to work at slightly lower temperatures.
Best Wood Filament Brands
Not all wood filaments are created equal. The wood particle size and percentage vary significantly between brands:
- Hatchbox Wood: Great all-rounder, consistent diameter, moderate wood content. Prints reliably with a 0.5mm nozzle.
- ColorFabb WoodFill: Premium option with very fine wood particles. Produces the most natural-looking finish but is more expensive.
- SUNLU Wood: Budget-friendly option that prints well. Slightly more prone to clogging than premium brands.
- Polymaker PolyWood: Uses a foam technology rather than actual wood particles. Easier to print but less authentic feel.
- 3D Solutech Real Wood: High wood fiber content for a more authentic texture. Requires a 0.6mm+ nozzle.
Project Ideas for Wood Filament
Once you’ve dialed in your settings, here are some projects that really showcase the material:
- Planters and vases: The natural wood look complements plants perfectly
- Board game pieces: Chess sets, custom tokens, and game boards
- Picture frames: Stained and sealed, they’re indistinguishable from real wood frames
- Figurines and sculptures: The matte finish hides layer lines beautifully
- Signs and nameplates: Engrave or wood-burn text for a rustic aesthetic
- Cosplay props: Wands, staffs, and weapon handles that look authentically wooden
Troubleshooting Common Wood Filament Issues
Inconsistent color
If your print has uneven coloring, your temperature is fluctuating. Check your PID tuning and make sure your hotend heater can maintain a steady temperature. Even 2–3°C variation can create visible color changes with wood filament.
Rough surface texture
This is actually a feature, not a bug. But if you want smoother surfaces, try reducing layer height to 0.1–0.15mm and printing slower. The wood particles will be more evenly distributed in thinner layers.
Brittle prints
Wood filament is inherently more brittle than standard PLA. For functional parts that need strength, increase your wall count to 4–5 perimeters and use 30–40% infill. Avoid thin features below 2mm where possible.
Wood filament adds a whole new dimension to your 3D printing toolkit. It takes a bit more patience than regular PLA, but the results — a genuine wood-look finish you can sand, stain, and seal — make it absolutely worth the effort. Start with a small test print, dial in your temperature, and prepare to be amazed at how realistic these prints can look.