Input Shaper and Vibration Compensation Guide for 3D Printers
What Is Input Shaper and Why Should You Care?
If you’ve ever pushed your 3D printer to higher speeds and noticed ghosting — those faint ripples or echoes on the surface of your prints, especially after sharp corners — you’ve hit a fundamental physics limitation. When the print head changes direction rapidly, it causes the frame and belts to vibrate. Those vibrations travel through the structure and show up as artifacts on your printed surfaces. This is called ringing or ghosting, and it gets worse the faster you print.
Input shaper is an algorithm built into Klipper firmware (and increasingly adopted by other systems) that counteracts these vibrations by modifying the motion commands before they reach the stepper motors. Instead of sending a simple “move here at this speed” command that causes the frame to ring, input shaper sends a modified set of movements that cancel out the resonant frequencies of your printer. The result: you can print significantly faster without ghosting artifacts.
To put numbers on it: a typical Ender 3 prints cleanly at about 50-60mm/s. With input shaper properly tuned, the same printer can produce equivalent or better quality at 80-120mm/s. Printers designed for speed, like CoreXY machines running Klipper, regularly hit 300-500mm/s with input shaper doing the heavy lifting.
How Input Shaper Works: The Simple Version
Every physical structure has natural resonant frequencies — the speeds at which it vibrates most easily. Tap your printer’s frame and listen: that ringing tone corresponds to a specific frequency, measured in Hertz (Hz). For most 3D printers, the relevant frequencies fall between 20 Hz and 100 Hz.
Input shaper works by measuring these resonant frequencies and then generating counter-vibrations in the motion commands. Think of it like noise-canceling headphones for your printer’s motion system. The algorithm knows when the frame will start vibrating after a sharp direction change, so it slightly modifies the acceleration profile to cancel those vibrations before they affect print quality.
There are several input shaper algorithms, each with different characteristics:
- MZV (Modified Zero Vibration) — The most commonly recommended shaper. Provides a good balance between vibration reduction and maximum achievable acceleration. This is the default choice for most printers.
- EI (Extra-Insensitive) — More robust than MZV at handling a range of frequencies, but limits your maximum acceleration more. Good if your printer’s resonant frequency shifts depending on the weight of the print or bed position.
- ZV (Zero Vibration) — The simplest shaper. Least restrictive on acceleration but only targets a narrow frequency band. Works well on very stiff frames with consistent resonances.
- 2HUMP_EI and 3HUMP_EI — Even more robust than EI but further restrict maximum acceleration. Used on printers with multiple resonance peaks or inconsistent mechanical behavior.
Measuring Your Printer’s Resonant Frequencies
Before configuring input shaper, you need to know your printer’s resonant frequencies for both the X and Y axes. There are two main methods:
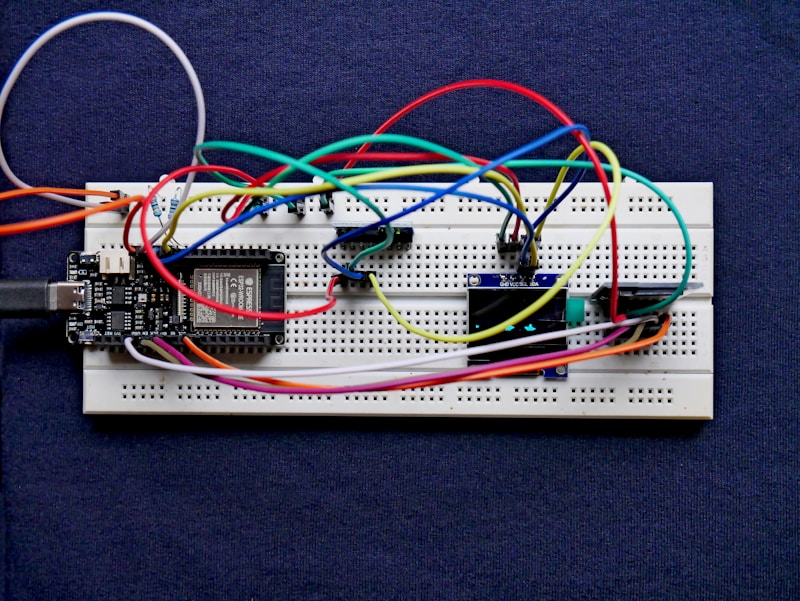
Method 1: Using an ADXL345 Accelerometer (Recommended)
This is the precise, data-driven approach. An ADXL345 is a small, inexpensive accelerometer that mounts to your print head and measures vibrations while the printer performs test movements.
What You Need
- ADXL345 accelerometer module (about $3-8 on Amazon or AliExpress)
- Wiring to connect it to your printer’s control board (SPI connection)
- A mounting solution (zip ties, a printed mount, or tape for temporary testing)
- Klipper firmware with the resonance testing module enabled
Wiring the ADXL345
The ADXL345 connects via SPI to your printer’s MCU. The exact pins depend on your board:
- For Raspberry Pi (direct connection): Connect to the Pi’s SPI pins — MISO, MOSI, SCLK, CS, 3.3V, and GND. This is the simplest approach if you’re running Klipper on a Pi.
- For the printer’s MCU: Connect to available SPI pins on the control board. Check your board’s pinout diagram — most modern boards have exposed SPI headers.
Running the Resonance Test
Once wired and configured in your printer.cfg, run the test through the Klipper console:
TEST_RESONANCES AXIS=X
TEST_RESONANCES AXIS=Y
Each test takes about 1-2 minutes. The printer will move the head back and forth at increasing frequencies while the accelerometer records the vibration data. You’ll hear the pitch change as it sweeps through frequencies, and you might notice the frame vibrate more strongly at certain points — those are your resonant frequencies.
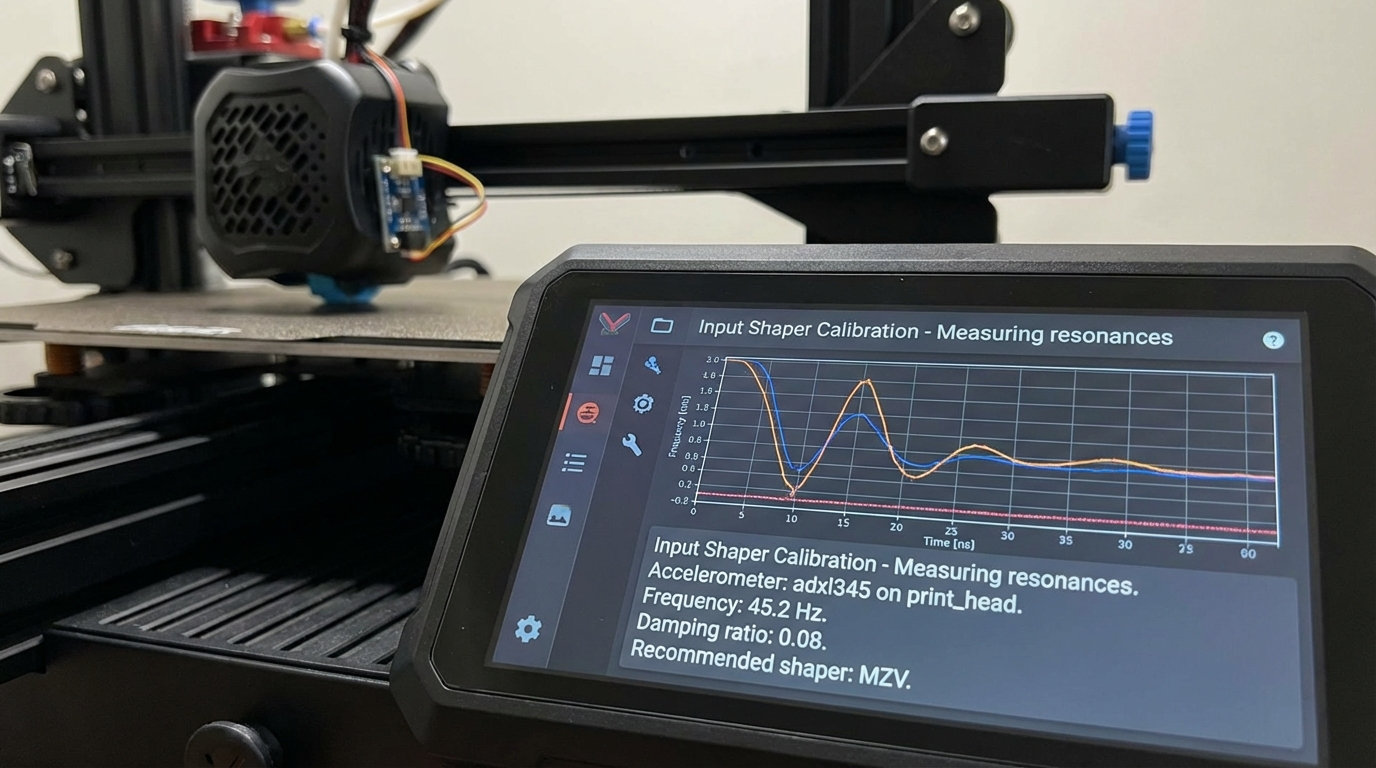
Analyzing the Results
After the test, Klipper generates CSV files with the raw data. Process them using the built-in analysis script:
~/klipper/scripts/calibrate_shaper.py /tmp/resonances_x_*.csv -o /tmp/shaper_calibrate_x.png
~/klipper/scripts/calibrate_shaper.py /tmp/resonances_y_*.csv -o /tmp/shaper_calibrate_y.png
This generates graphs showing vibration amplitude versus frequency and recommends the best shaper type and frequency for each axis. It also tells you the maximum acceleration each shaper can support. Follow these recommendations as your starting point.
Method 2: The Ringing Tower Test (No Accelerometer)
If you don’t have an accelerometer, you can estimate resonant frequencies using a test print. Print a ringing test tower (available on Printables — search for “Klipper ringing tower” or “input shaper test”) at high speed with input shaper disabled. The tower will show visible ringing patterns whose spacing corresponds to the resonant frequency.
Measure the distance between ringing waves on the X and Y walls of the tower and use this formula:
Frequency = Print Speed / Ringing DistanceFor example, if you printed at 100mm/s and measure ringing waves 2mm apart: Frequency = 100 / 2 = 50 Hz.
This method is less precise than an accelerometer but works in a pinch. You’ll likely need to print 2-3 test towers while fine-tuning the values.
Configuring Input Shaper in Klipper
Once you have your resonant frequencies, add the configuration to your printer.cfg:
[input_shaper]
shaper_freq_x: 48.6
shaper_freq_y: 36.2
shaper_type_x: mzv
shaper_type_y: mzv
The frequencies and shaper types come directly from the calibration script output. Note that X and Y often have different frequencies because the mass and belt tension differ between axes. On a bed-slinger like the Ender 3, the Y axis (which moves the heavy heated bed) typically has a lower resonant frequency than the X axis (which moves the lighter print head).
After adding the configuration, restart Klipper and run a test print. Compare it to a print made before input shaper was enabled — the difference is usually dramatic, especially on prints with sharp corners and flat surfaces.
Tuning Maximum Acceleration
Input shaper doesn’t just eliminate ringing — it also tells you how fast you can safely accelerate. The calibration script outputs recommended maximum accelerations for each shaper type. Update your printer.cfg accordingly:
[printer]
max_accel: 5000  # Set based on calibration results
max_accel_to_decel: 2500  # Half of max_accel is a good default
Start with the recommended values and increase gradually. If you see any ghosting returning, back off the acceleration. Common ranges:
- Ender 3 / bed slingers: 3000-7000 mm/s²
- CoreXY (Voron, RatRig): 5000-20000 mm/s²
- Bambu Lab P1S/X1C: 9000-12000 mm/s² (factory tuned)
Input Shaper on Non-Klipper Printers
Klipper pioneered accessible input shaping for desktop 3D printers, but the technology has spread:
- Bambu Lab printers — Input shaper is built into Bambu’s firmware and auto-calibrated. No user intervention needed.
- Marlin firmware — Input shaper support was added in Marlin 2.1.x, but it’s less mature and harder to calibrate than Klipper’s implementation.
- RepRapFirmware — Supports input shaping with accelerometer-based auto-calibration, similar in capability to Klipper.
- Prusa printers — The MK4 and XL include built-in accelerometers and auto-calibrate input shaper through Prusa’s custom firmware.
Common Input Shaper Mistakes
Using Someone Else’s Values
Every printer is different, even two identical models. Belt tension, frame rigidity, fastener tightness, and even the table your printer sits on affect resonant frequencies. Always calibrate your own printer — don’t copy values from a YouTube video or forum post.
Calibrating With a Full Build Plate
Run the calibration with the print head at the center of the bed with no print on the plate. The mass of a print changes the dynamics, but you want the baseline calibration done in a neutral state.
Forgetting to Re-Calibrate After Hardware Changes
Changed your hotend? Tightened or replaced belts? Moved the printer to a different table? Added an enclosure? Re-run the resonance test. Any change to the mechanical system can shift your resonant frequencies.
Setting Acceleration Too High
Just because input shaper reduces ghosting doesn’t mean you should crank acceleration to the moon. Extremely high acceleration stresses your belts, pulleys, and stepper motors. Stay within the calibration script’s recommended range and your printer will last longer.
Before and After: What to Expect
After properly configuring input shaper, you should see:
- Dramatically reduced ghosting — Sharp corners on prints will be clean, without the ripple effect that extends across flat surfaces.
- Higher usable print speeds — You can increase speed by 50-100% while maintaining the same quality you had at lower speeds without input shaper.
- Cleaner corner definition — Corners that used to bulge slightly will be sharper and more accurate.
- Consistent quality at speed — The print quality difference between 50mm/s and 100mm/s becomes minimal.
Input shaper is one of those upgrades that makes you wonder how you ever printed without it. Whether you’re running Klipper on a modified Ender 3 or using a printer with built-in resonance compensation, understanding and properly calibrating input shaper is the key to unlocking your printer’s full speed potential without sacrificing the quality you’ve worked so hard to achieve. Get an ADXL345, spend 30 minutes on calibration, and never look at ghosting the same way again.