Creality K1 Max Best Settings Guide 2026: PLA, PETG, ABS Optimized
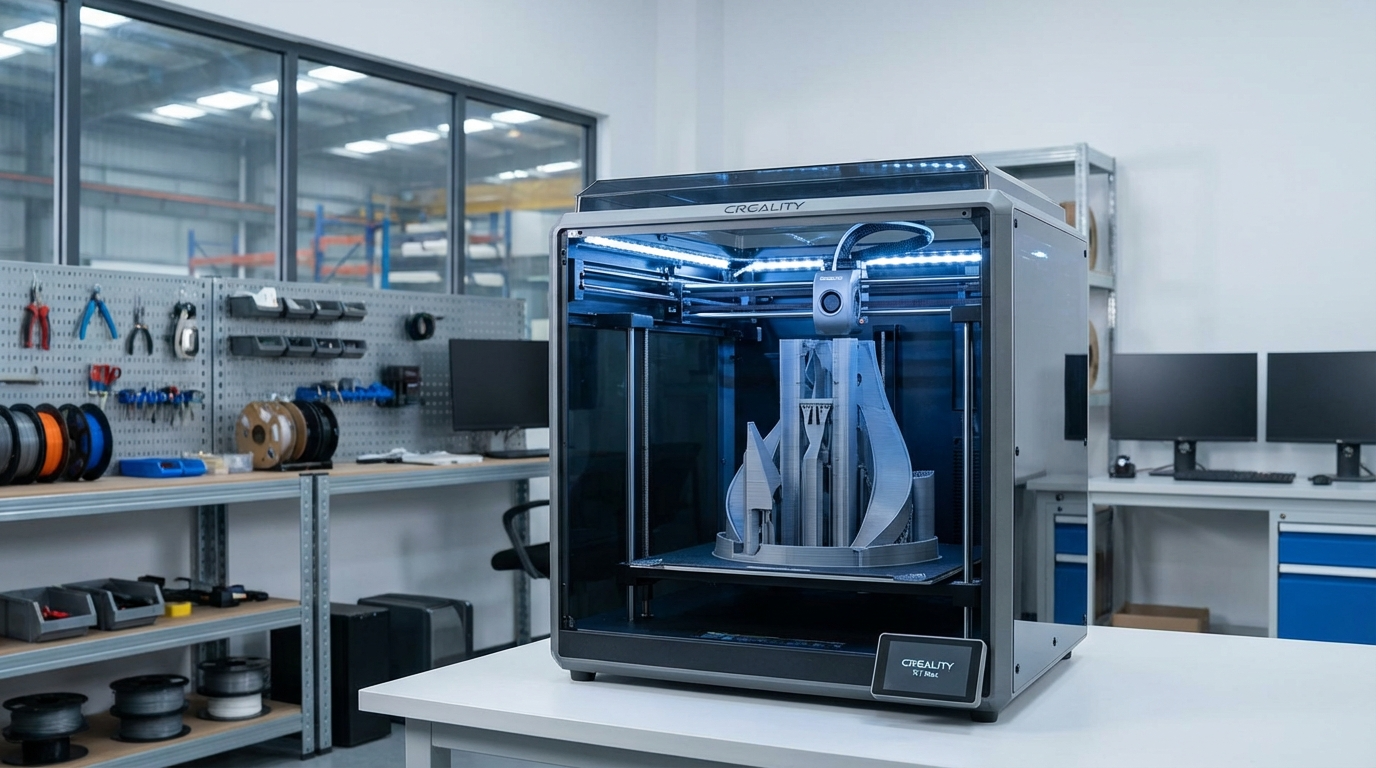
The Creality K1 Max is one of the most ambitious printers Creality has ever built — a large-format CoreXY machine that promises 600mm/s print speeds and a 300x300x300mm build volume. Out of the box, the default settings are decent, but they leave a lot of performance on the table. The K1 Max is capable of stunning quality and reliability once you dial in the right settings for your specific machine.
In this guide, I’ll share the best settings I’ve found after extensive testing with the K1 Max across multiple filament types. These settings prioritize the balance between speed and quality that most users want — you’ll get fast prints that actually look good.
Initial Setup: Before You Touch Any Settings
Before tweaking slicer settings, make sure your K1 Max is mechanically sound. Settings can’t fix hardware problems.
Essential First Steps
- Update firmware — Creality regularly releases updates that improve print quality and fix bugs. Go to the printer’s settings menu and check for updates, or download from Creality’s website.
- Run auto-calibration — The K1 Max has built-in auto-calibration for bed leveling, vibration compensation (input shaping), and flow. Run all of these from the touchscreen before your first print.
- Check belt tension — The CoreXY belts should be firm but not guitar-string tight. Pluck them — they should produce a low twang, not a high-pitched ping.
- Level the gantry — Power off the printer, then gently push both sides of the X-axis gantry up to the top to square it against the frame. This ensures the nozzle stays at consistent height across the bed.
- Clean the PEI sheet — Wash it with dish soap and warm water, then wipe with isopropyl alcohol. Oils from your hands are the number one cause of adhesion problems.
Best PLA Settings for the Creality K1 Max
PLA is the bread and butter of 3D printing, and the K1 Max handles it beautifully once properly configured.
Temperature Settings
- Nozzle temperature: 210-220°C (start at 215°C)
- Bed temperature: 55-60°C (55°C for most PLA brands)
- First layer nozzle temp: 220°C (5°C above normal for better adhesion)
- First layer bed temp: 60°C
Speed Settings
The K1 Max can technically hit 600mm/s, but quality suffers at extreme speeds. Here’s the sweet spot:
- Outer wall speed: 150-200mm/s (this is what you see, so keep it reasonable)
- Inner wall speed: 250-300mm/s
- Infill speed: 300-400mm/s
- Top/bottom surface speed: 150mm/s
- Travel speed: 400-500mm/s
- First layer speed: 50-60mm/s
- Acceleration: 10000-12000mm/s² (the input shaper handles the vibrations)
Quality Settings
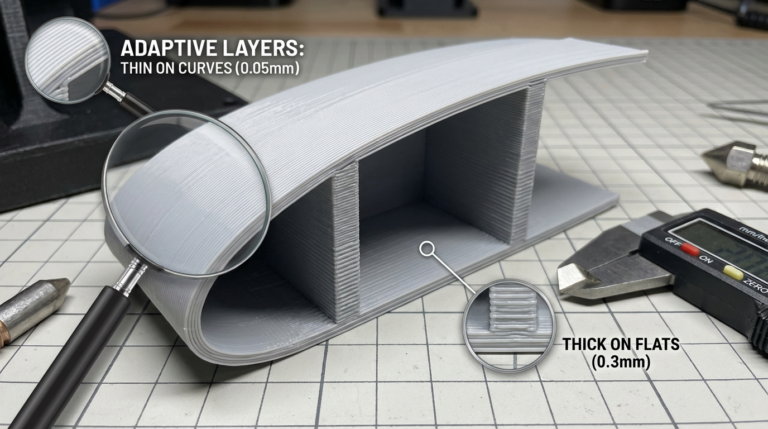
- Layer height: 0.2mm for standard, 0.12mm for fine detail
- Line width: 0.42mm (slightly wider than 0.4mm nozzle for better adhesion)
- Wall count: 3-4 walls (3 for visual models, 4 for functional parts)
- Top/bottom layers: 4-5 layers
- Infill: 15-20% for display models, 30-50% for functional parts
- Infill pattern: Gyroid for strength-to-weight, Grid for speed
Best PETG Settings for the K1 Max
PETG is more demanding than PLA but the K1 Max handles it well with these adjustments:
Temperature Settings
- Nozzle temperature: 235-245°C (start at 240°C)
- Bed temperature: 75-85°C (80°C works for most brands)
- First layer nozzle temp: 240°C
Speed Adjustments
PETG is stringier than PLA and needs slightly slower speeds:
- Outer wall speed: 100-150mm/s
- Inner wall speed: 200-250mm/s
- Infill speed: 250-300mm/s
- First layer speed: 40-50mm/s
Critical PETG Settings
- Retraction distance: 0.5-0.8mm (the K1 Max has a direct drive extruder)
- Retraction speed: 30-40mm/s
- Z-hop: 0.3mm (prevents nozzle from dragging through PETG)
- Fan speed: 30-50% (PETG needs less cooling than PLA)
- Combing mode: Within infill (reduces stringing on outer surfaces)
Best ABS/ASA Settings for the K1 Max
The K1 Max’s enclosed chamber gives it a real advantage with ABS and ASA, which need warm ambient temperatures to avoid warping.
Temperature Settings
- Nozzle temperature: 240-260°C (250°C is a good start)
- Bed temperature: 100-110°C
- Chamber: Keep the door closed and the top lid on — target 40-50°C ambient
ABS-Specific Settings
- Fan speed: 0% for the first 3-4 layers, then 10-20% max
- Print speed: Same as PETG settings
- Brim: Always use an 8mm brim with ABS — warping is almost guaranteed without one
- Z-seam: Set to “Aligned” — random seam placement on ABS can cause inconsistent shrinkage
Retraction and Stringing Settings
The K1 Max’s direct-drive extruder means short retraction distances are key. Long retractions on a direct drive cause more problems than they solve.
| Material | Retraction Distance | Retraction Speed | Z-Hop |
|---|---|---|---|
| PLA | 0.5-0.8mm | 40-50mm/s | 0.2mm |
| PETG | 0.5-0.8mm | 30-40mm/s | 0.3mm |
| ABS/ASA | 0.4-0.6mm | 30-40mm/s | 0.2mm |
| TPU | 0.2-0.4mm | 20-25mm/s | 0.3mm |
If you’re getting stringing, resist the urge to increase retraction distance beyond 1mm. Instead, try lowering the nozzle temperature by 5°C and enabling “Wipe while retracting.”
Input Shaper Settings
The K1 Max’s input shaper is what allows it to print at high speeds without ringing artifacts. After running the auto-calibration, the printer stores resonance frequency data. But you can optimize further:
- Run calibration with the bed loaded — Place a weight similar to your typical print on the bed during calibration. This accounts for the added mass.
- Recalibrate periodically — Belt tension changes over time. Recalibrate every 50-100 print hours.
- Acceleration limits: The input shaper works best at 8000-15000mm/s². Going above 15000mm/s² can cause issues even with compensation.
First Layer Optimization
A perfect first layer is the foundation of every good print. The K1 Max’s auto bed leveling is generally reliable, but fine-tuning the Z-offset is still important:
- Start with auto-level — Run the automatic bed leveling routine
- Print a first layer test — Use a single-layer square (100x100mm)
- Adjust Z-offset in 0.01mm increments — Lines should be slightly squished flat, not round and not so flat they’re transparent
- First layer flow: 100-105% (slightly over-extrude for better adhesion)
- First layer line width: 0.5mm (wider than normal for better bed grab)
K1 Max Slicer: Creality Print vs Alternatives
The K1 Max ships with Creality Print, but you’re not locked into it. Here’s the comparison:
- Creality Print: Pre-configured profiles for the K1 Max. Good starting point but limited advanced options. Use it for your first prints.
- OrcaSlicer: The community favorite for K1 Max. Excellent Klipper integration, superior retraction and pressure advance controls. Has K1 Max profiles built-in.
- Cura with K1 Max plugin: Works but requires more manual profile setup. Use if you’re already deeply invested in the Cura ecosystem.
My recommendation: Start with Creality Print to verify your printer works, then switch to OrcaSlicer for the best experience. The built-in pressure advance tuning in OrcaSlicer makes a noticeable difference on the K1 Max.
Common K1 Max Issues and Quick Fixes
Spaghetti on First Layer
Usually a Z-offset problem. The nozzle is too high. Lower Z-offset by 0.05mm and retest.
Ringing/Ghosting at High Speeds
Recalibrate input shaper. If it persists, reduce acceleration to 8000mm/s² and outer wall speed to 150mm/s.
PETG Sticking Too Much to PEI
Lower bed temperature to 70°C and apply a thin layer of glue stick as a release agent. This sounds counterintuitive, but the glue actually prevents PETG from bonding too aggressively to PEI.
Clicking/Skipping Extruder
Usually a partial clog or temperature too low. Increase nozzle temp by 10°C and perform a cold pull if clicking persists.
Layer Shifting at High Speeds
Check belt tension — too loose is the most common cause. Also verify the grub screws on the pulleys are tight. Reduce acceleration to 8000mm/s² as a temporary fix.
Performance Optimization Tips
- Use a textured PEI sheet for PETG — Smooth PEI bonds too aggressively with PETG
- Calibrate pressure advance — Run the PA calibration in OrcaSlicer. Start around 0.04 and work from there.
- Enable arc fitting — Reduces the number of G-code commands for curved surfaces, resulting in smoother walls at high speeds
- Monitor chamber temperature — For ABS, keep the chamber closed. For PLA, open the top lid to prevent heat creep at high speeds.
- Clean the nozzle regularly — A brass brush on the outside, cold pulls on the inside. Do this every 10-20 prints.
The Creality K1 Max is a capable machine that rewards careful tuning. Start with the settings in this guide, make one change at a time, and keep notes on what works for each filament you use. Within a few prints, you’ll have a machine that produces professional-quality parts at speeds that would have seemed impossible just a few years ago.