How to Fix Uneven Extrusion and Inconsistent Flow in 3D Printing
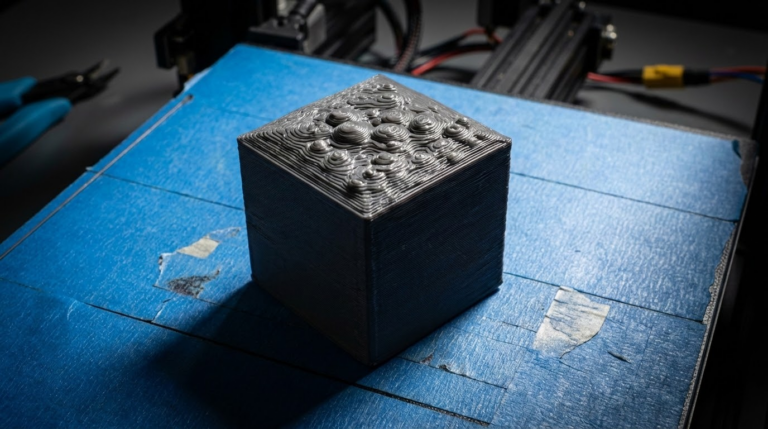
What Uneven Extrusion Looks Like
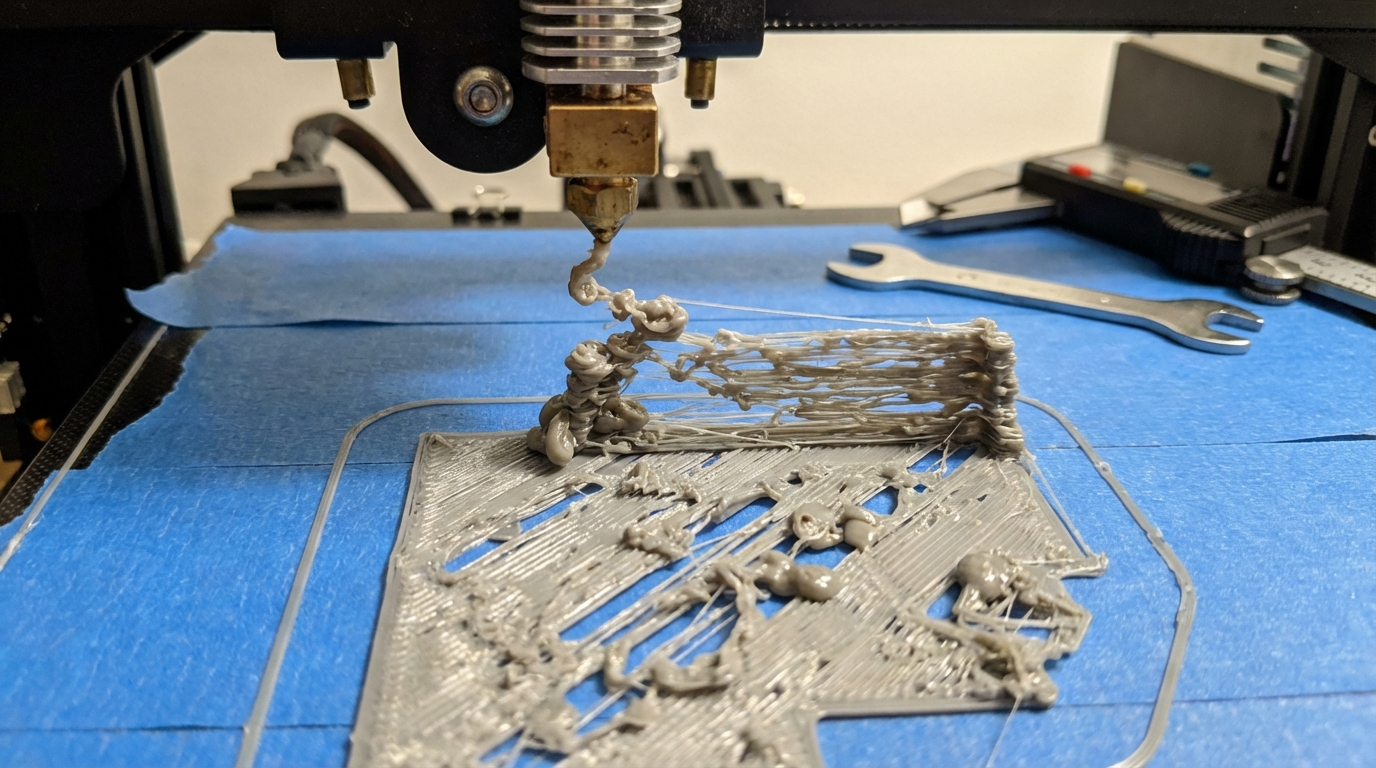
You’re watching your print go down and something’s off. The lines aren’t uniform. Some sections look thick and glossy while others are thin and rough. Maybe there are random gaps in what should be solid surfaces. That’s uneven extrusion — one of the most frustrating 3D printing problems because it has about a dozen possible causes, and they all look roughly the same.
In this guide, I’ll walk through every common cause of inconsistent extrusion, how to diagnose which one is affecting your prints, and the specific fix for each. We’ll go from the most likely culprits to the more obscure ones, so you can solve this systematically instead of randomly changing settings.
Partial Nozzle Clog
This is the number one cause of inconsistent extrusion, and it’s where you should start your troubleshooting.
What happens: A small piece of debris, charred filament, or foreign material partially blocks the nozzle opening. Filament still flows, but not consistently. The blockage shifts around as pressure changes, creating random thick and thin sections.
How to diagnose: Manually extrude filament through the nozzle. If it curls to one side instead of going straight down, or if the flow rate varies visibly, you likely have a partial clog.
Fixes:
- Cold pull: Heat the nozzle to printing temperature, push filament through, then cool to 90°C (for PLA) and firmly pull the filament out. The tapered end should come out with debris attached. Repeat 3-4 times
- Acupuncture needle: With the nozzle at printing temperature, carefully insert a cleaning needle (0.3mm for a 0.4mm nozzle) from below. Gently move it up and down to dislodge blockages
- Atomic method: Similar to cold pull but done with nylon filament, which is better at grabbing contaminants due to its adhesive properties when warm
- Replace the nozzle: If cold pulls don’t work, brass nozzles cost less than a dollar. Sometimes replacement is faster and more effective than cleaning
Inconsistent Filament Diameter
What happens: Budget filament or old filament can have sections that are thicker or thinner than the rated 1.75mm. When a thick section hits the hotend, it acts like a partial clog. When a thin section comes through, you get under-extrusion.
How to diagnose: Measure your filament diameter at multiple points along the spool using digital calipers. Good filament should be within ±0.02mm of 1.75mm. Anything beyond ±0.05mm will cause visible inconsistency.
Fixes:
- Switch to better filament. Brands like Prusament, Hatchbox, and eSUN maintain tight tolerances
- If you need to use the filament, measure the average diameter and input it in your slicer (most slicers have a filament diameter setting)
- Slow down your print speed — giving the hotend more time to melt variable-diameter filament reduces the impact
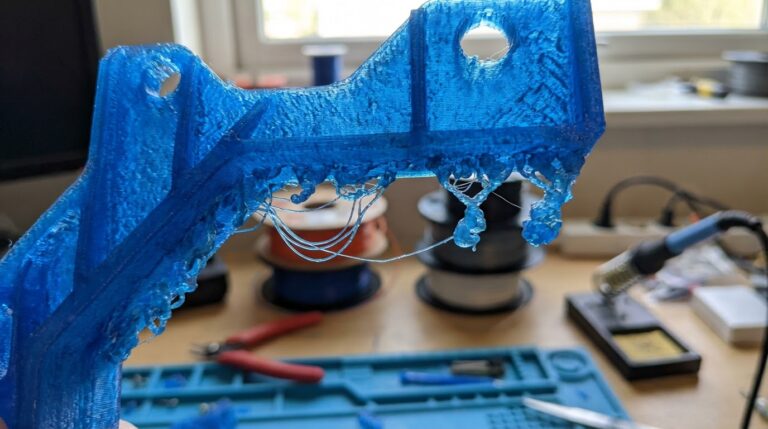
Wet Filament
What happens: Moisture absorbed by the filament turns to steam in the hotend, creating pressure fluctuations and micro-bubbles. This disrupts the smooth flow of plastic.
How to diagnose: Listen for popping or crackling sounds during printing. Look for tiny pits or bubbles on the print surface. Hold a piece of filament near a candle flame — if it pops and sizzles, it’s wet.
Fixes:
- Dry your filament. PLA: 45°C for 4-6 hours. PETG: 65°C for 4-6 hours. Nylon: 70°C for 8-12 hours
- Use a filament dehydrator or food dehydrator
- Print from a dry box to prevent re-absorption during long prints
- Store filament in airtight containers with desiccant when not in use
Extruder Issues
The extruder — the mechanism that pushes filament into the hotend — has several failure modes that cause inconsistent extrusion:
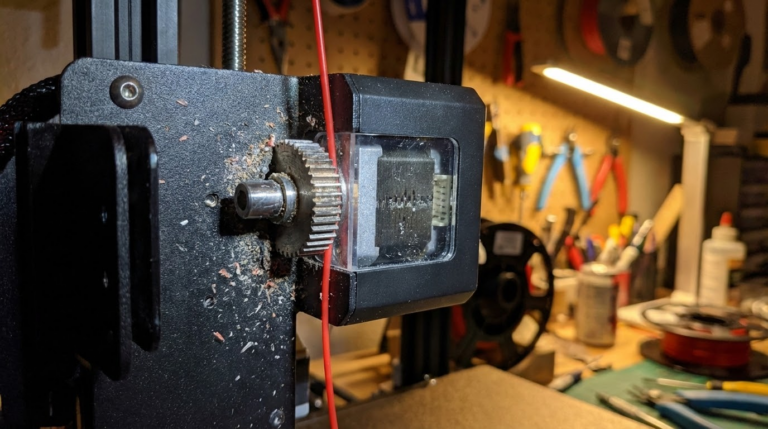
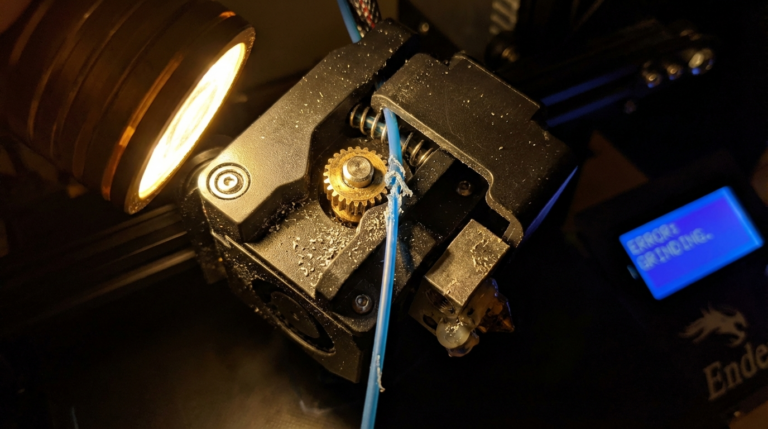
Worn Drive Gear
The teeth on the drive gear wear down over time, reducing grip on the filament. You’ll see inconsistent feeding and possibly filament shavings accumulating around the extruder.
Fix: Clean or replace the drive gear. Check for buildup of plastic dust in the gear teeth.
Incorrect Tension
If the extruder idler spring tension is too low, the drive gear slips on the filament. Too high, and it deforms the filament, making it bind in the PTFE tube.
Fix: Adjust tension so the drive gear grips the filament firmly but doesn’t flatten it. You should see light tooth marks on extruded filament, not deep grooves.
Heat Creep
When the cold end of the hotend gets too warm, filament softens before it reaches the melt zone. Softened filament is harder to push, causing inconsistent pressure and flow.
Fix: Ensure your hotend fan (the small one, not the part cooling fan) is running at 100% and isn’t blocked. Check that the heat break is properly installed. Consider upgrading to an all-metal heat break if you’re printing at high temperatures frequently.
Temperature Fluctuations
What happens: If your hotend temperature isn’t stable, the viscosity of the melted filament changes, causing flow variation. Even ±5°C swings can produce visible inconsistency.
How to diagnose: Watch the temperature readout on your printer during a print. The hotend temperature should stay within ±1-2°C of your target. Larger swings indicate a PID tuning issue.
Fixes:
- PID tune your hotend. Most firmwares have a built-in PID auto-tune function. In Marlin, the command is
M303 E0 S200 C8(for 200°C, 8 cycles). Save the results withM500 - Check your thermistor connection. A loose thermistor gives erratic readings and unstable temperature control
- Make sure the heater cartridge is firmly seated in the heater block. A loose heater takes longer to respond, making PID control harder
- Insulate your heater block with a silicone sock. This reduces the impact of ambient temperature changes and part cooling fan on the heater block
PTFE Tube Issues
What happens: If the PTFE tube inside your Bowden tube setup or hotend lining has a gap, filament can pool in the gap and create inconsistent backpressure.
How to diagnose: Remove the nozzle and push filament through the hotend manually. If it catches or requires varying force at different points, there’s likely a gap or deformed tube section.
Fixes:
- Ensure the PTFE tube is cut square (use a PTFE tube cutter, not scissors)
- Push the tube all the way down to the nozzle — there should be zero gap between the tube end and the nozzle face
- Replace the tube if it’s discolored, swollen, or has been exposed to temperatures above 240°C (PTFE degrades at higher temps)
- Consider upgrading to a Capricorn tube, which has tighter tolerances and better heat resistance
Slicer Settings to Check
Sometimes the problem isn’t hardware — it’s your slicer configuration:
Flow Rate / Extrusion Multiplier
If your flow rate is set too high or too low, every line will be consistently over or under-extruded. But if combined with other issues, it can make inconsistency worse.
Calibrate by printing a single-wall cube and measuring the wall thickness. Adjust flow rate until the measured wall equals the expected value (nozzle diameter × number of walls).
Print Speed Variation
Different features print at different speeds (infill fast, perimeters slow, bridges very slow). If these speed changes happen abruptly, the extruder and hotend can’t respond instantly, creating temporary over and under-extrusion at transitions.
Fix: Enable Linear Advance (Marlin) or Pressure Advance (Klipper) to compensate for pressure changes during speed transitions. This single setting can dramatically improve extrusion consistency.
Retraction Settings
Excessive retraction distance or speed can introduce air into the melt zone, causing gaps and inconsistency after travel moves.
Fix: Use the minimum retraction distance that prevents stringing. For direct drive: 0.5-2mm. For Bowden: 3-6mm. Test with a retraction tower.
Mechanical Issues
Finally, some mechanical problems can masquerade as extrusion issues:
- Loose nozzle: A nozzle that isn’t fully tightened (when hot!) can create a leak between the nozzle and heat break. Molten plastic seeps out the sides, reducing flow through the nozzle
- Warped build plate: If your bed isn’t flat, the nozzle-to-bed distance varies across the print area, making the first layer look like inconsistent extrusion
- Binding on guide rods: If the print head doesn’t move smoothly, it can cause pressure variation in the nozzle. Check linear bearings and rods for debris or damage
- Coasting/wipe settings: Some slicers stop extruding slightly before the end of a perimeter (coasting) or add a wipe move. If these aren’t tuned correctly, they create visible gaps
A Systematic Approach
When troubleshooting inconsistent extrusion, work through this checklist in order:
- Do a cold pull to rule out partial clogs
- Check filament diameter with calipers
- Dry your filament (or switch to a known-dry spool)
- Verify hotend temperature stability (±2°C max)
- Inspect extruder tension and drive gear
- Check PTFE tube seating
- Calibrate flow rate with a single-wall test
- Enable Pressure Advance / Linear Advance
- Check mechanical components (nozzle tightness, bed flatness, bearings)
Most inconsistent extrusion problems are solved within the first three steps. If you’ve gone through the entire list without improvement, consider that multiple small issues might be combining to create the symptom — fix each one individually and retest after each change.